
Quick Guide for Clients or Stakeholders
Ready to give feedback and approve content in Gain? Let's begin!
Jump ahead
- Logging in
- Your approval queue
- Requesting changes
- Approving
- Viewing the content calendar
- Viewing Instagram posts on the Grid
- Connecting social media accounts
- Annotating files
Logging in
Via email notification
When you have content pending your approval, you'll receive an email notification like this one. Clicking on it will automatically log you in – no passwords!
Note: This secure link will only work once and expires in 24 hours. If it expires before you can get to it, you can always ask the sender for a new one.

Until you've requested changes or approved the content in Gain, you will receive reminder emails. These are sent 6, 12, 24, 48, and 72 hours after the first email. (We really don't want you to miss your target publish dates!)

Tip: You can download the desktop version of Gain so that your notifications won't be lost among your other emails.
Via website
You can also log in from the Gain website. Just enter your email address and click Send me a link. You'll receive an email with a link that will automatically log you in without a password.

If you really want to, you can create a password. Just click on your initials or avatar on the top right in Gain and open your Personal Settings.
Your approval queue
Clicking on your email notification will take you to your approval queue, with a list of all the content that is pending your approval. Each social post includes relevant information like post type, social network account, and publish date. Here, you can click on Approve or Request Changes.

Clicking on View details will open an individual post on the screen, so you can focus on interacting with it like you would on each social network: play a video, expand the text caption to read more, or see multiple images in a Carousel post.

Requesting changes
On an individual post
From your approval queue, click on Request Changes on the post you want to give feedback on. This will open the individual post in the window and a field where you can write your comments.

In bulk
Choose individual posts by checking the box in the left upper corner of each preview.

Choose all the posts on your queue by checking the box All on the left upper corner of your queue.

Whenever you've selected more than one post, you can click on Request Changes on the right upper corner of your queue. This will open a field for you to enter your feedback, which will be attached to all the selected posts and sent to the content creator.
Approving
An individual post
From your approval queue, click on Approve to approve immediately or click on the down arrow to Approve with a comment.

This will open a field for you to enter any positive feedback or comments that will be sent to the person who sent you the content with your approval.

In bulk
Select individual posts by checking the box in the upper left corner on top of each post preview, or select all the posts in the queue by checking the All box on the top left corner of the queue.
Click on Approve on the upper right corner of the page, or scroll down to the end of the page and click on Approve All on Page.

Viewing the content calendar
From your approvals queue, click on Go to workspace on the upper left corner of your screen and select your workspace. If you've been invited to see more than one workspace in Gain, you'll see them displayed here to choose which calendar you want.

Monthly view
In the calendar, you'll see social posts that are pending your approval, the social posts you have approved and have been scheduled, and the published (live) posts on your social channels.

Weekly view
To get more granular, you can switch to the weekly view from the selector on the top left, right above the calendar.

Filtering the content on your calendar
You can use filters to choose which posts you want to see. For example, let's say you want to see in your calendar only the posts for a specific social network, or only a certain post type like Reels or Stories, or only the posts that are scheduled to be published in the next month.
Click on the filter icon on the top left of the calendar to open the filter panel.

Open the type of filter you want, and choose. In this example, we're selecting to see only Pinterest posts. Then, click on Apply at the bottom of the filter panel.

After clicking on Apply, your calendar will refresh to show you the results. With this filter applied, you can go to different weeks or months. To reset your filters, click on Reset Filters at the bottom of the filter panel.

Viewing Instagram posts on the Grid
When reviewing Instagram posts, you can also see how they'll look in the Instagram account's profile grid. Just click View in Grid to see a specific post on the Grid.

From the Grid, you can see posts that are:
- pending your approval
- already approved
- scheduled
- live on Instagram

Connecting social media accounts
If the account owner has granted you permission, you can also add social profiles to Gain as a Client (a stakeholder whose role is to approve content). You will receive an email invitation like this one to connect social media accounts:

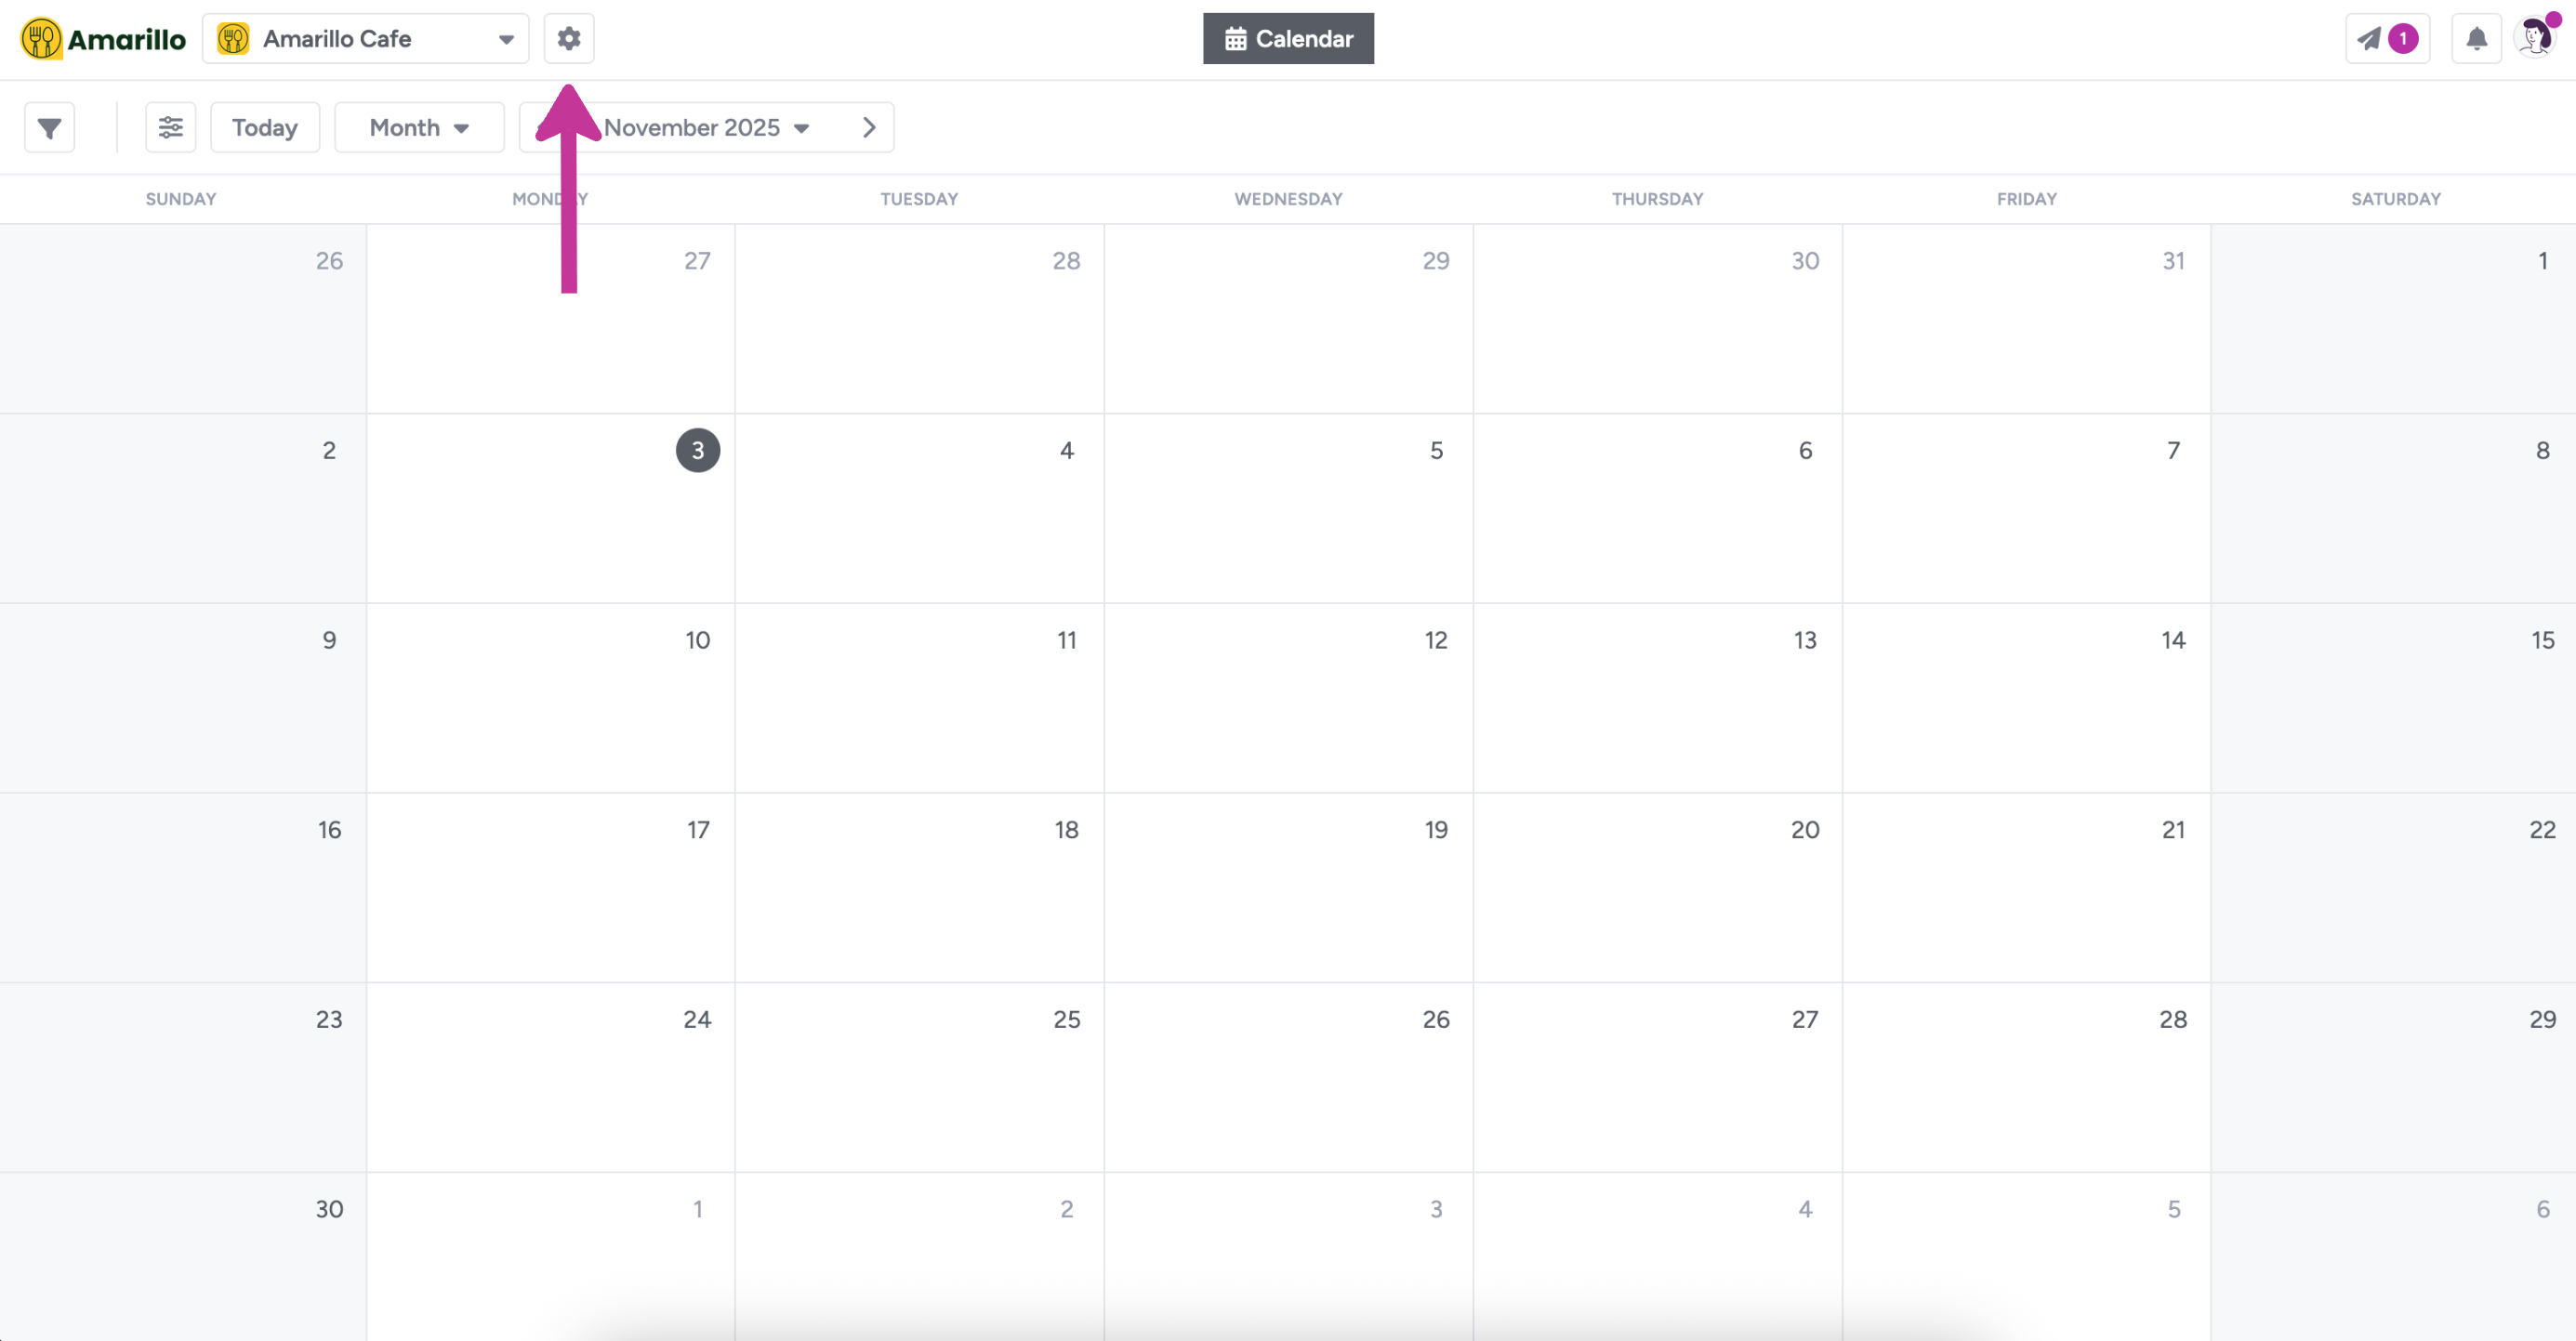
Click on Connect a social account on your email notification to get started. You can also connect a social account from your calendar view in Gain, by clicking on the gear (⚙️) to open your Workspace settings.
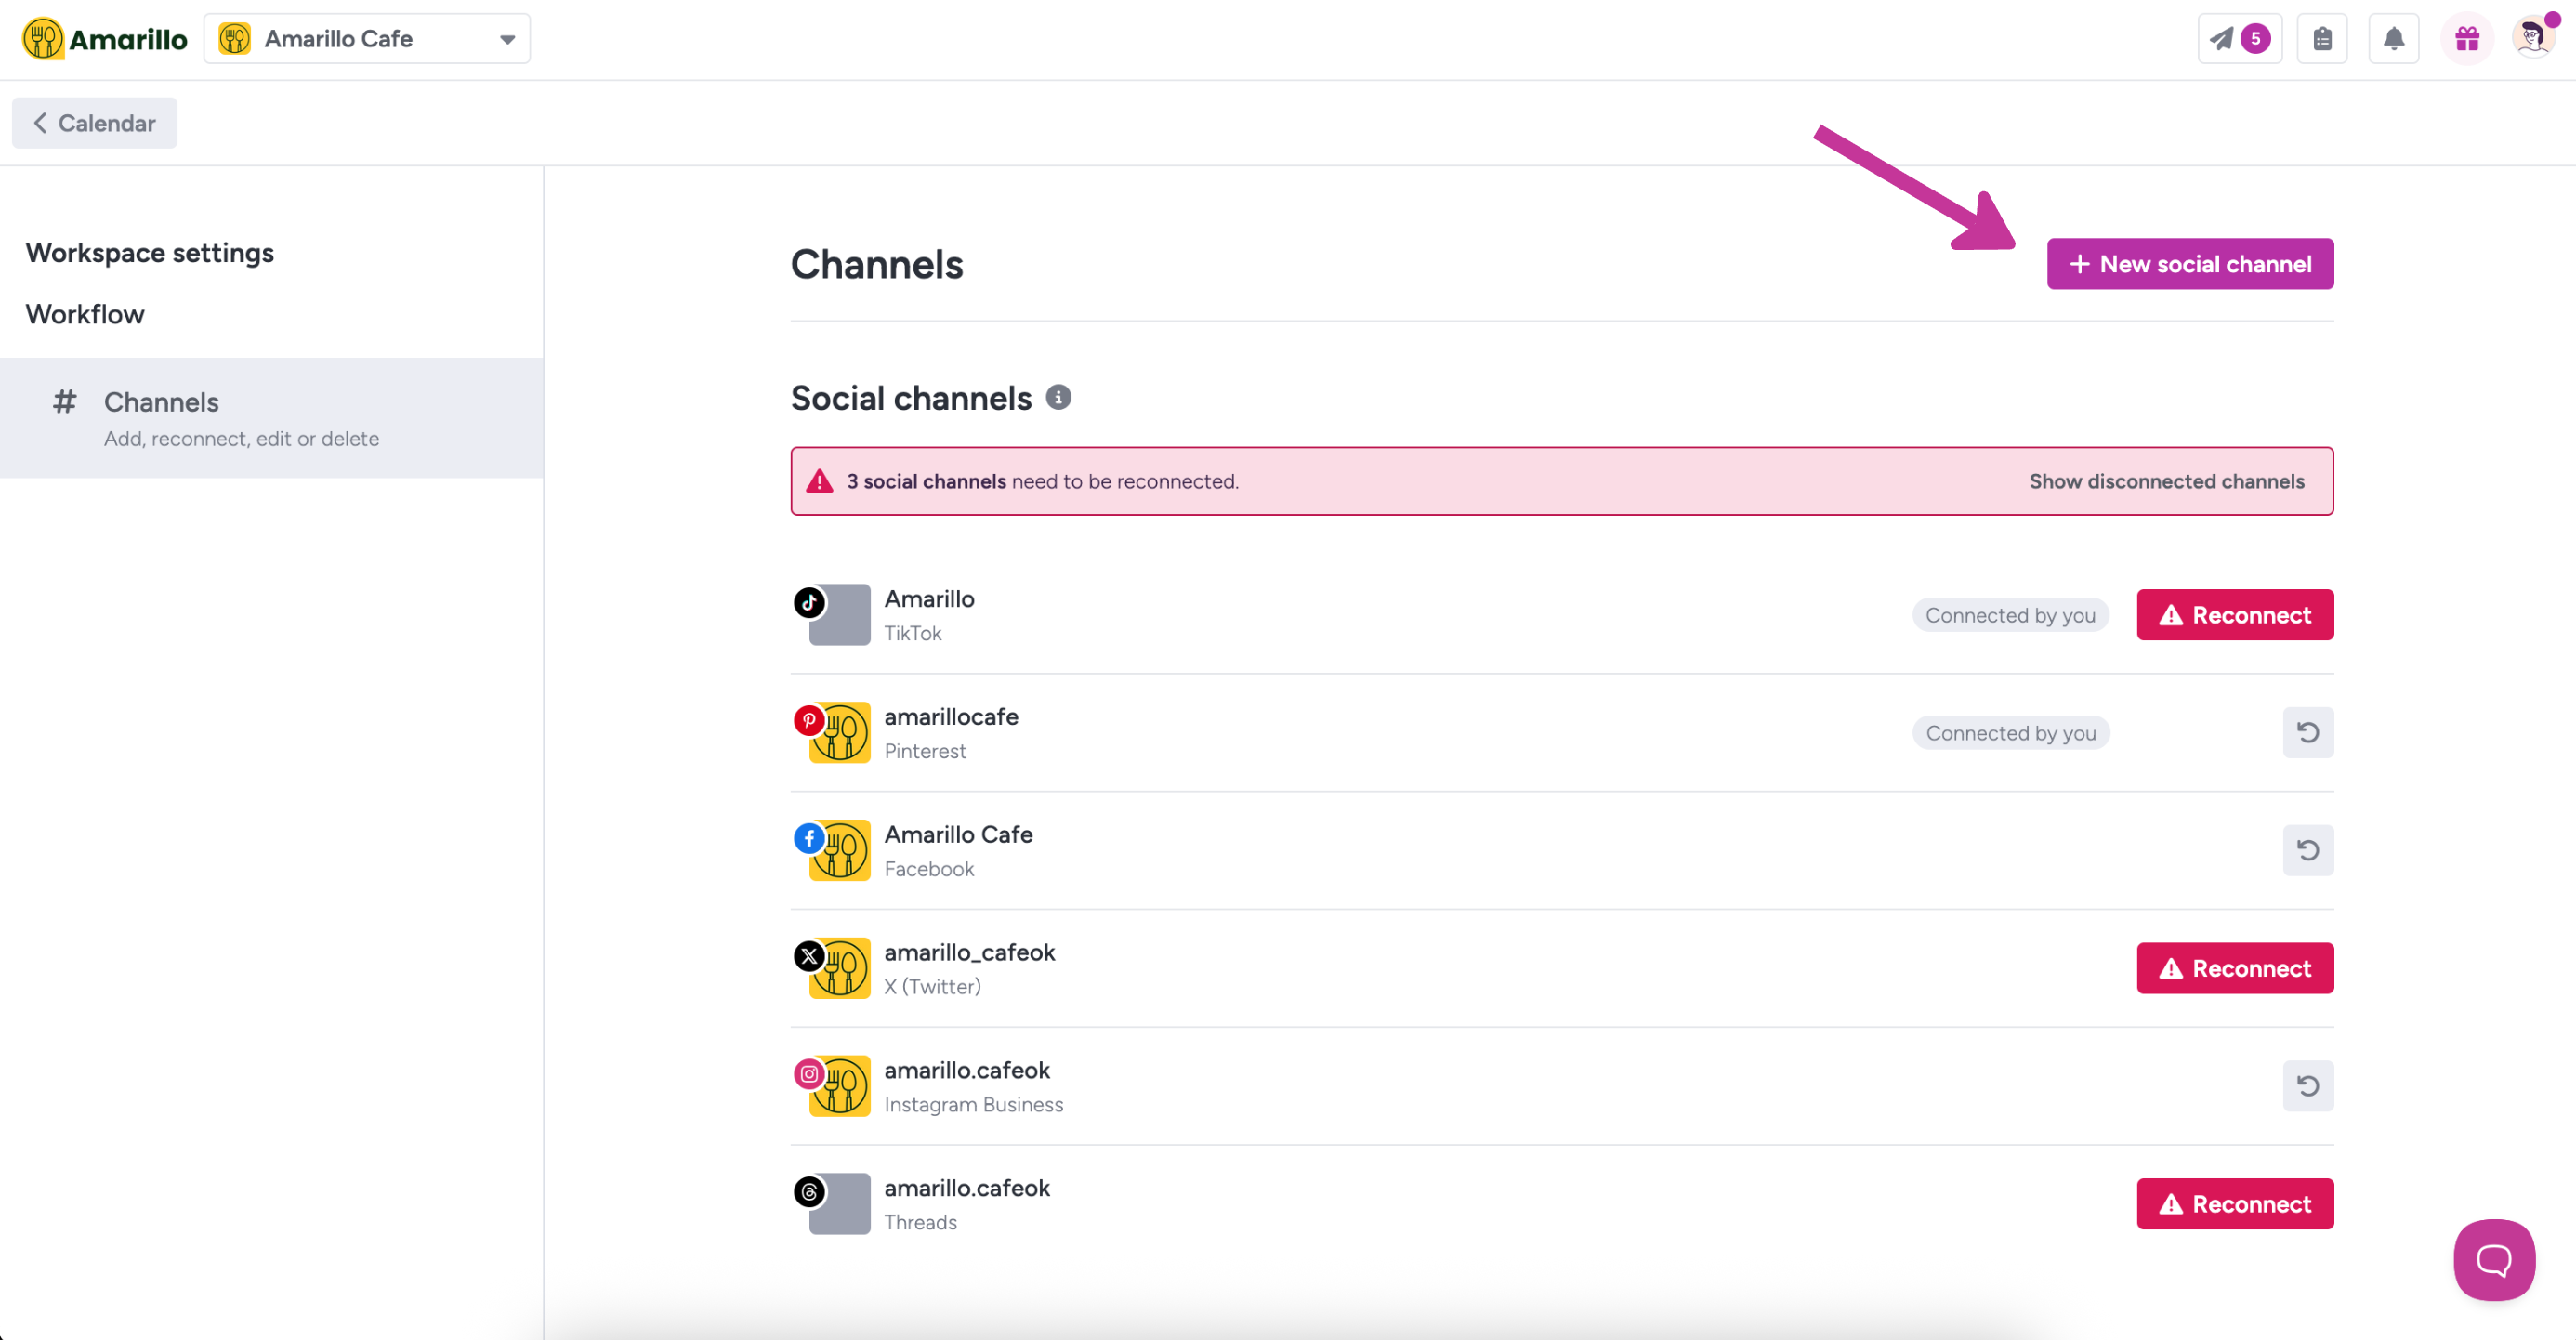
Now click on + New social channel and follow the prompts!
⚠️ Before connecting a social channel:
- Make sure you are the owner or have the necessary admin permissions on each social network.
- Make sure you are logged into the social network with the correct account to prevent unintentional publishing to the wrong profile.
About connecting Instagram accounts
- You can connect both Personal and Business Instagram accounts to Gain. However, only Business accounts allow for direct publishing from Gain to Instagram, among other advantages. If you have a Personal Instagram account, we highly recommend you change it to a Business account in Instagram first, and then connect it to Gain.
- Your Instagram account must also be associated to a Facebook Page, and you must have full access to manage both on Meta Business Suite. Here's more info about setting up your Facebook and Instagram permissions correctly.
About connecting LinkedIn profiles
- You must be a Super admin of the LinkedIn Page you want to connect to Gain.
About connecting Google Business profiles
- To connect a Google Business Profile to Gain, your business must be verified on Google. Here's how to verify your business on Google. You must have either an Owner or a Manager role to connect the profile to Gain.
Reconnecting your social channels
Occasionally, social accounts in Gain may need to be reconnected due to the social networks' access token expiring, password changes, or policies set by the social network. When that happens, you'll need to reconnect them. Don't worry, it's simple enough; just click on the gear (⚙️) to open your Workspace settings, and click Reconnect.

Disconnecting your social channels
There are 2 ways to disconnect a social channel from Gain:
- Ask the Gain Account Owner or Admin to disconnect it manually from their Gain settings.
- Remove Gain's permission to connect to your social network account on each social network.
Annotating files
When reviewing files – such as PDFs, photos, slide presentations or spreadsheets – you can make annotations on them to give precise feedback.
When you click on Request Changes, you will see the Add Annotations button below the comment field. Click on it and select the area of the file you want to comment about by dragging your mouse/pointer over it.

You can add as many annotations as you want on a single file, by clicking on the plus sign below the comment field.

If have questions or need help, contact support@gainapp.com