
Quick Guide for Content Creators
Gain helps your team collaborate on a shared content calendar and centralize feedback from your stakeholders, getting you the thumbs-up from the right people before any content goes live. This guide will help you get started quickly on creating and managing content.
Jump ahead
Scheduling and publishing content
Before you get started
Key terms to know:
- Workspaces: Workspaces are spaces to organize your content in Gain. An Account Owner or Admin can create them to organize content by brand, client, team, country, or project. Every workspace has its calendar, which you can easily share with your clients or stakeholders. If you manage multiple clients or brands, we highly recommend creating a workspace for each!
- Team Member roles: By default, team members join workspaces as Publishers. Publishers can schedule and publish social posts, upload files, send content for approval, and more. 👉🏼 Learn more about user roles and permissions
Setting up your profile
When an Admin or Account Owner invites you to Gain, you'll receive an email invitation. Follow these steps to set up your profile:
- Click on the invitation link to set up your password.
- Gain will redirect you to the Workspaces dashboard, where you'll see the workspaces you've been granted access to.
Note: If you don't receive an invitation, check your spam folder or contact support@gainapp.com. You can also double-check with your company's IT team that emails from @gainapp.com are allowed.
Access your Personal Settings and additional features by clicking on your initials in the upper right corner.
- Personal Settings - Reset your password, upload a profile picture, or enable Two-Factor Authentication (2FA) for added security.
- Notification Preferences - Customize your notifications and delivery methods. Check out this article for more details on the different notifications Gain will send you.
Creating & managing content
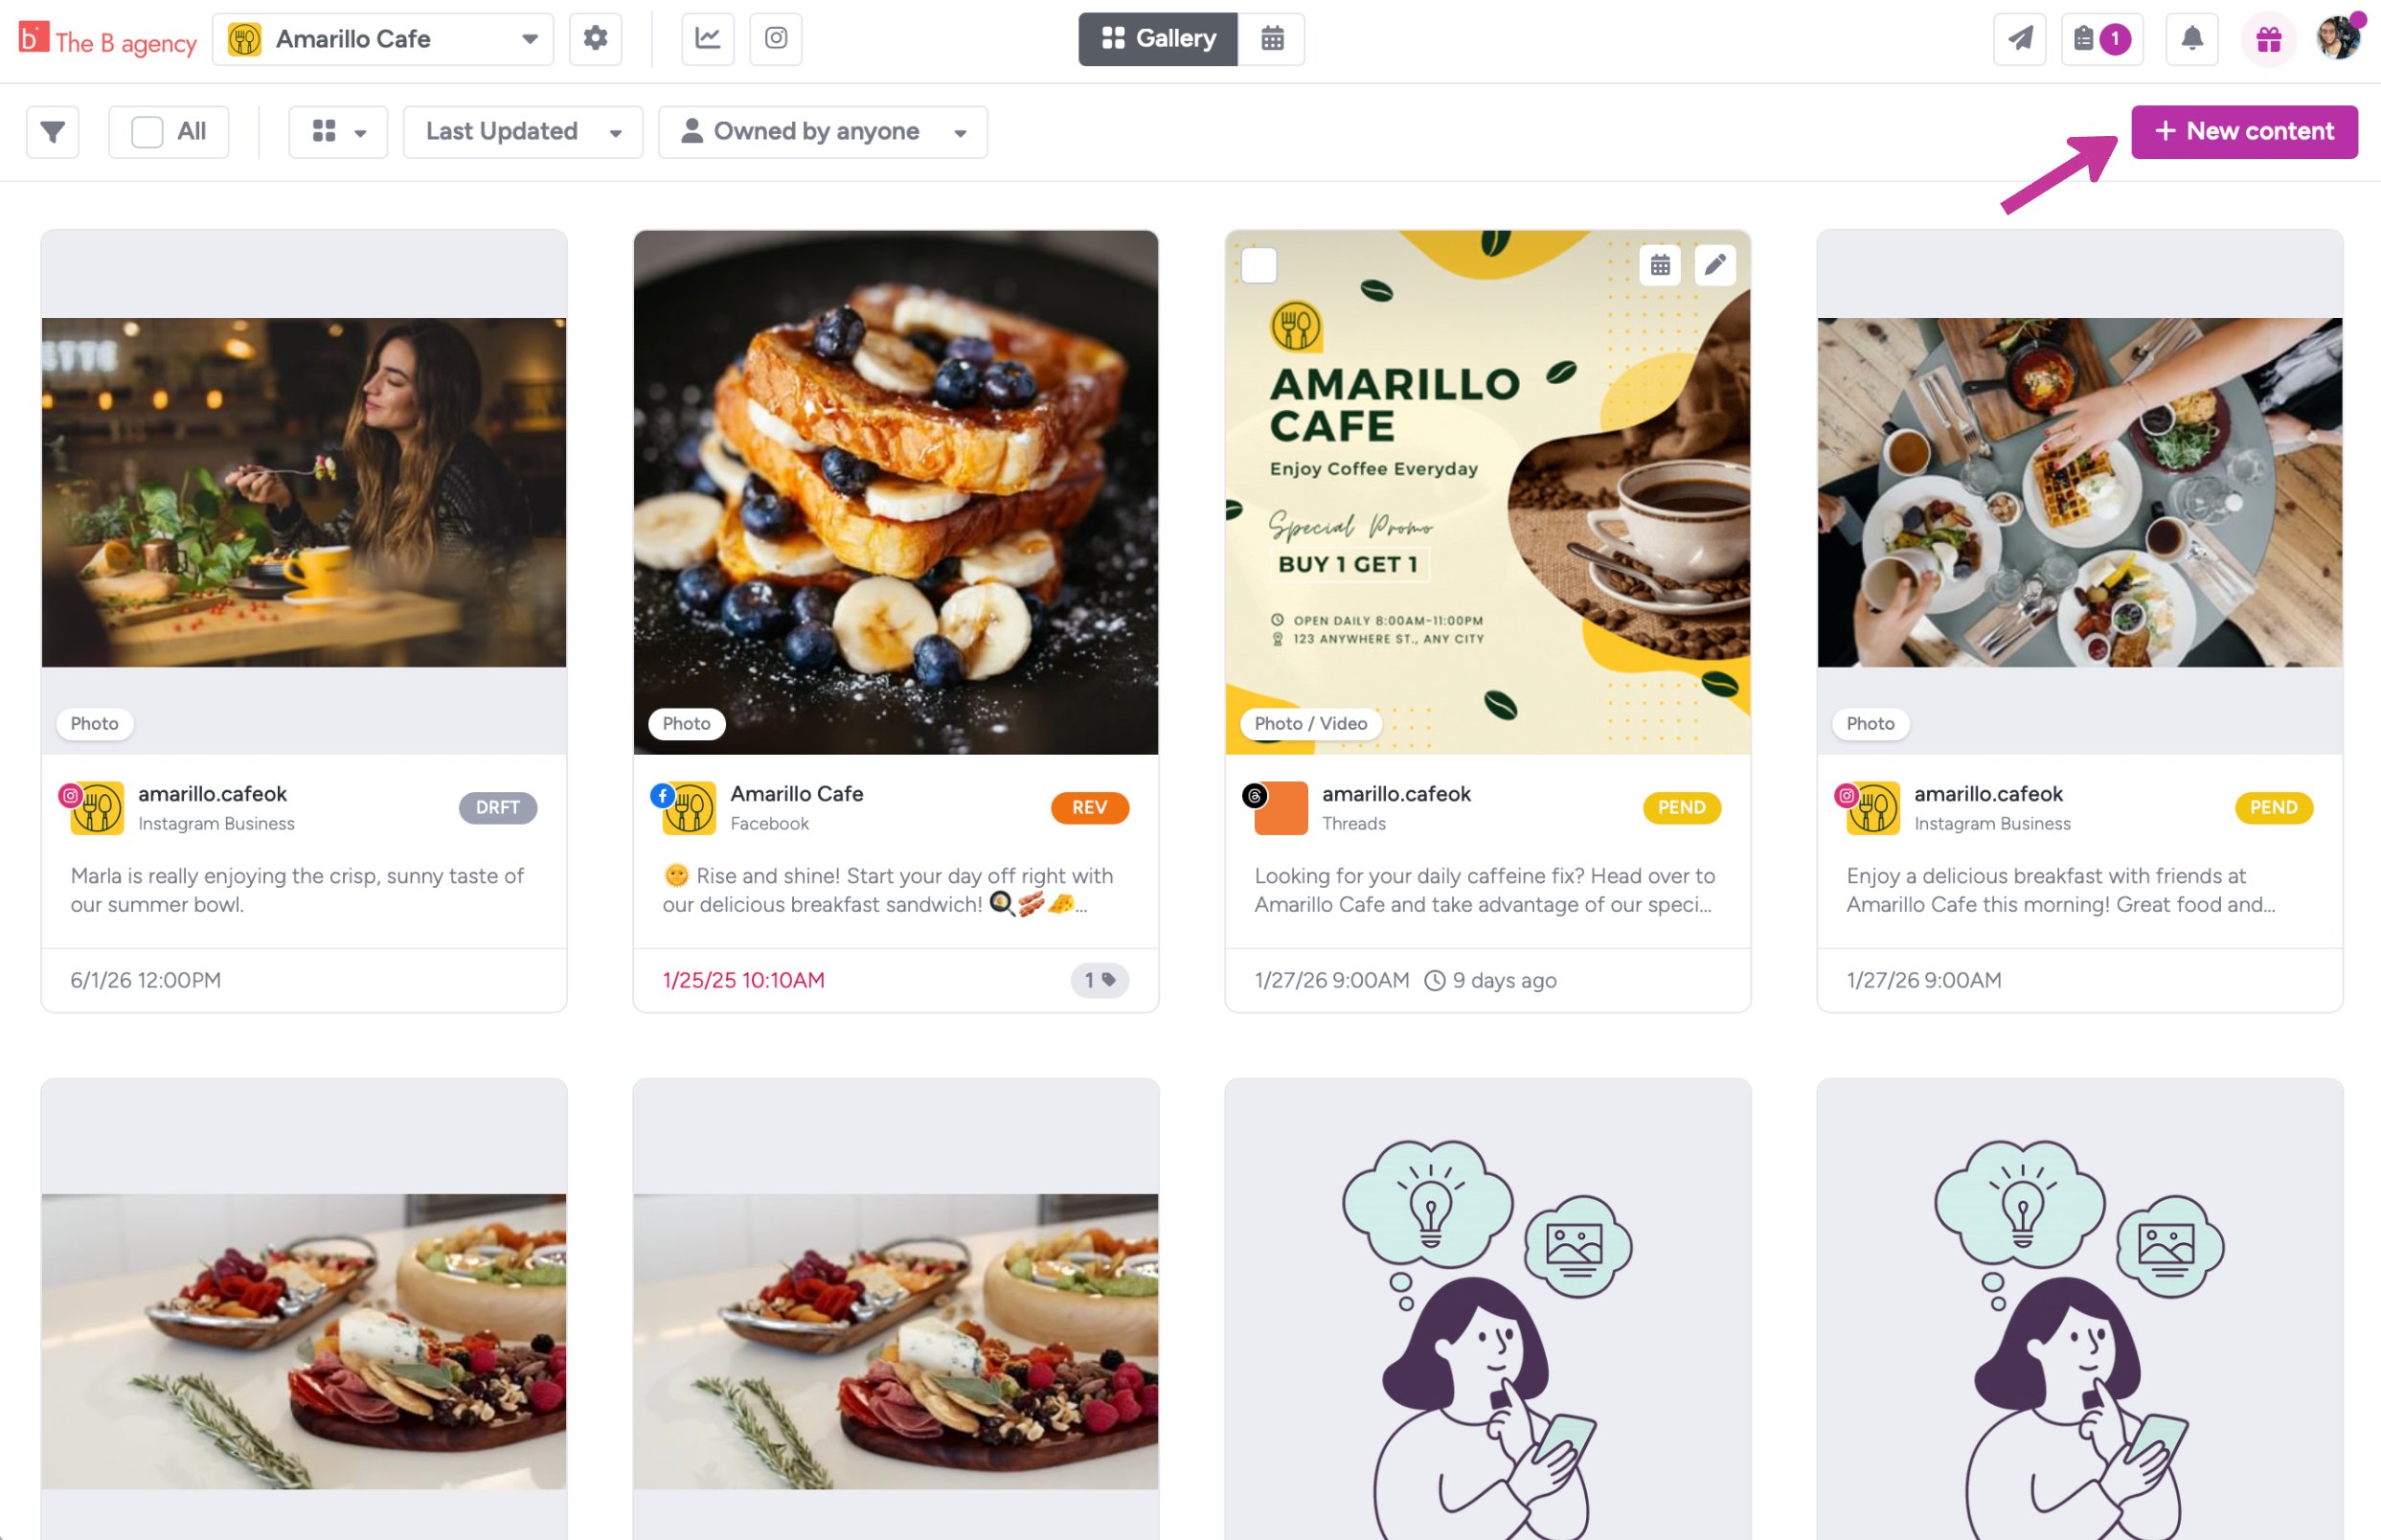
You can create and schedule social posts and upload files from the Calendar view or the Gallery view by clicking + New Content at the upper right corner.
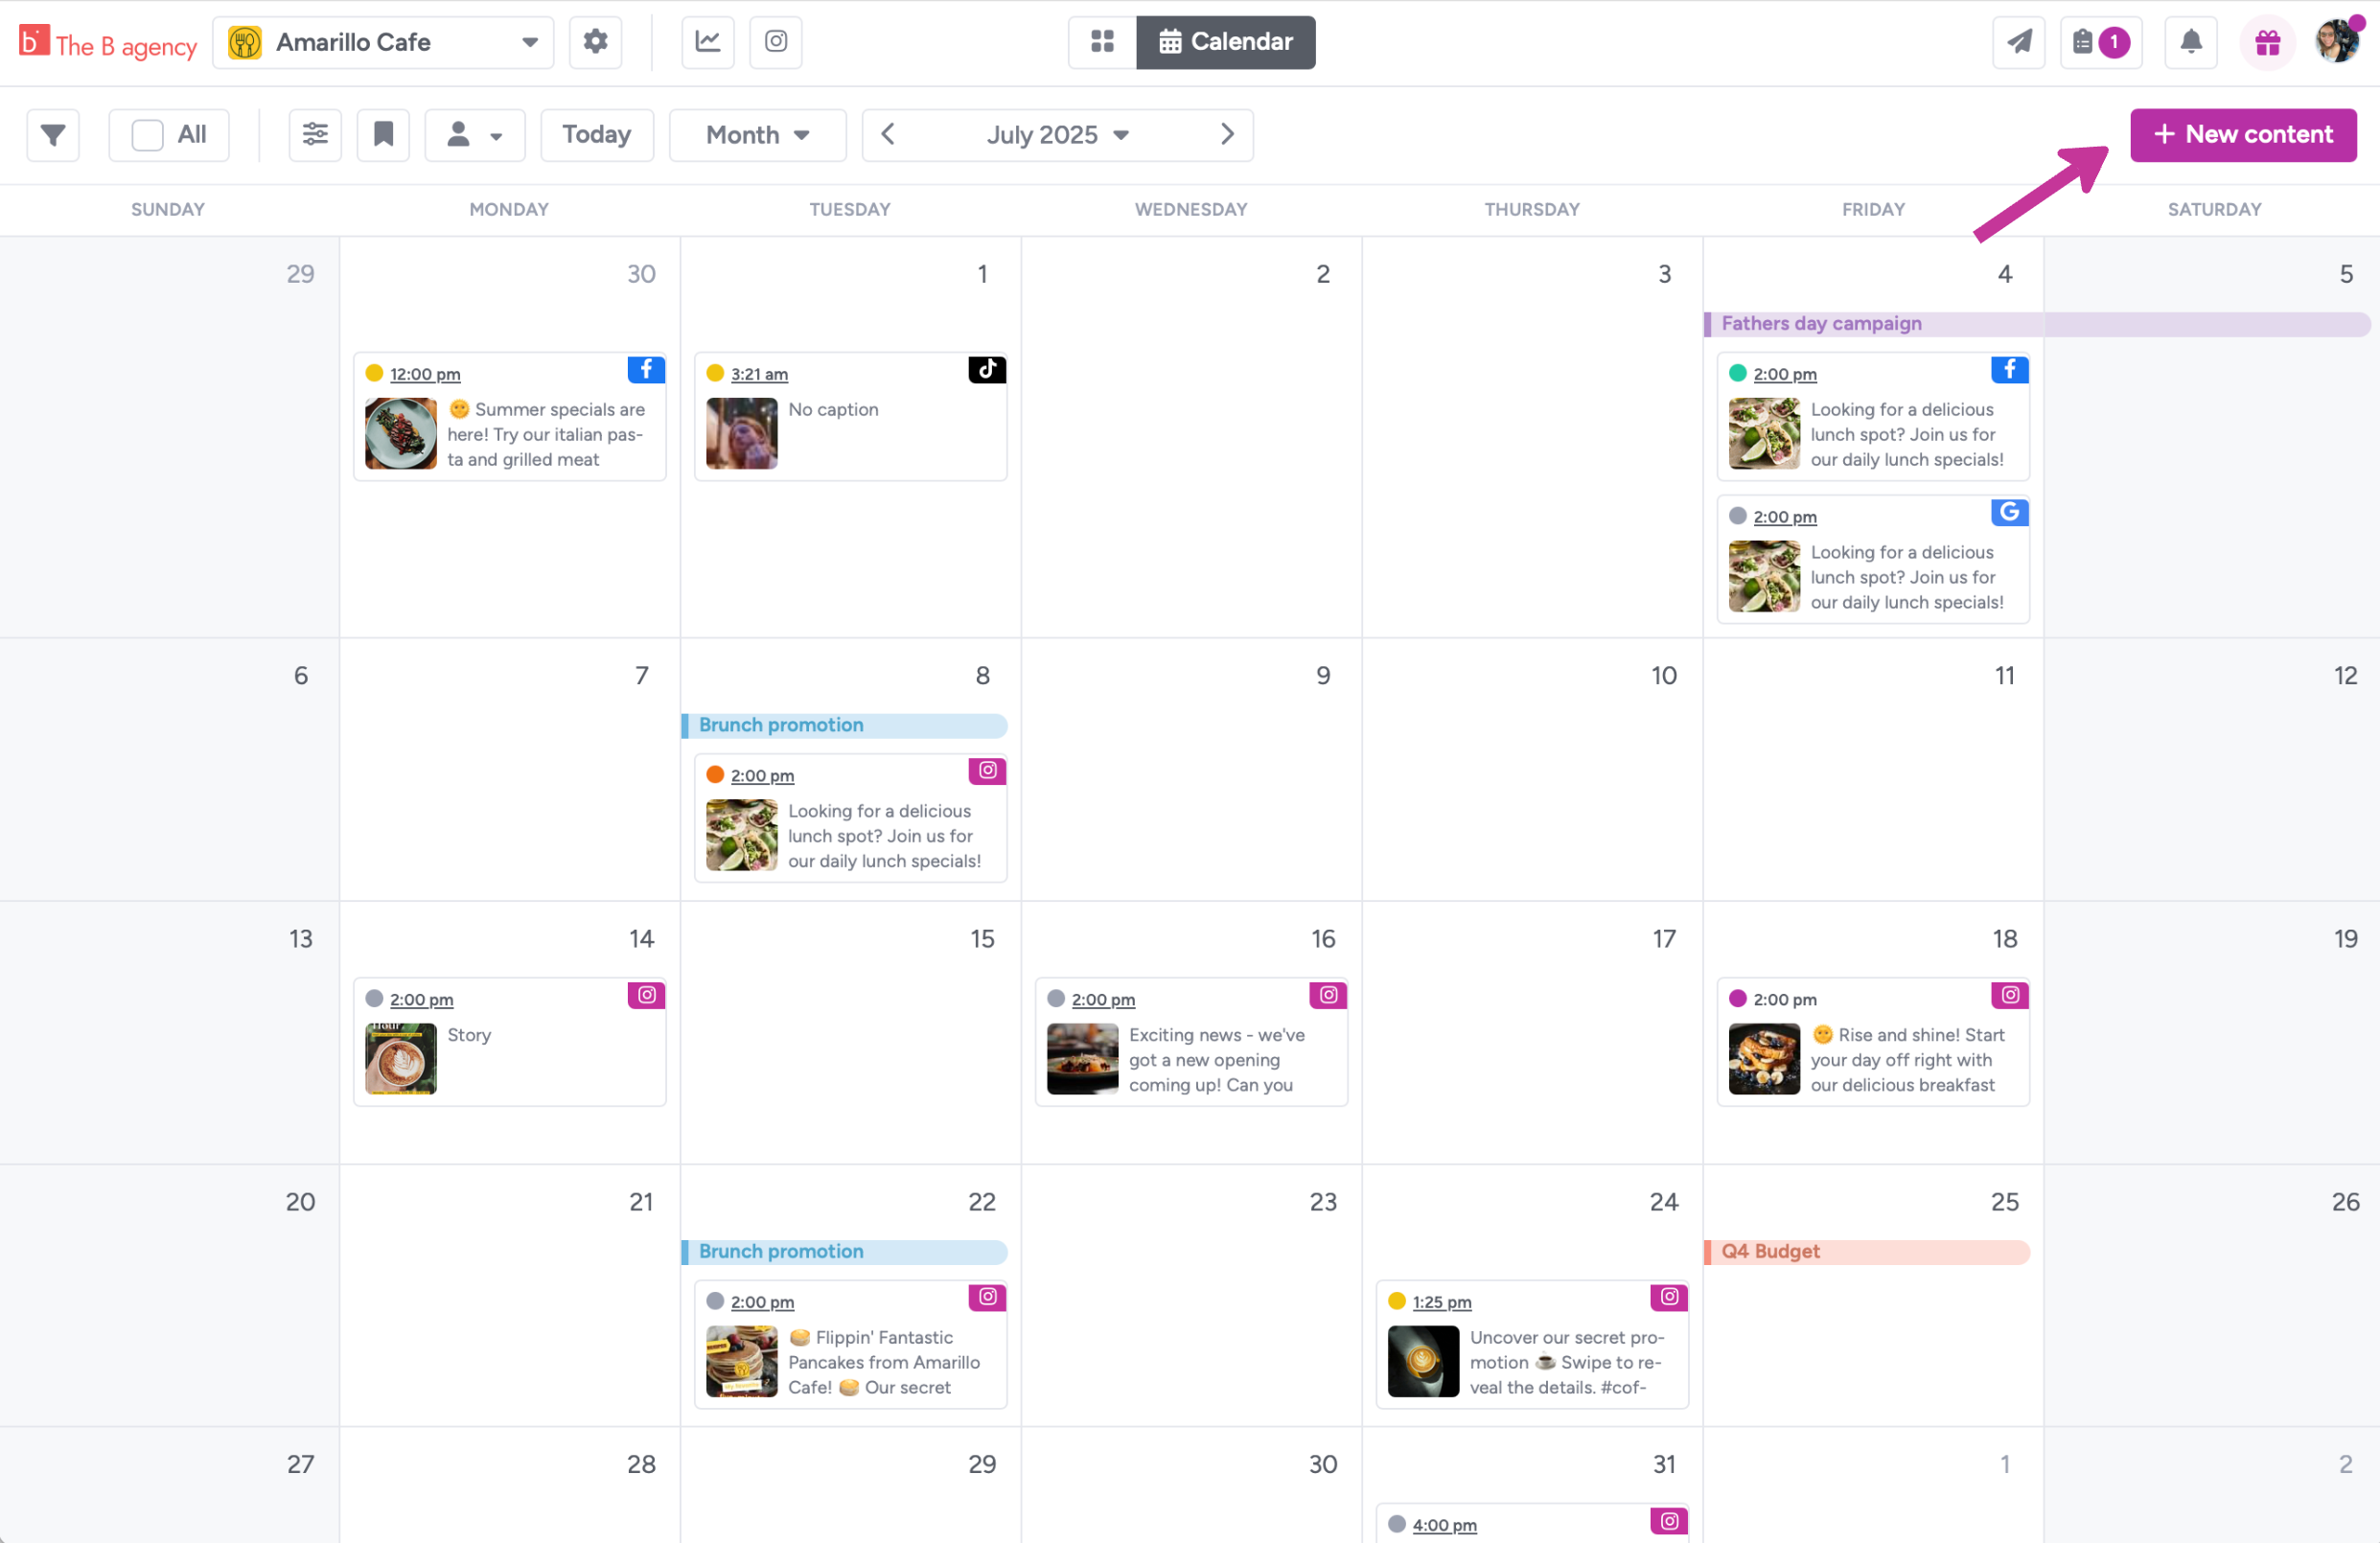
From the Calendar, you can also hover over a date and click on the plus sign. Creating a content item from a specific date will set that date as the intended publish date. (You can always change it later if needed.)

After you save your post, you can duplicate it to other social profiles, schedule it, or send it for approval.
In Gain, your content progresses through different phases, including stages like Pending Approval and Scheduled. The colored dots on the calendar help you know the status of your content at a glance.

👉🏼 Learn about the life-cycle of a content item
Uploading files
You can upload most file formats to Gain (such as PDFs, photos, videos, slide presentations, and spreadsheets) and organize them in Folders. You can send files to your stakeholders for approval and add them to social posts.
Drag and drop up files to the Gallery view or to a day in the Calendar view of your workspace. You can upload up to 25 items in bulk. Once your files are processed, you can:
- select the folder where you'd like to store your files
- add a publish date (optional)
- write a description with notes for your team members
- add content tags to categorize or filter content in Gain

Note: You can use creative assets from folders to create social posts. 👉🏼 Learn about folders and managing files
Sending content for approval
You can send a content item to a Client or stakeholder for approval from the content editor immediately after creating it, or from the Calendar or Gallery views, where you can select more than one item to send them in bulk. Just select the desired items and click To Approval from the top bar on the right.
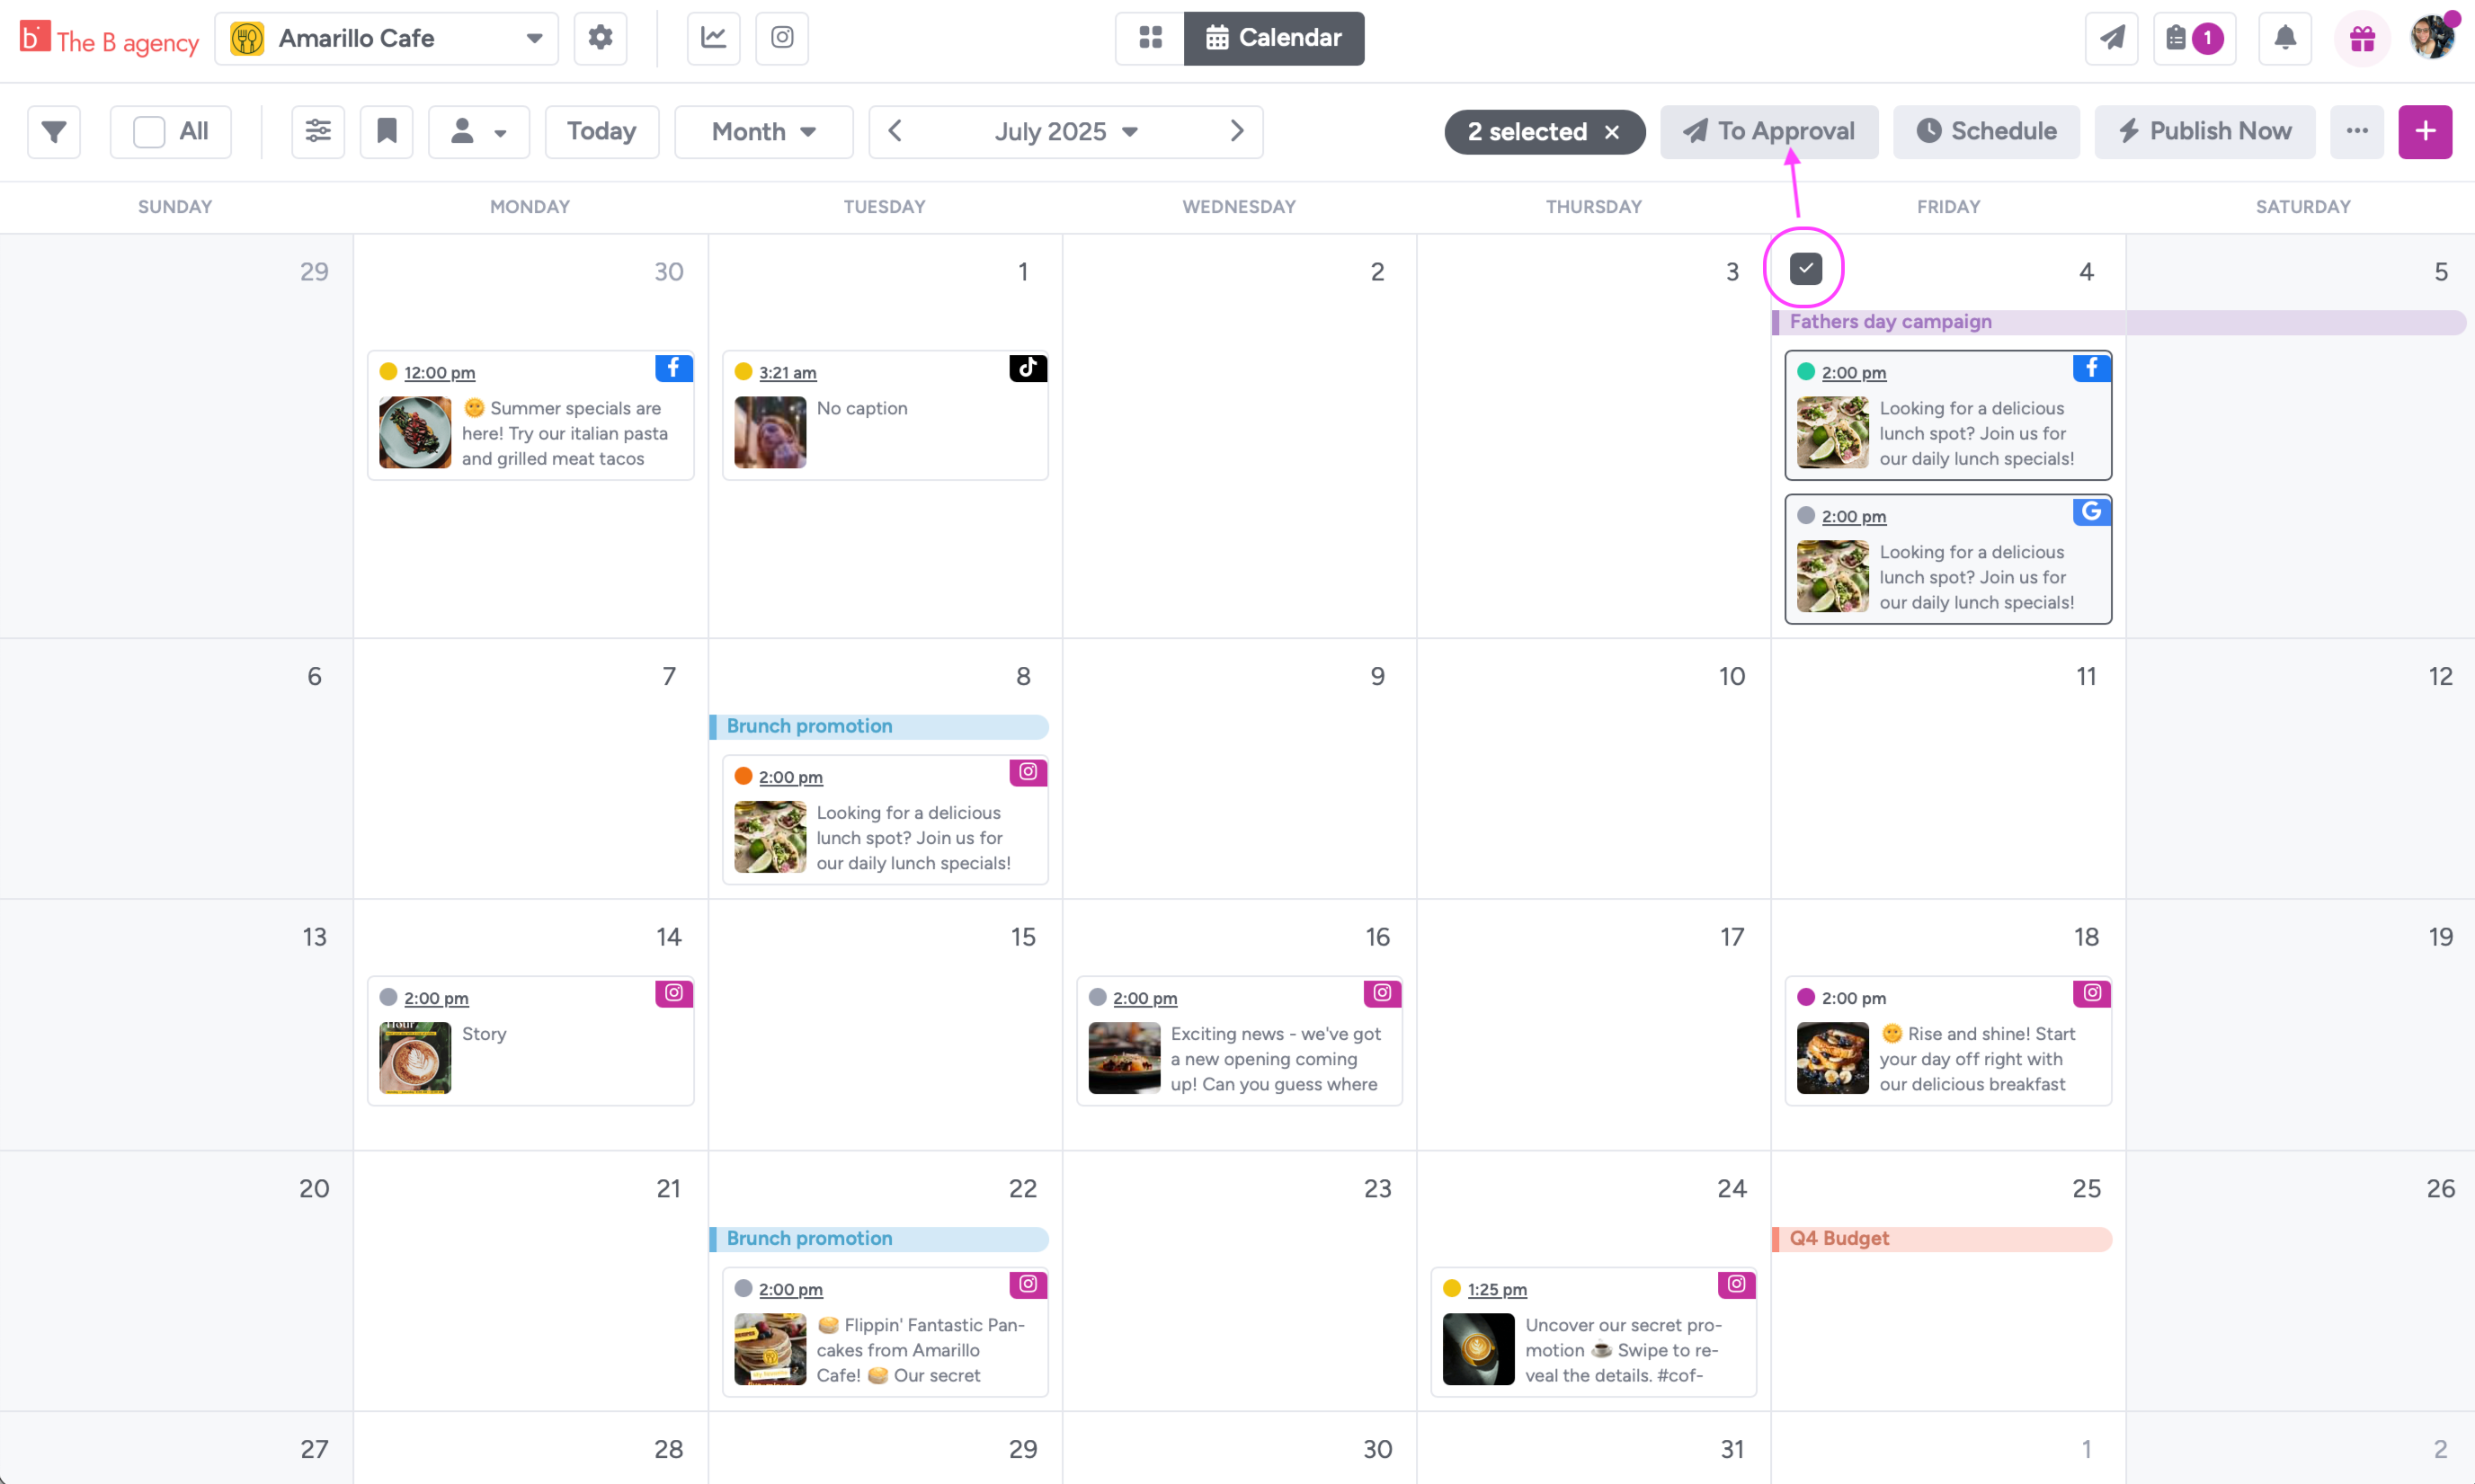
Then, you will have the choice to select an approval workflow or, if you don't have multiple stakeholders or layers of approval, send the content directly to one or more people in a single round.
Keep in mind:
- All the content you send for approval will change from Draft status to Pending Approval. 👉🏼 Learn about the life-cycle of a content item
- Your Clients will receive an email notification when you send them content for review. The email includes a login link that takes them to their approval queue.

- You'll be notified via email and the Notification Center in Gain (🔔 on the top right) when your Client has requested changes. Both the email and the in-app notification will take you to the content item to view the feedback.

- When someone requests changes, the content status changes from "Pending Approval to "Revision." When content is in revision status, you can make changes and send content back to the stakeholder who requested it .
👉🏼 Learn all about managing change requests from stakeholders
- Gain tracks all the activity in each content item. Under Activity, you can see the full history of the item, including comments from Team Members as well as your Clients. Under Approval, you can monitor the progress of the approval workflow. You'll see the user's name under each round, accompanied by a color that indicates the status:
- Orange if the Client requested changes.
- Yellow when content is pending their approval.
- Green after they've approved.


👉🏼 Learn more about sending content for approval and monitoring progress
Schedule and publish content
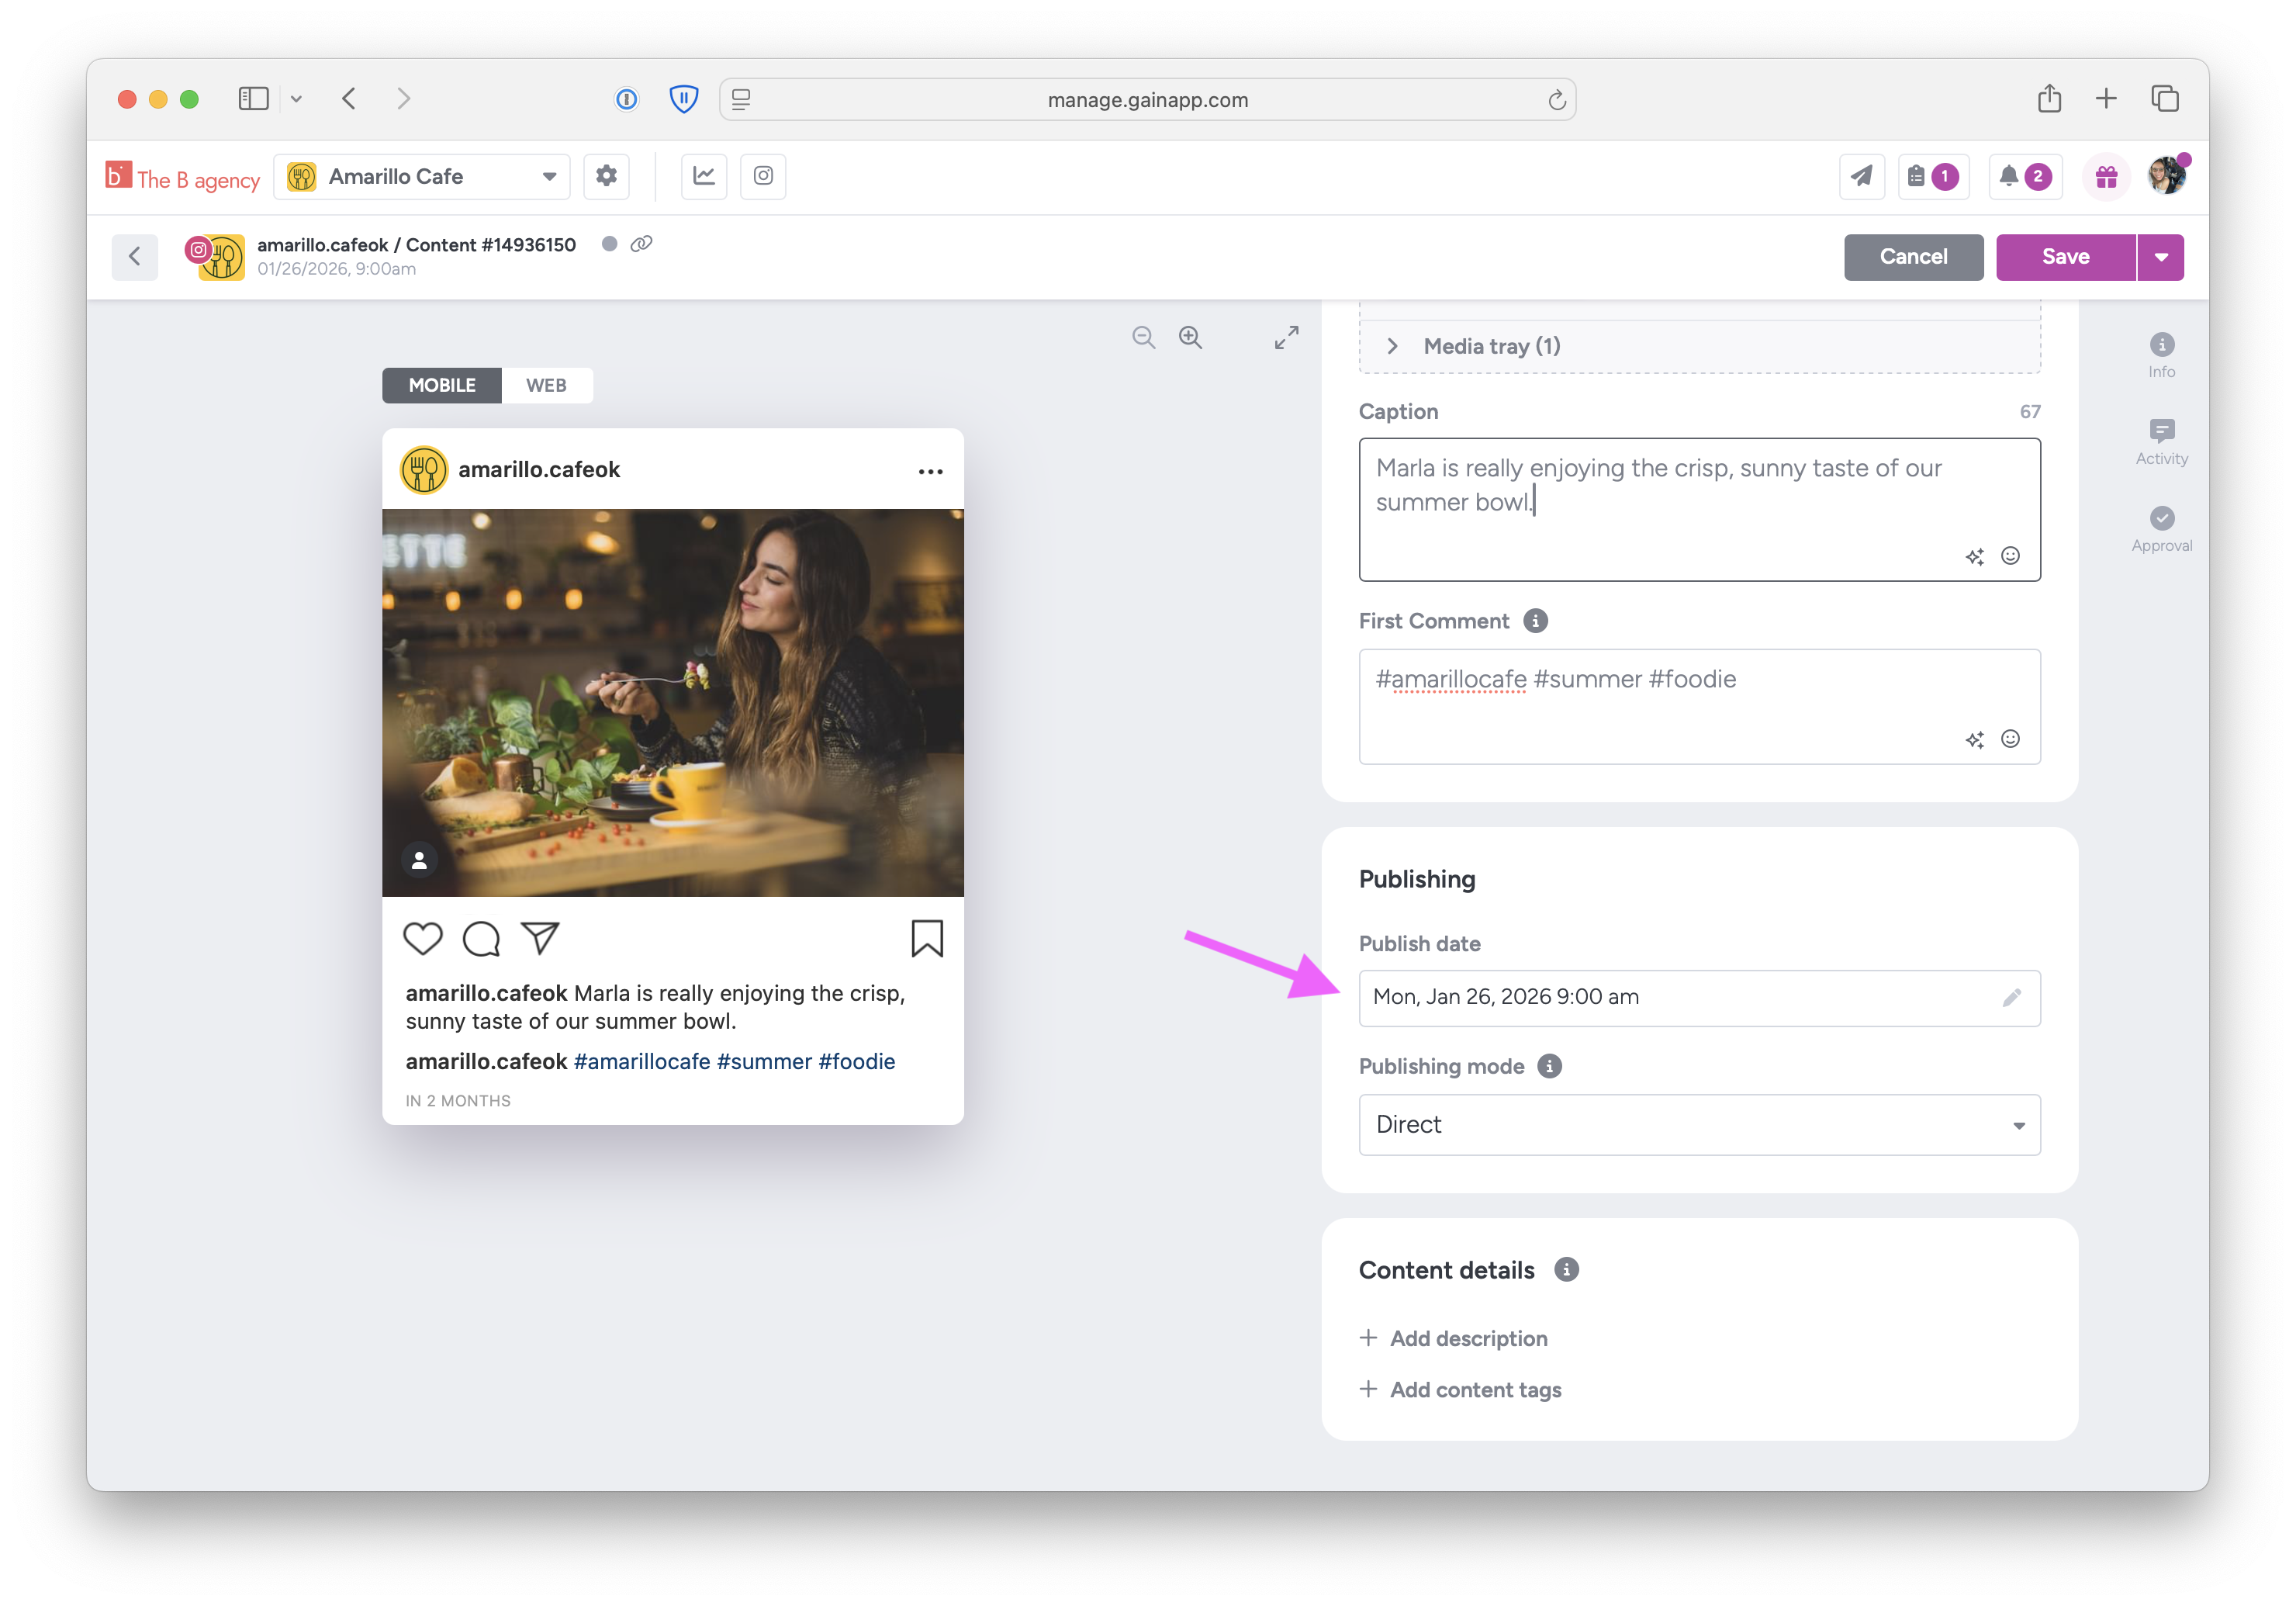
Setting and changing a publish date
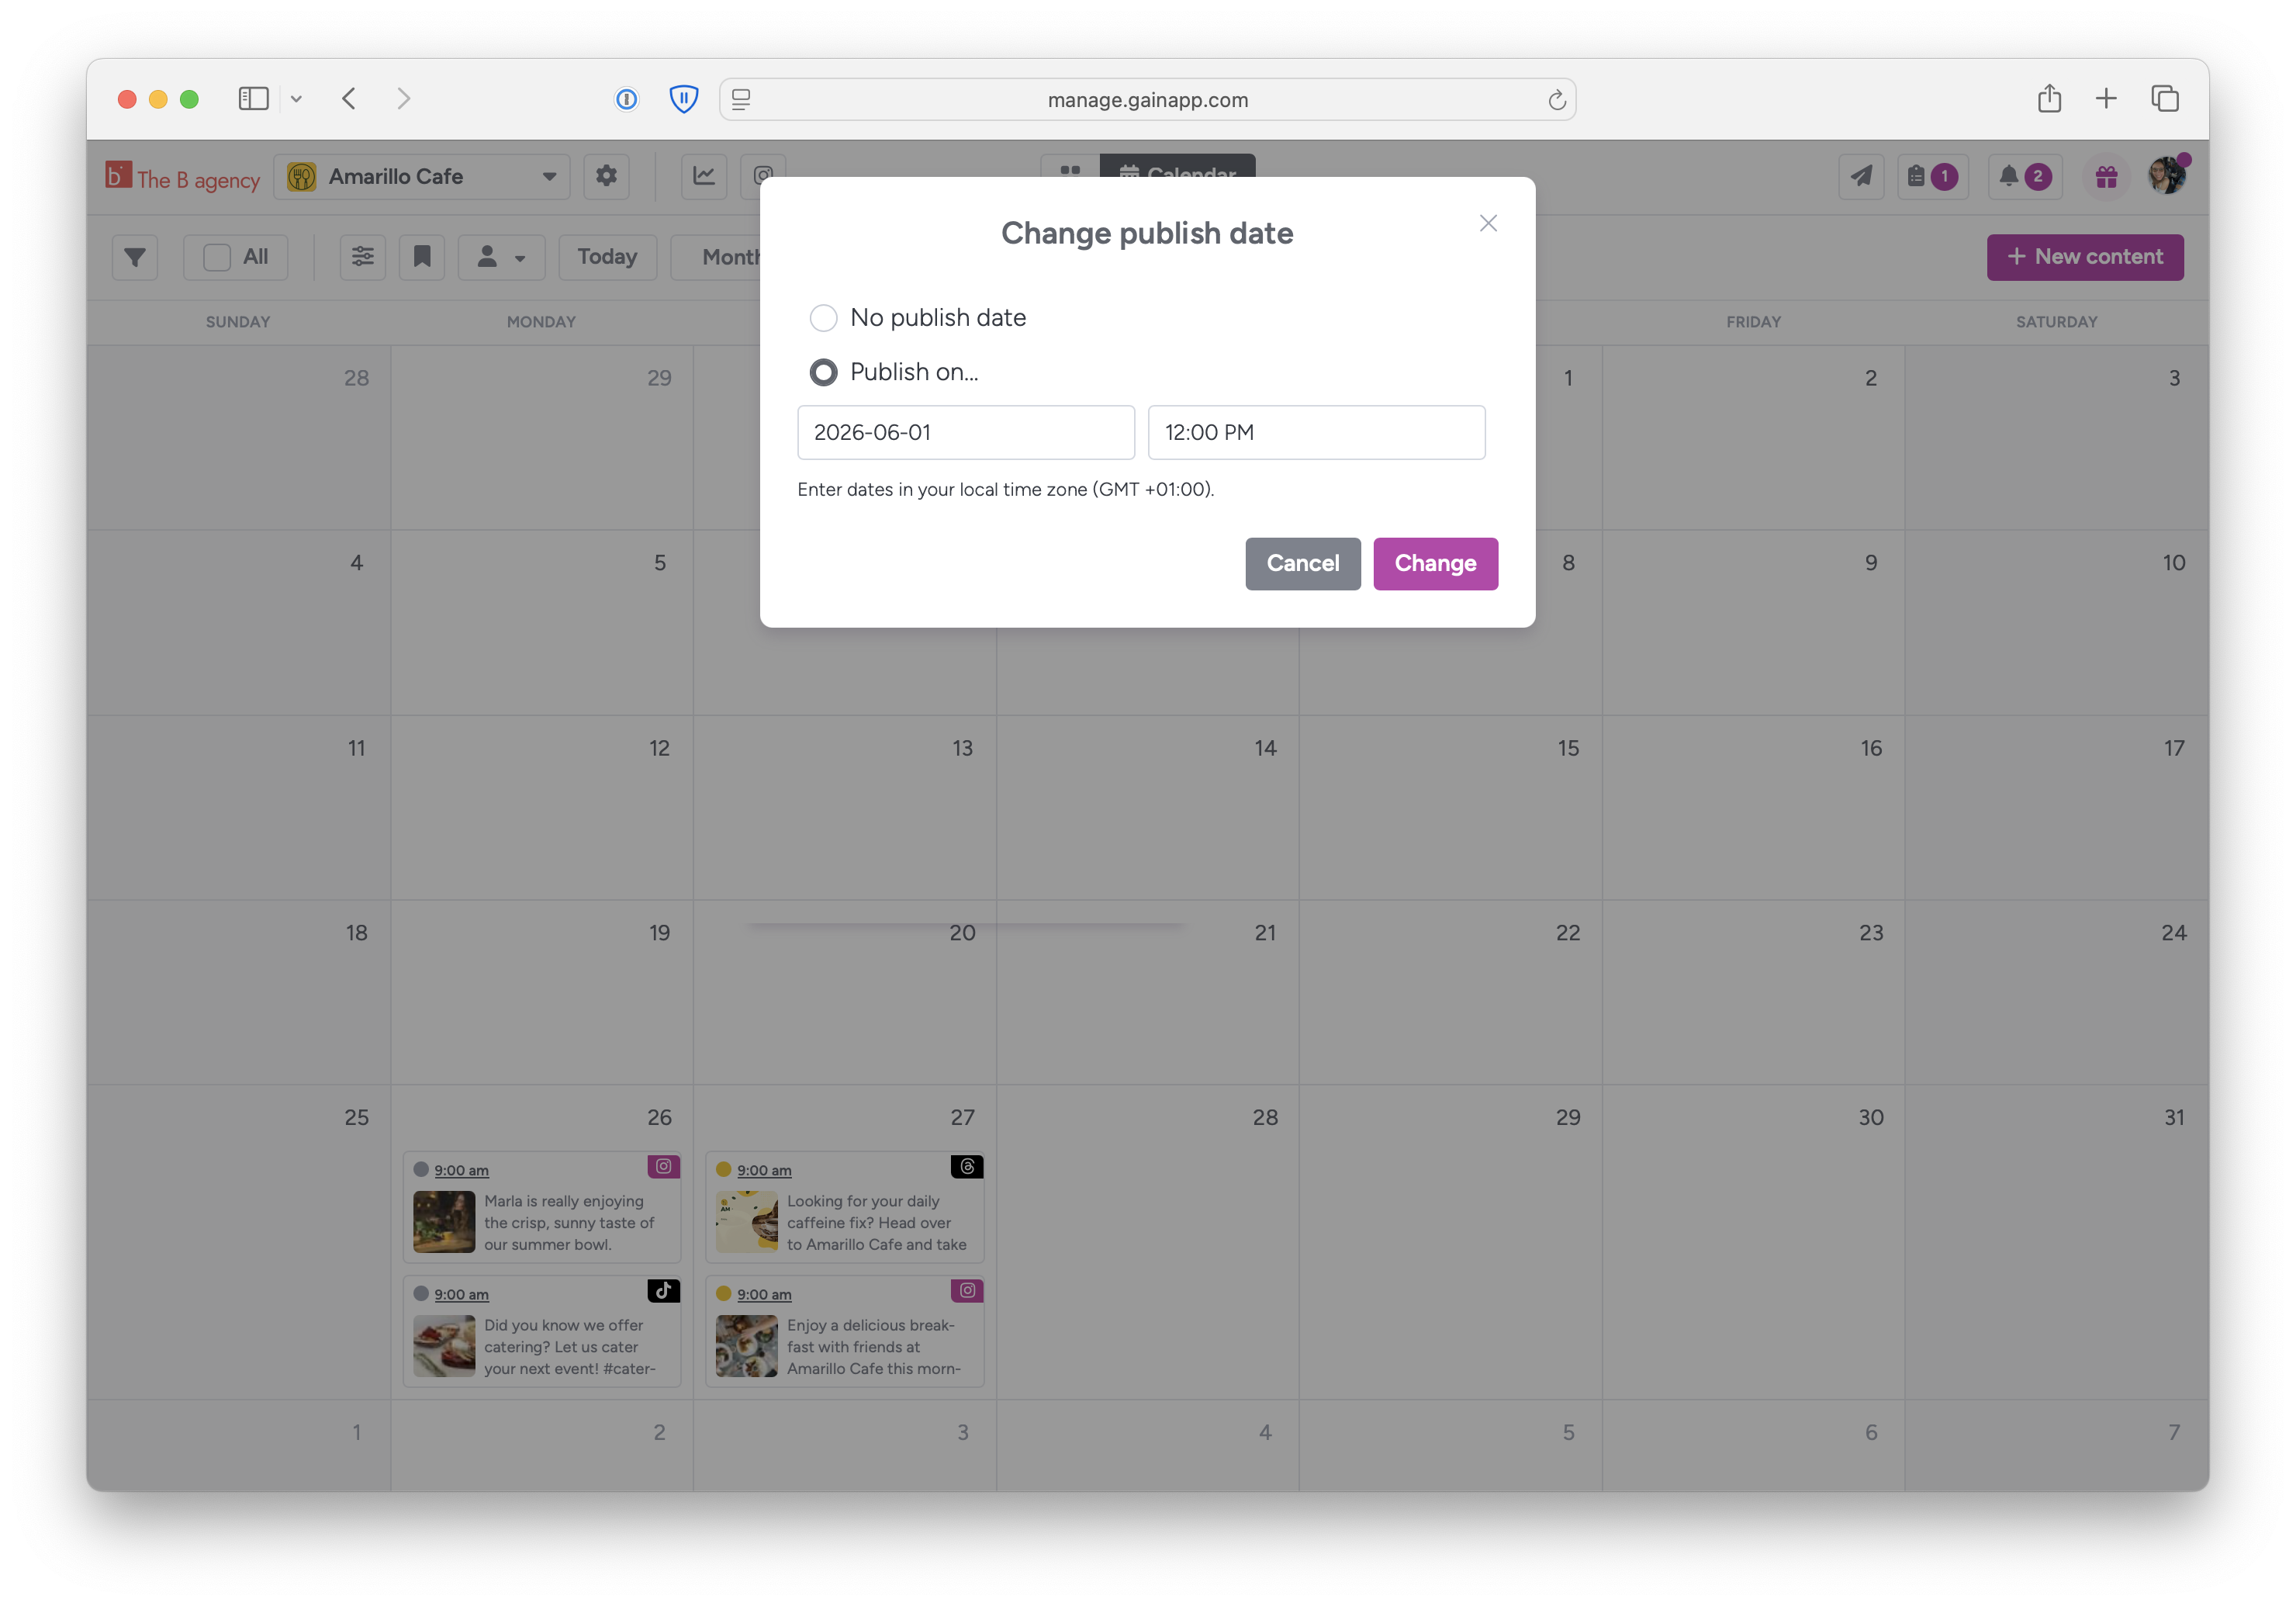
The publish date can be edited whenever you're creating new content or editing existing content:
As a shortcut, you can also edit the publish date from the calendar, by clicking on the date in the specific content item you wish to change.
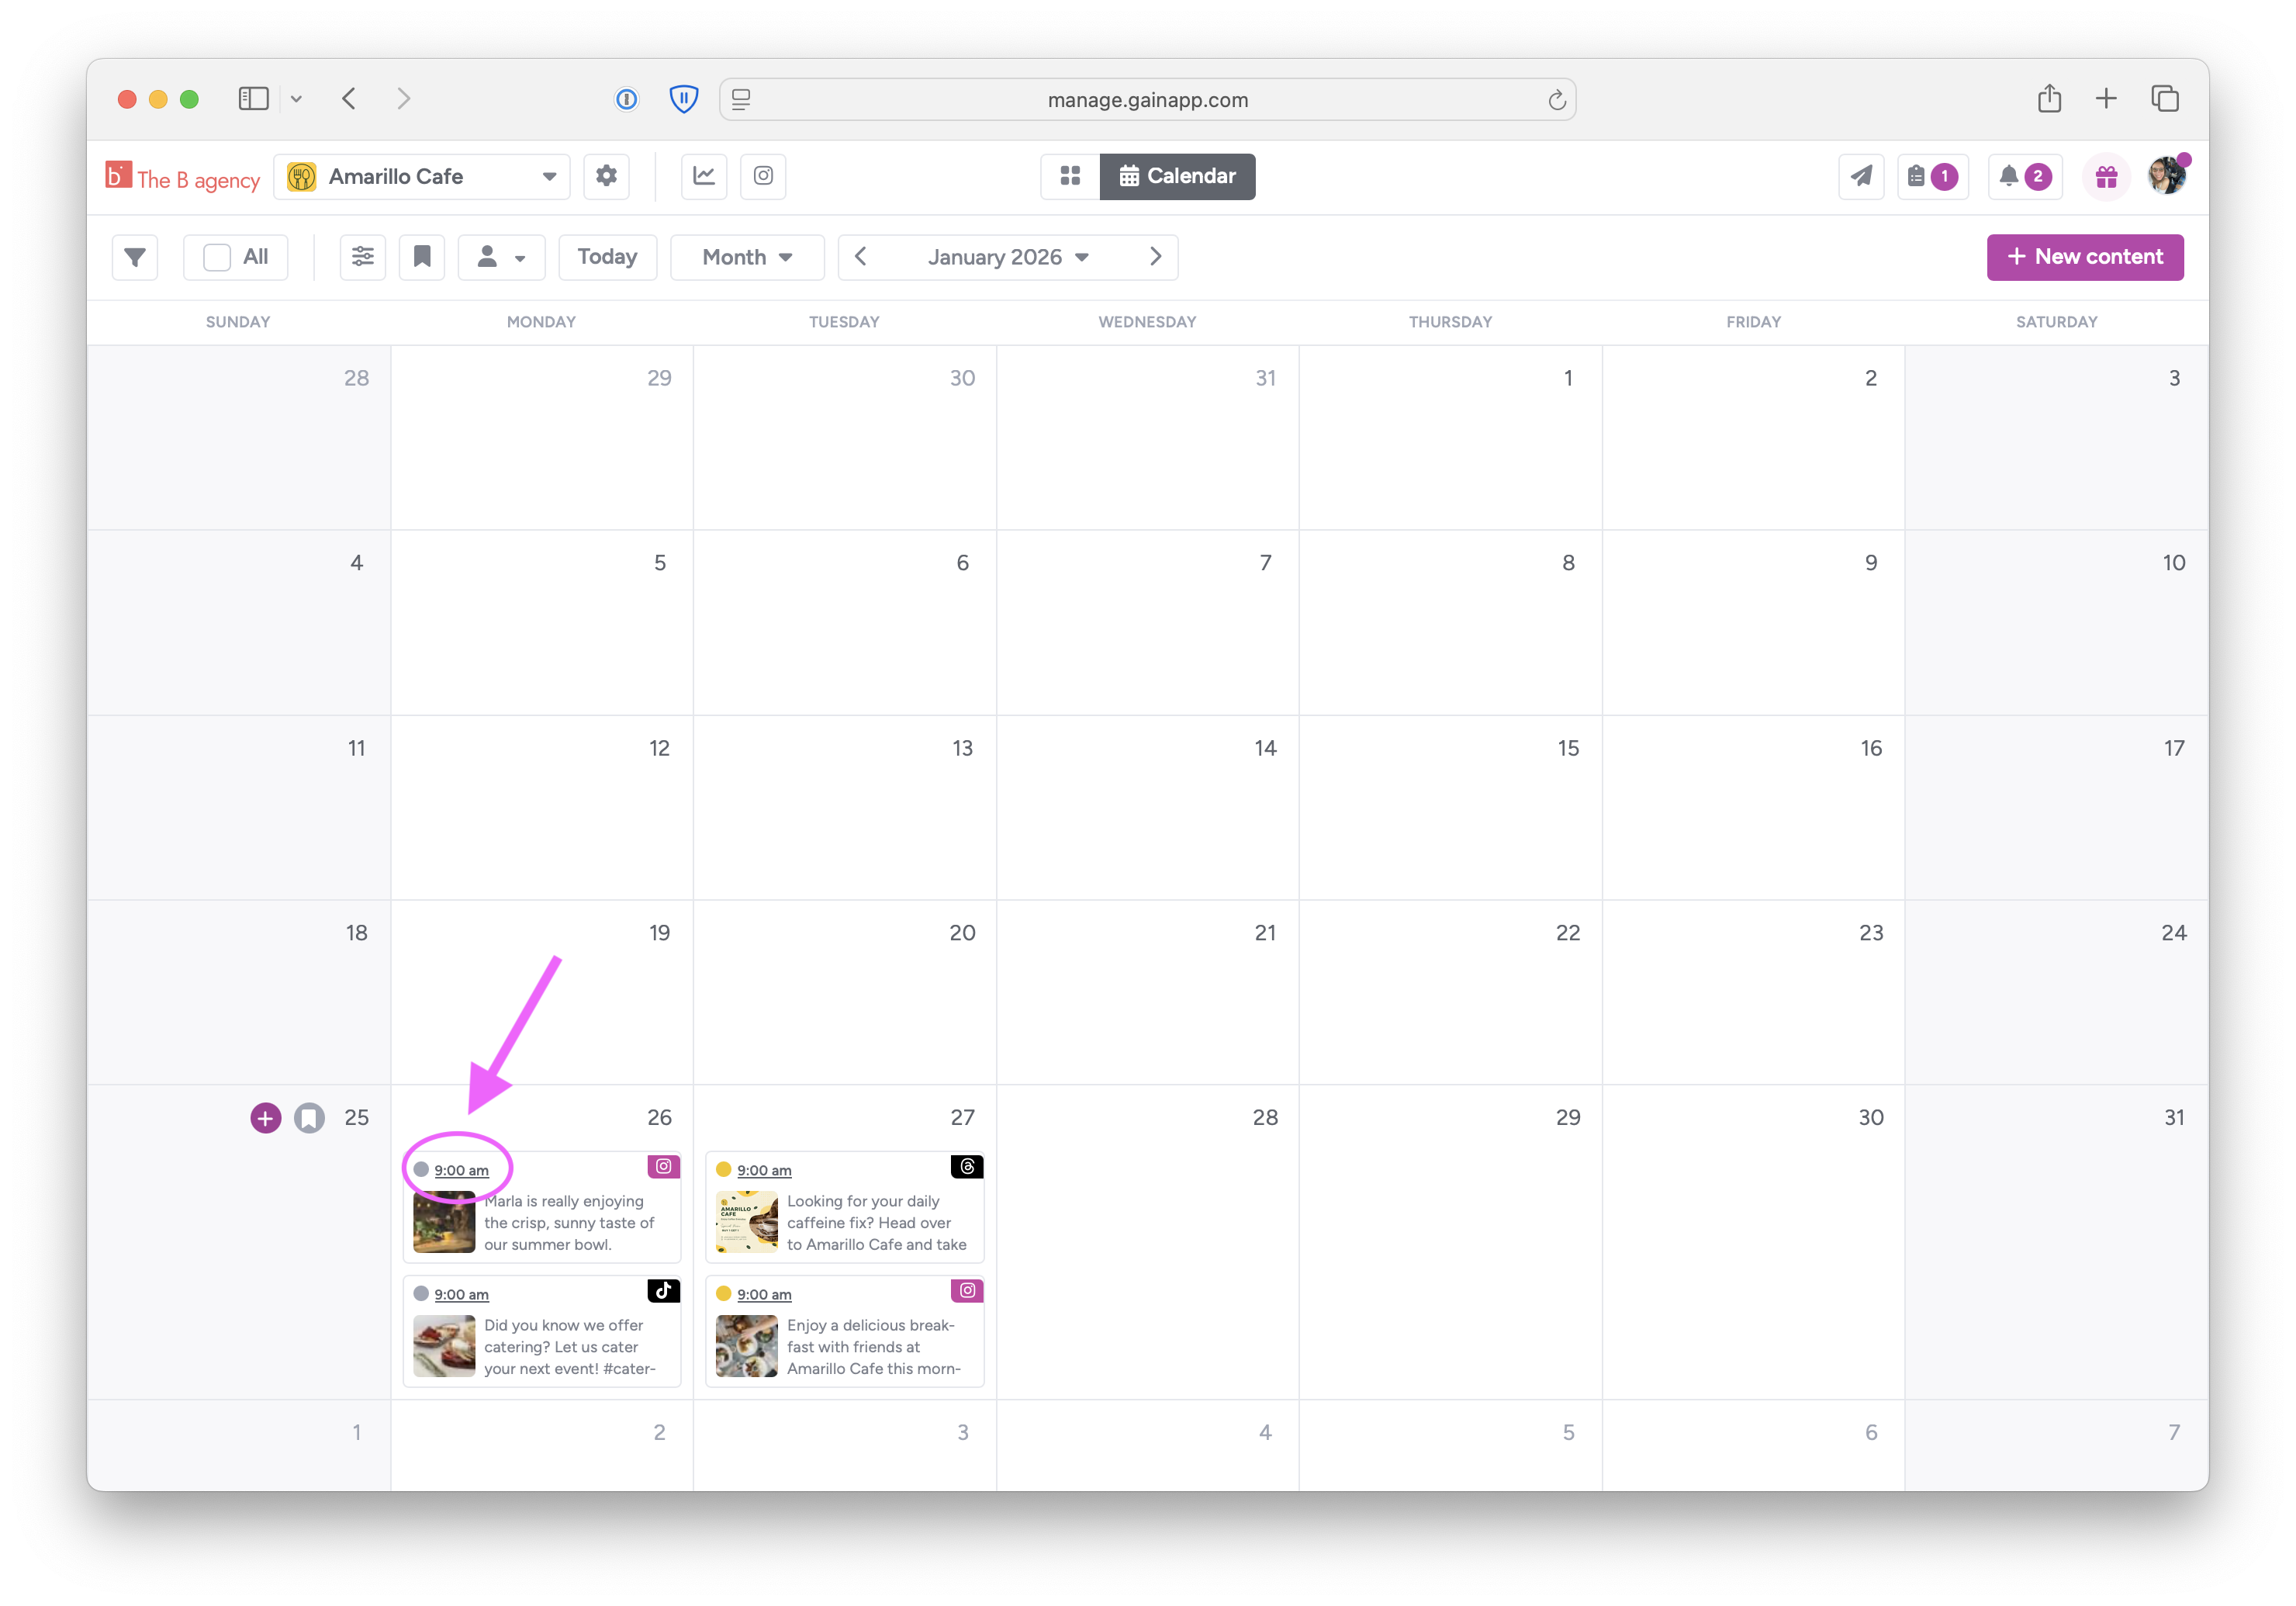
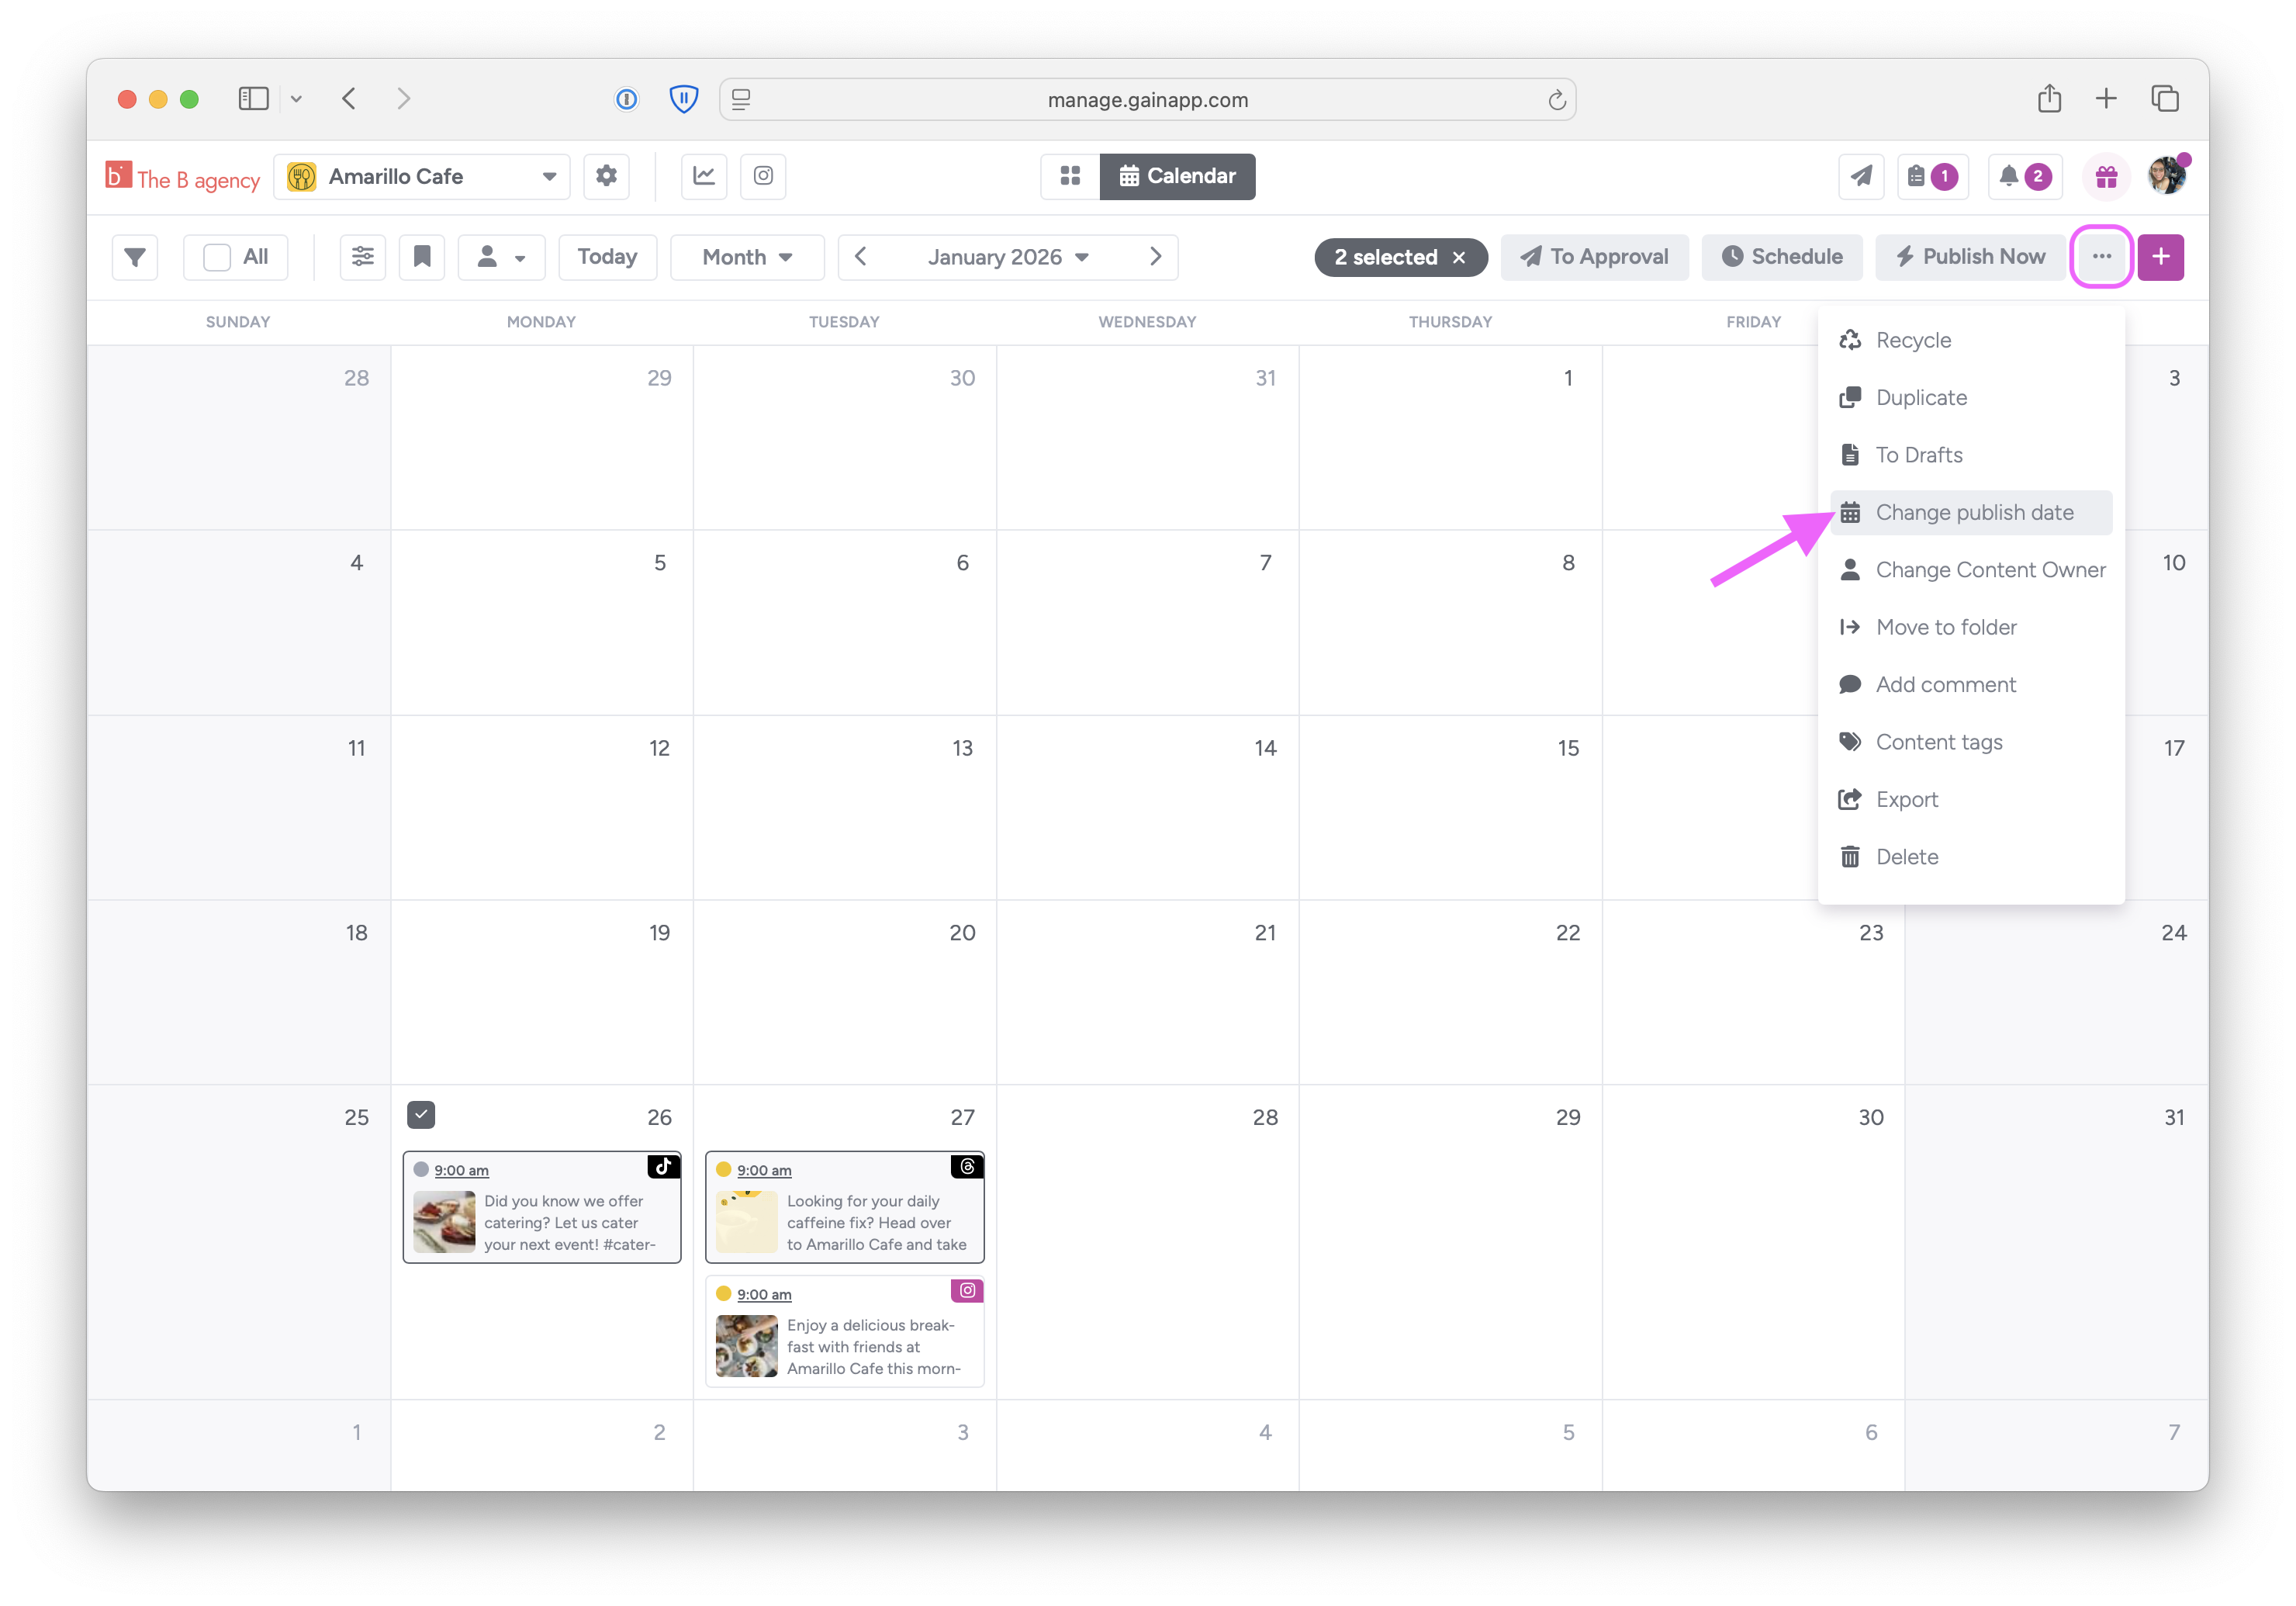
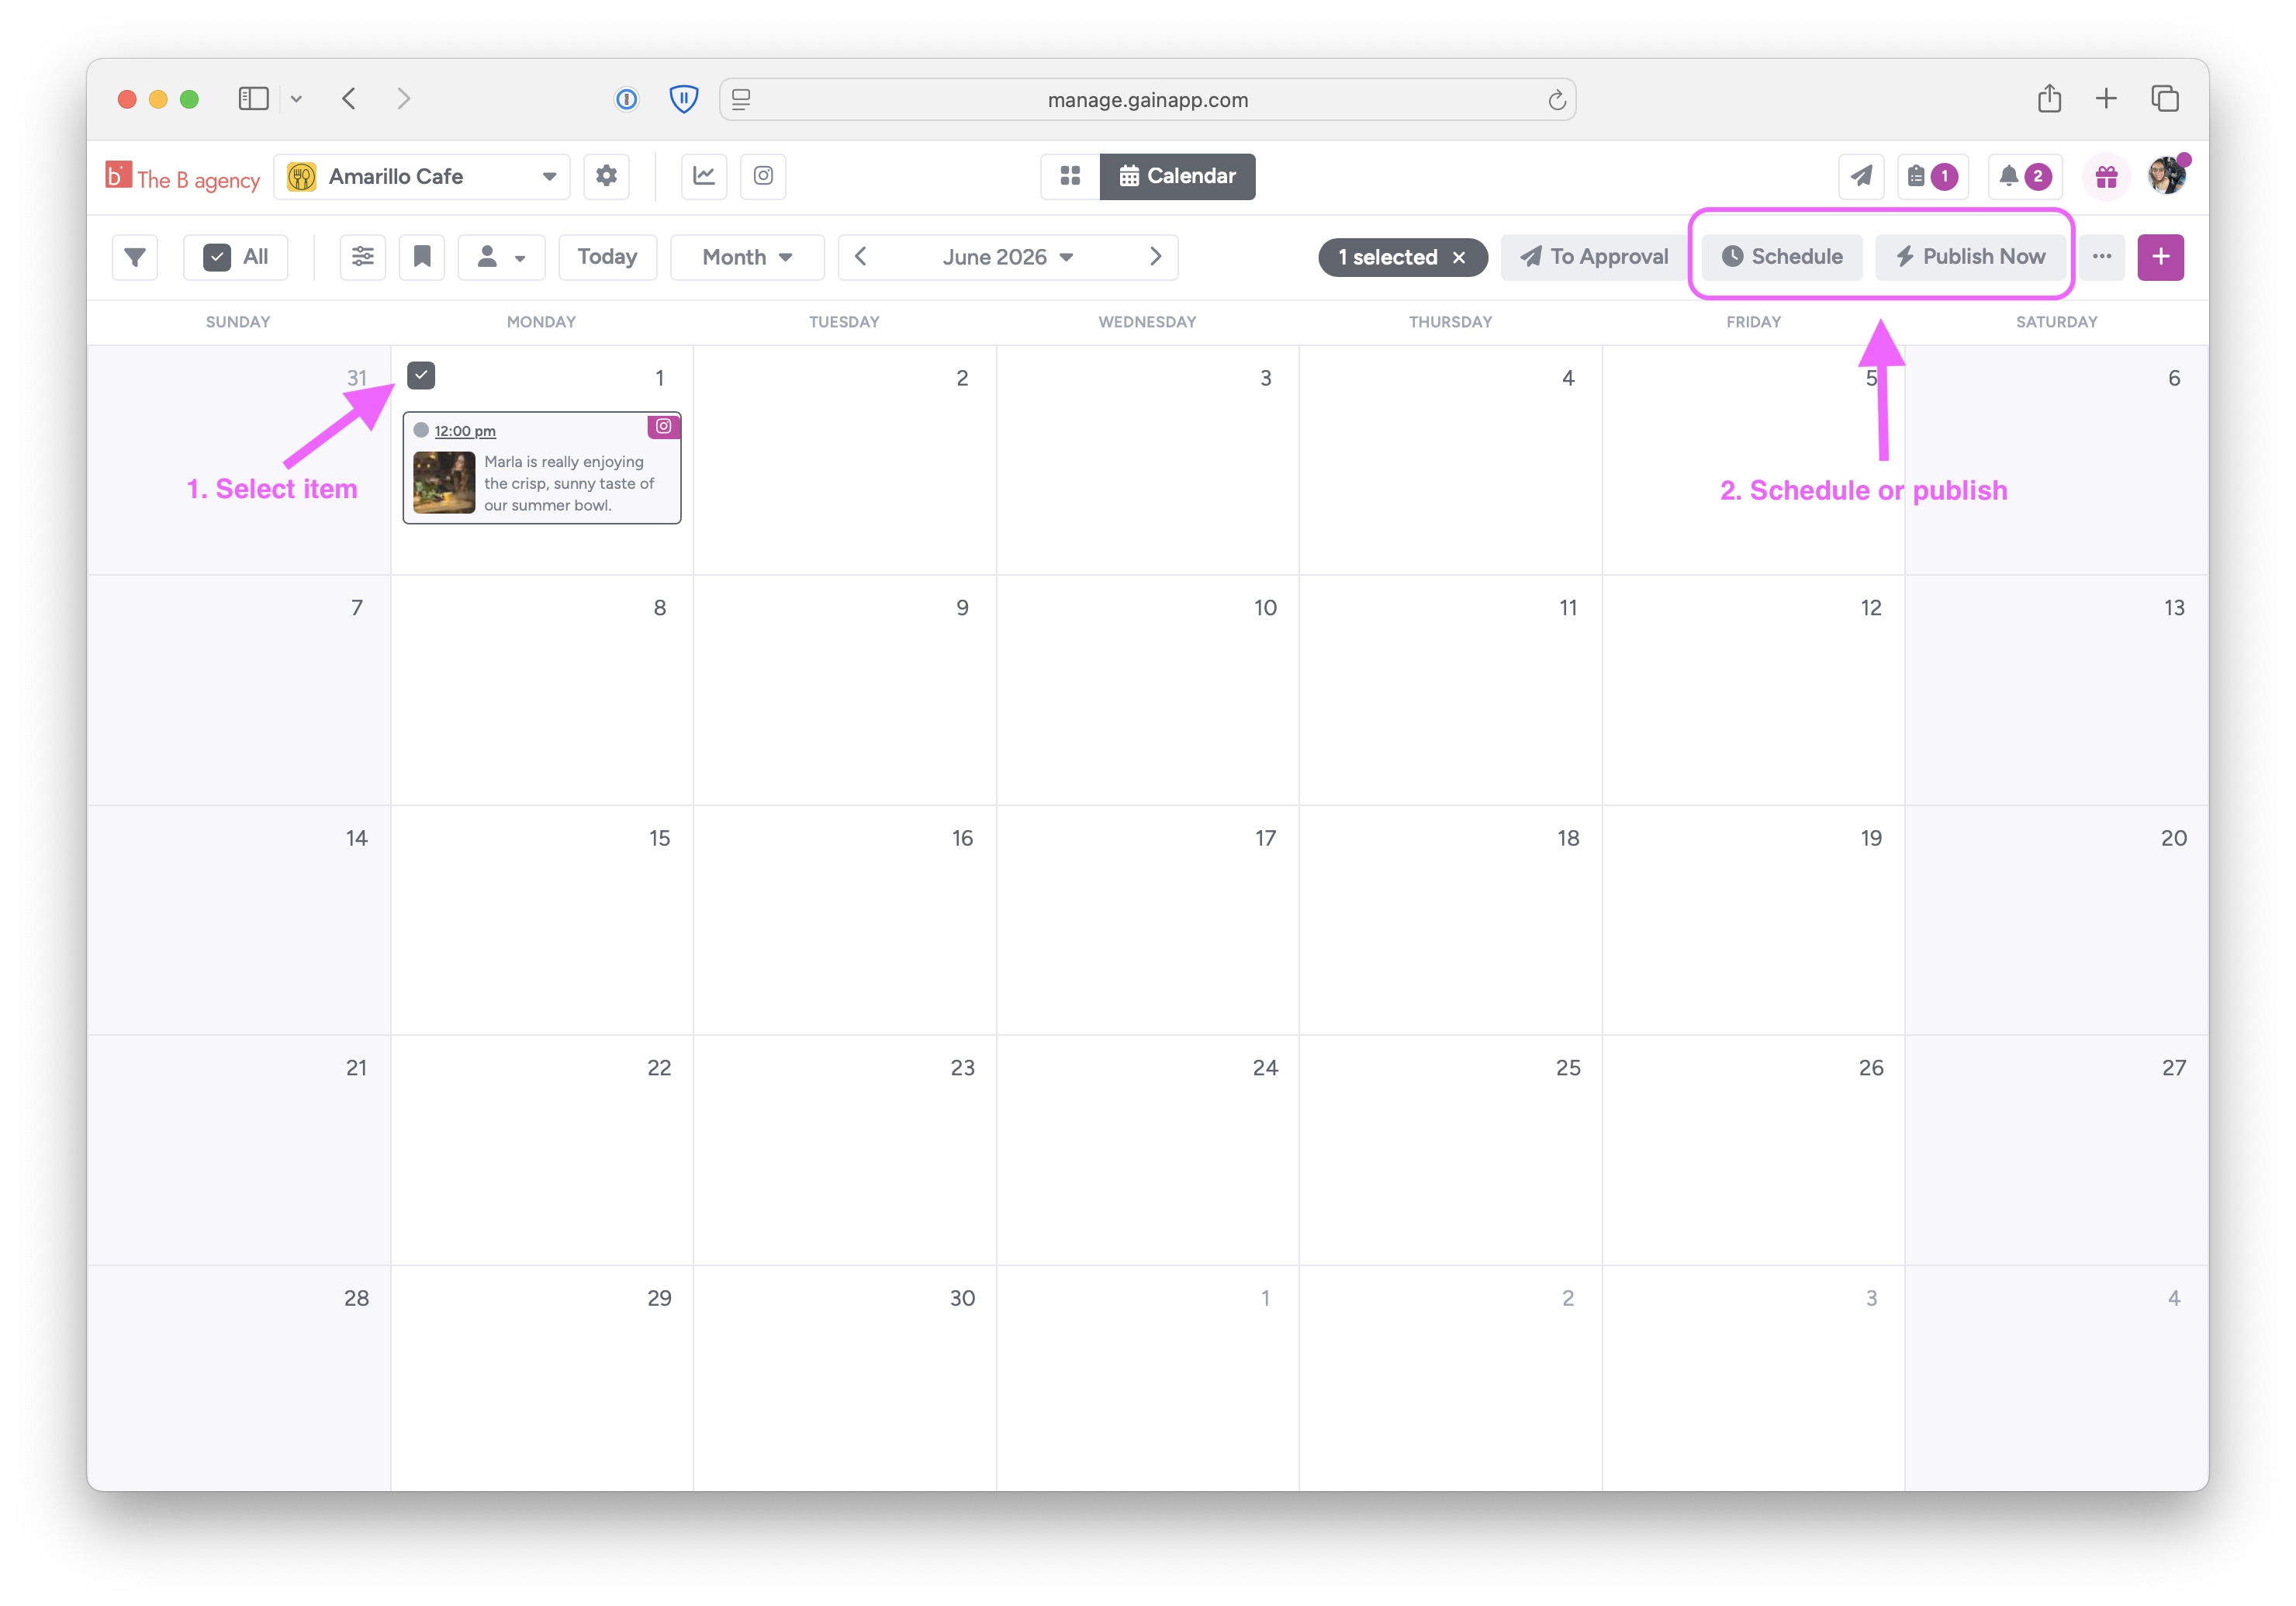
If you want to edit the publish date of more than one item at a time, select them in the calendar...
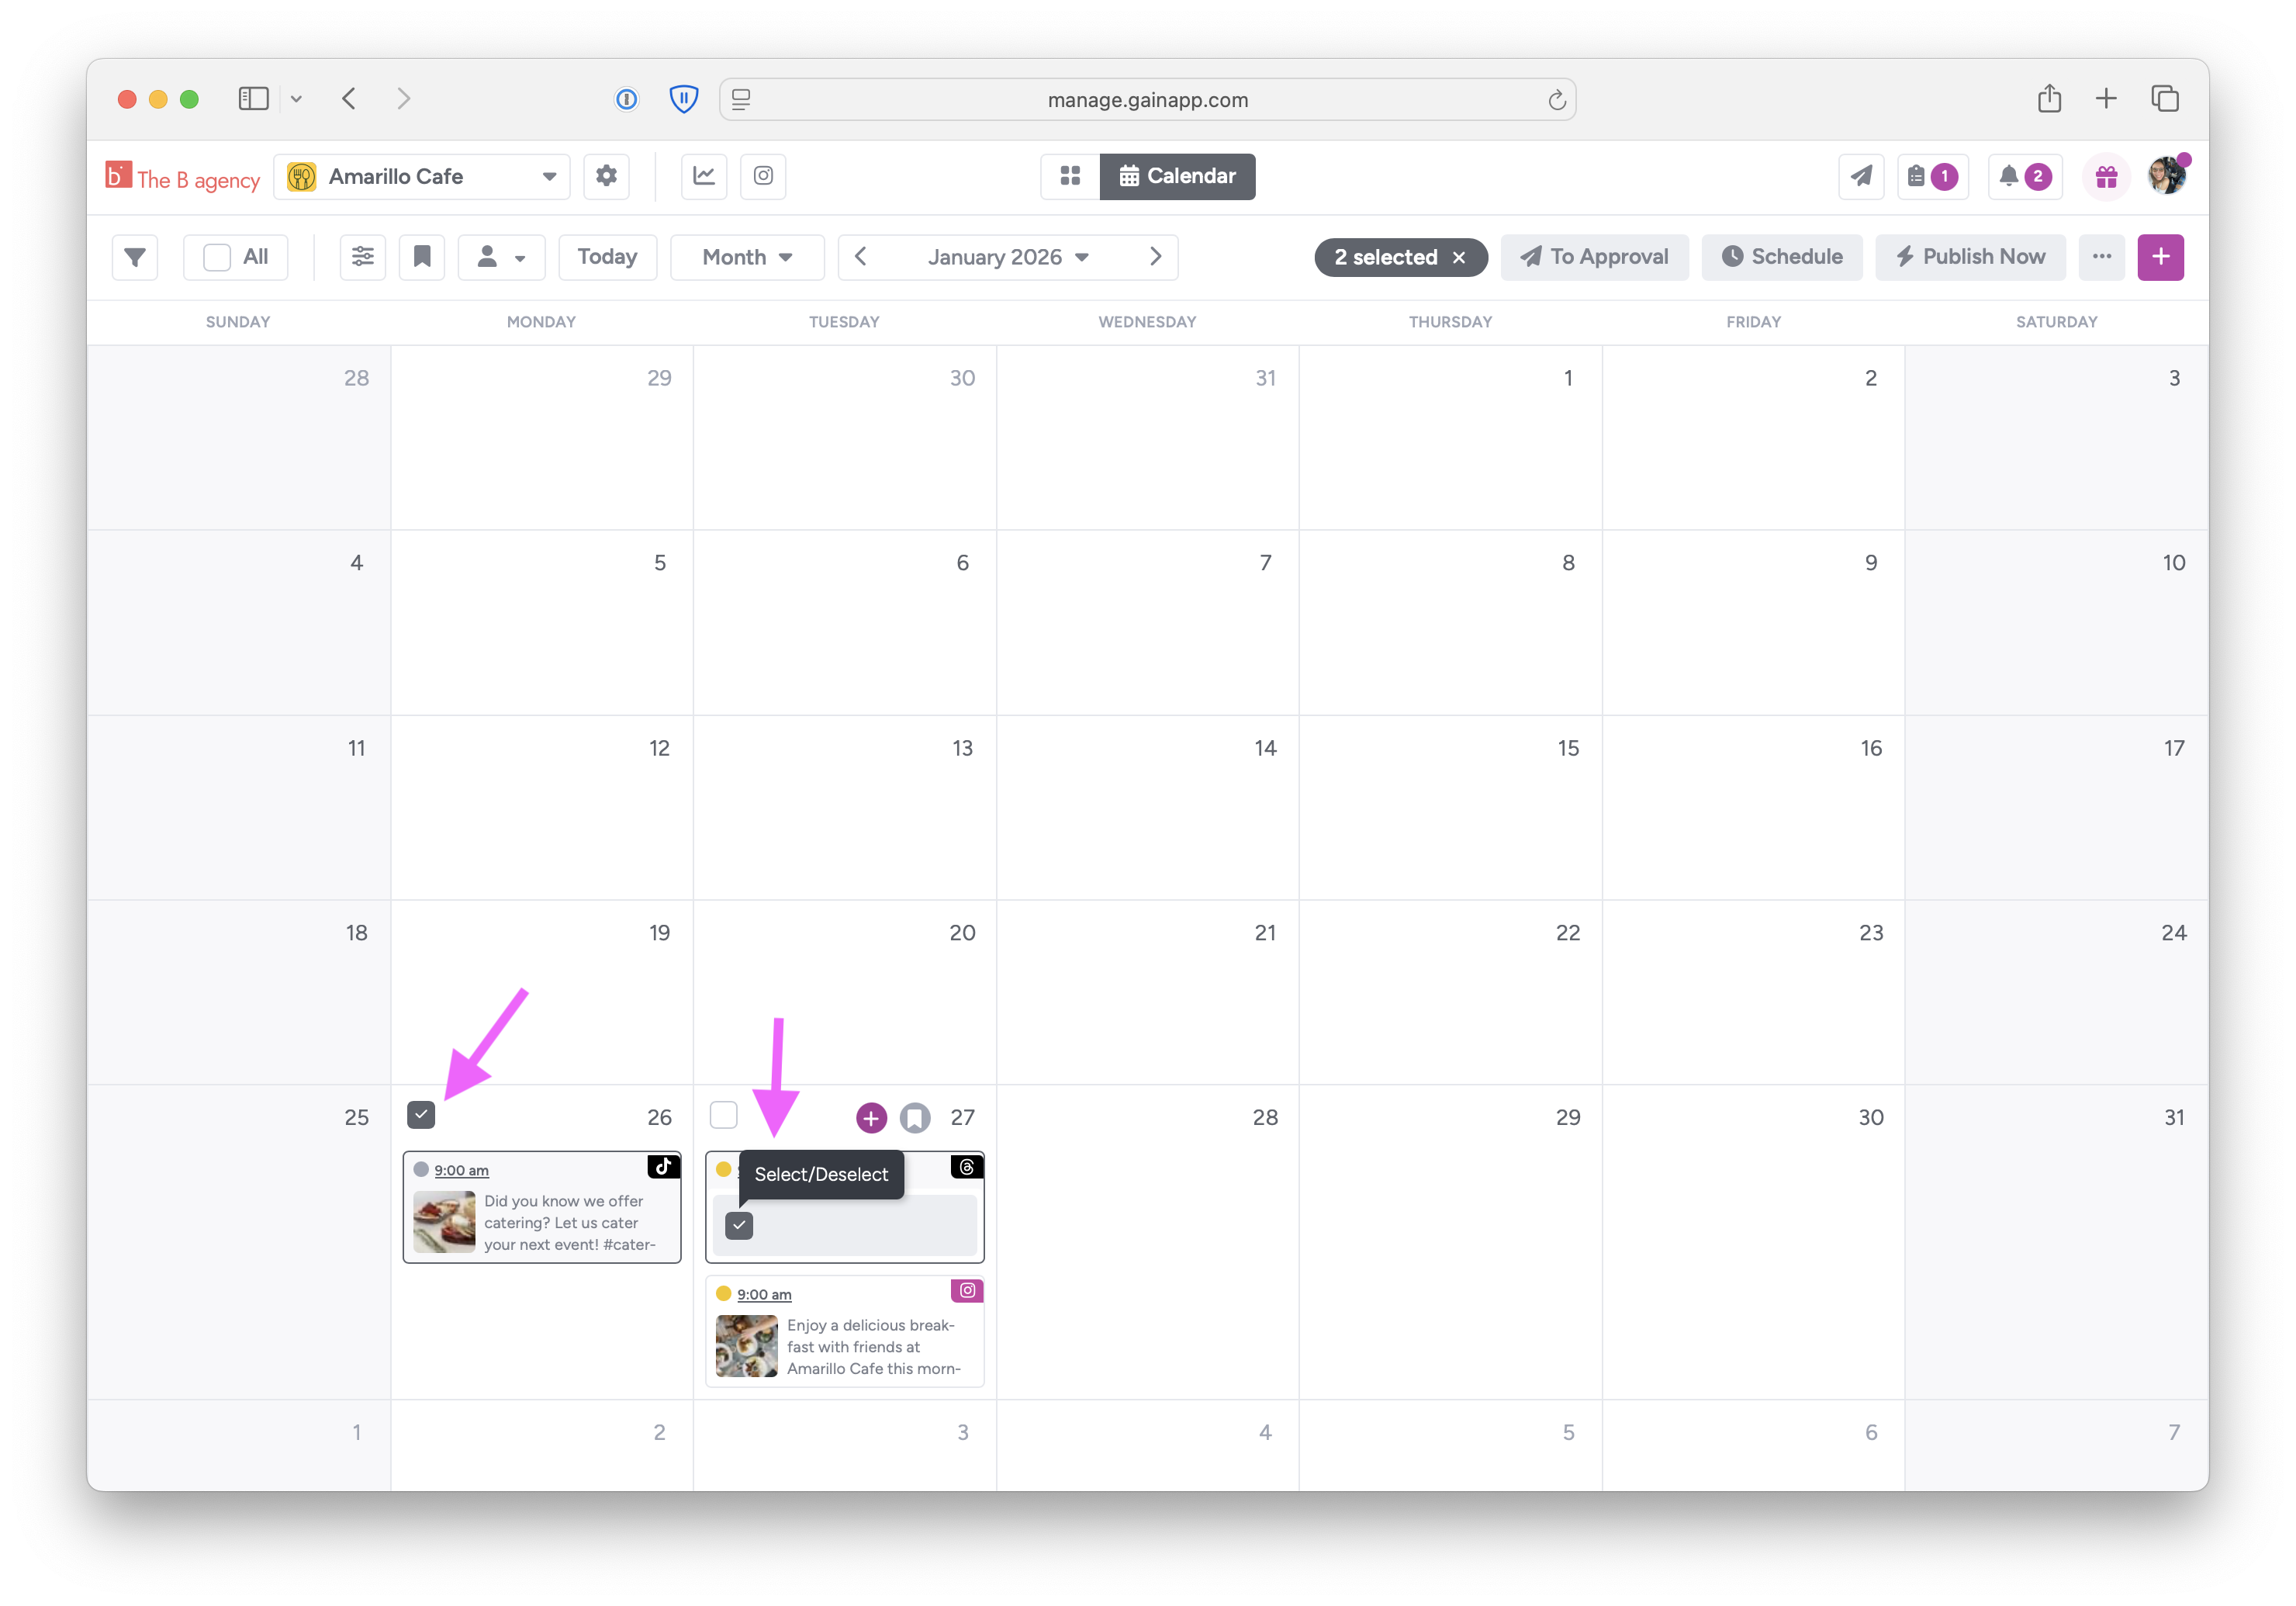
and click on Change publish date under the More (...) menu.
Scheduling and publishing
Gain can automatically schedule and publish your content once it's been approved by your stakeholder(s). When you create your approval workflow or choose the people you will send your content to, check the box to Auto-schedule after everyone approves.

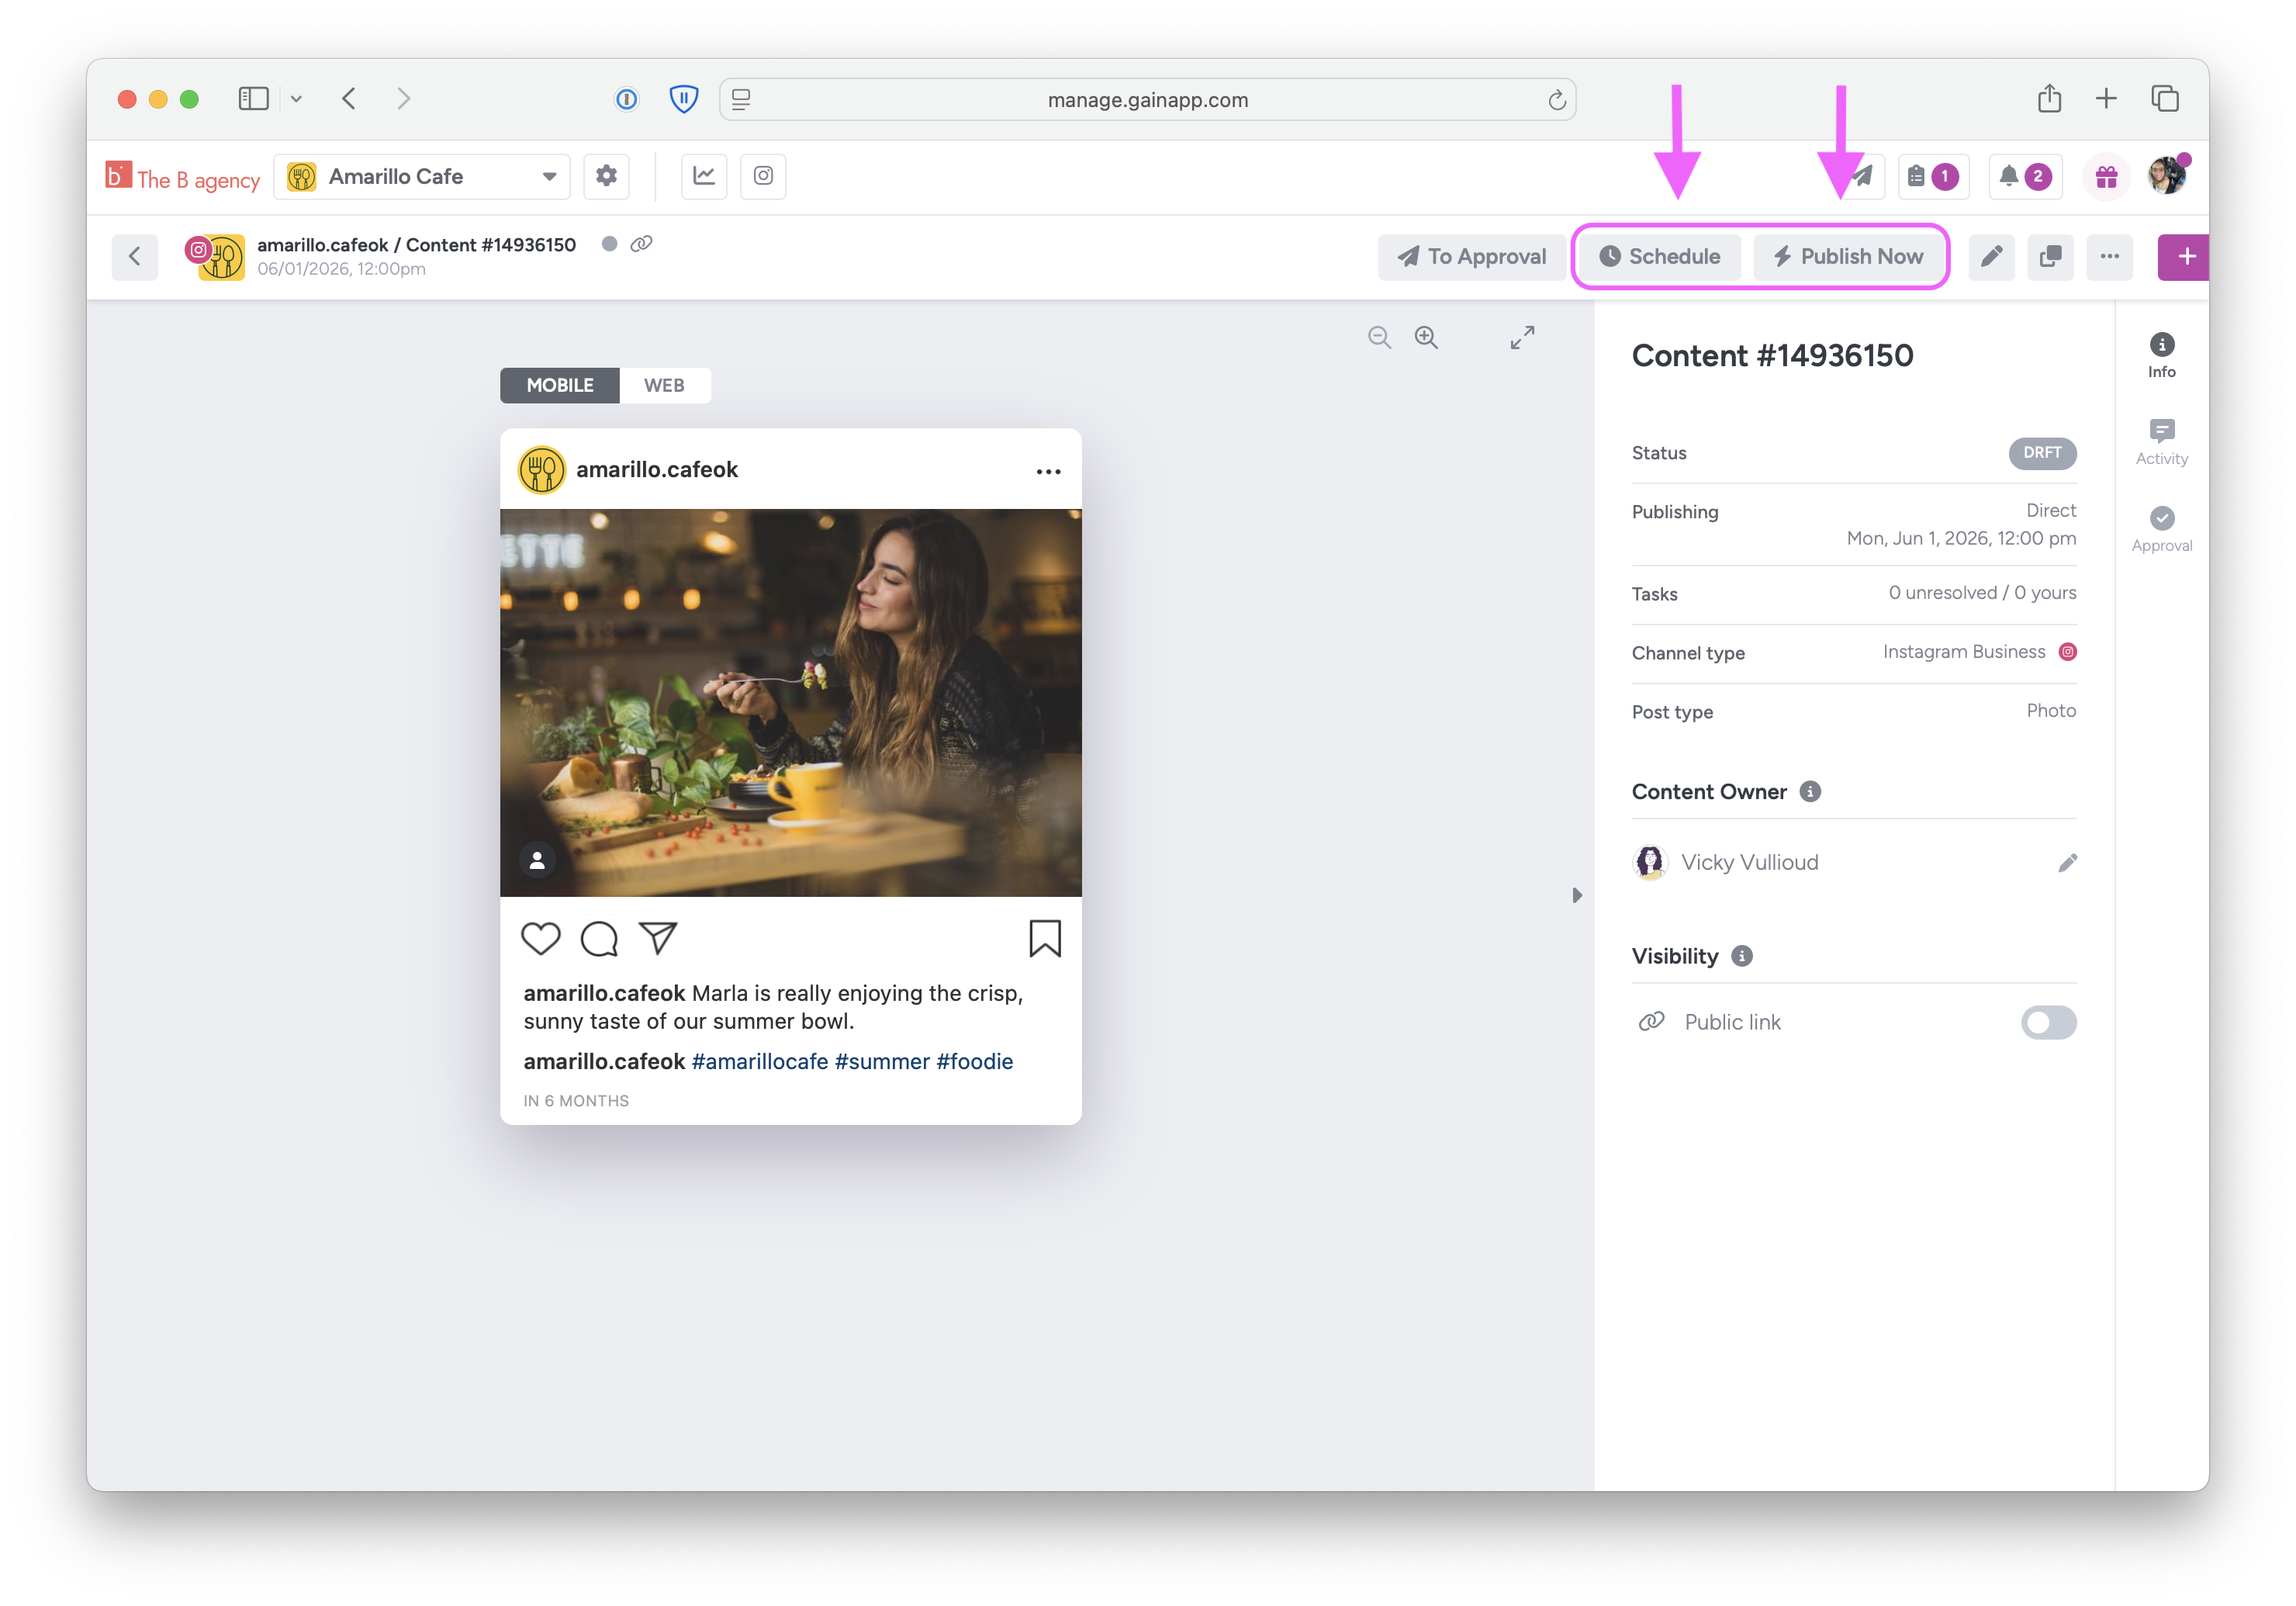
If you don't check the box to auto-schedule, you can schedule for publication and/or immediately publish your content manually by clicking on the desired option from the action menu of each content item...
or from the calendar:
You can schedule content and publish content regardless if you send it to a client or stakeholder for approval or not. You can always choose to skip the approval process. Learn more about scheduling for specific social channels
Important: Only the Gain account owner or admins can connect social media accounts. Learn more about connecting social channels to a workspace
What's next?
Want to speed up your onboarding? Schedule a personalized training session with our team! You can also chat with us from Gain or email support@gainapp.com. We're here to make your transition to Gain easy and smooth.