
Create Custom Views with Filters
Use filters to create customized views in your Calendar, Gallery, or List views. Gain remembers the filters you applied in any given workspace until you change or reset them.
Why use filters? 🤔 You can use filters to:
- Reduce loading times by displaying only the content you need.
- Focus on content that requires your immediate attention.
- Quickly find specific types of content.
- Take bulk actions like scheduling or sending content for approval.
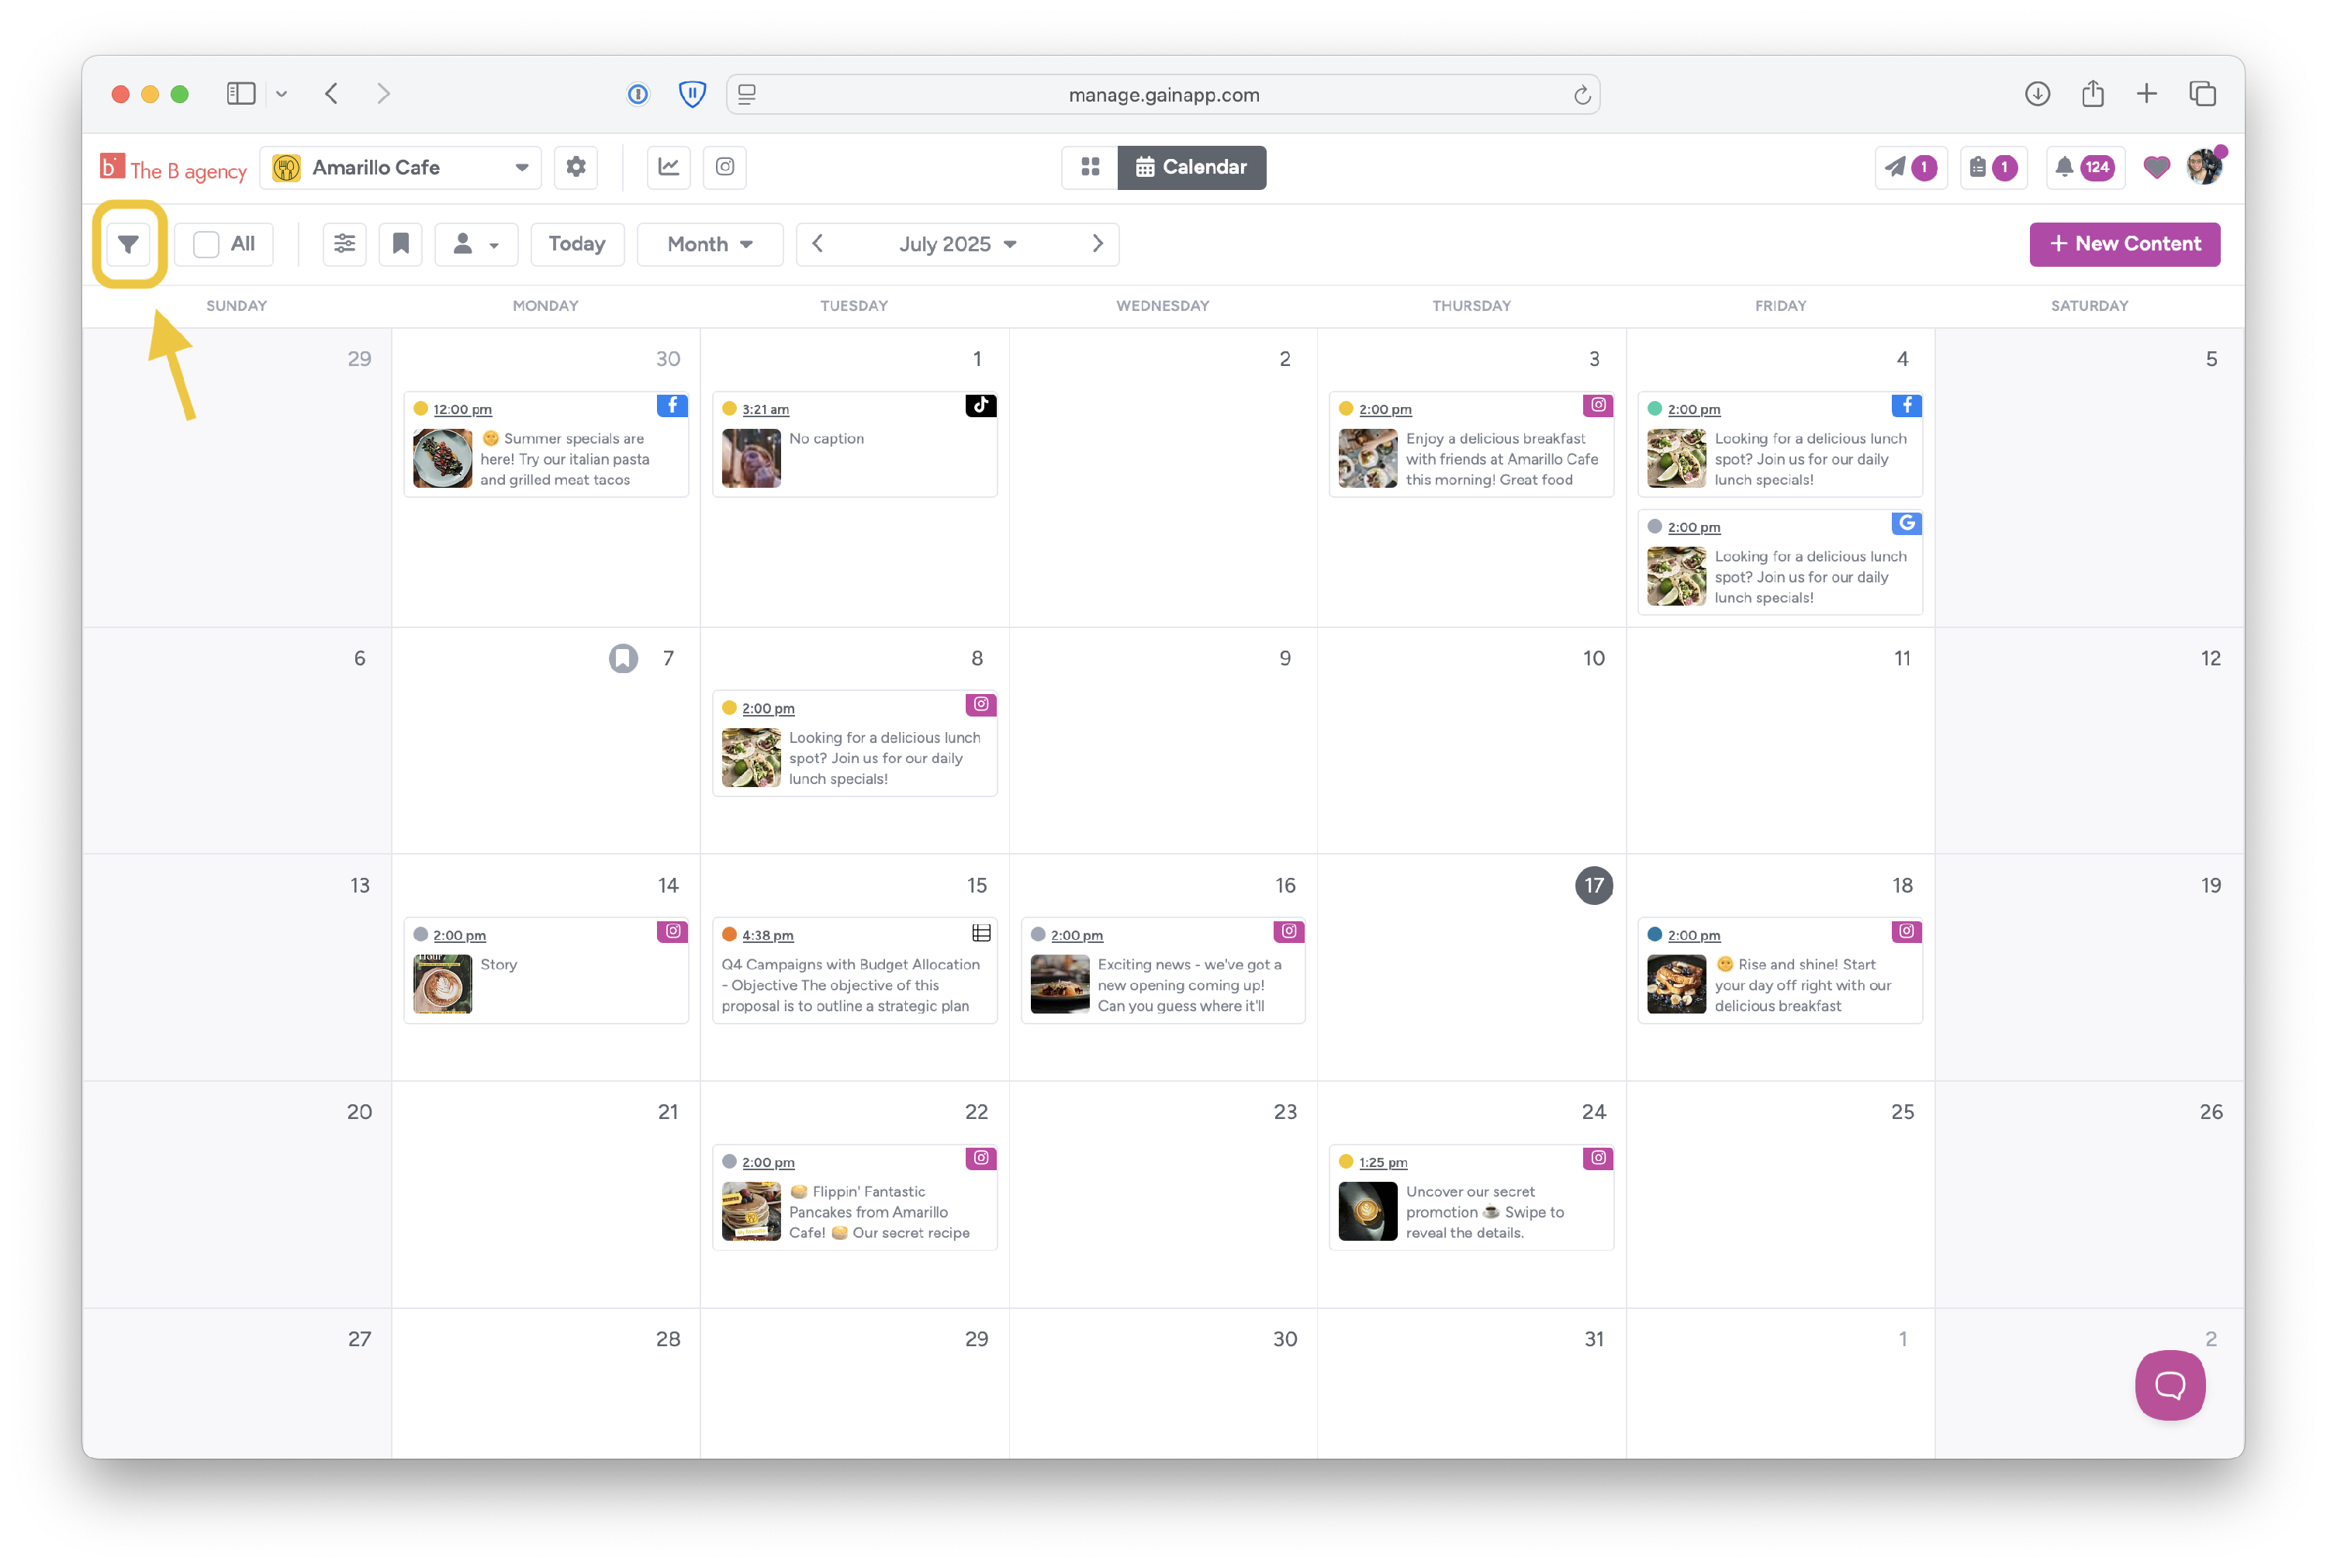
To open the filters, click on the filter icon on the top left in Calendar, Gallery or List view.
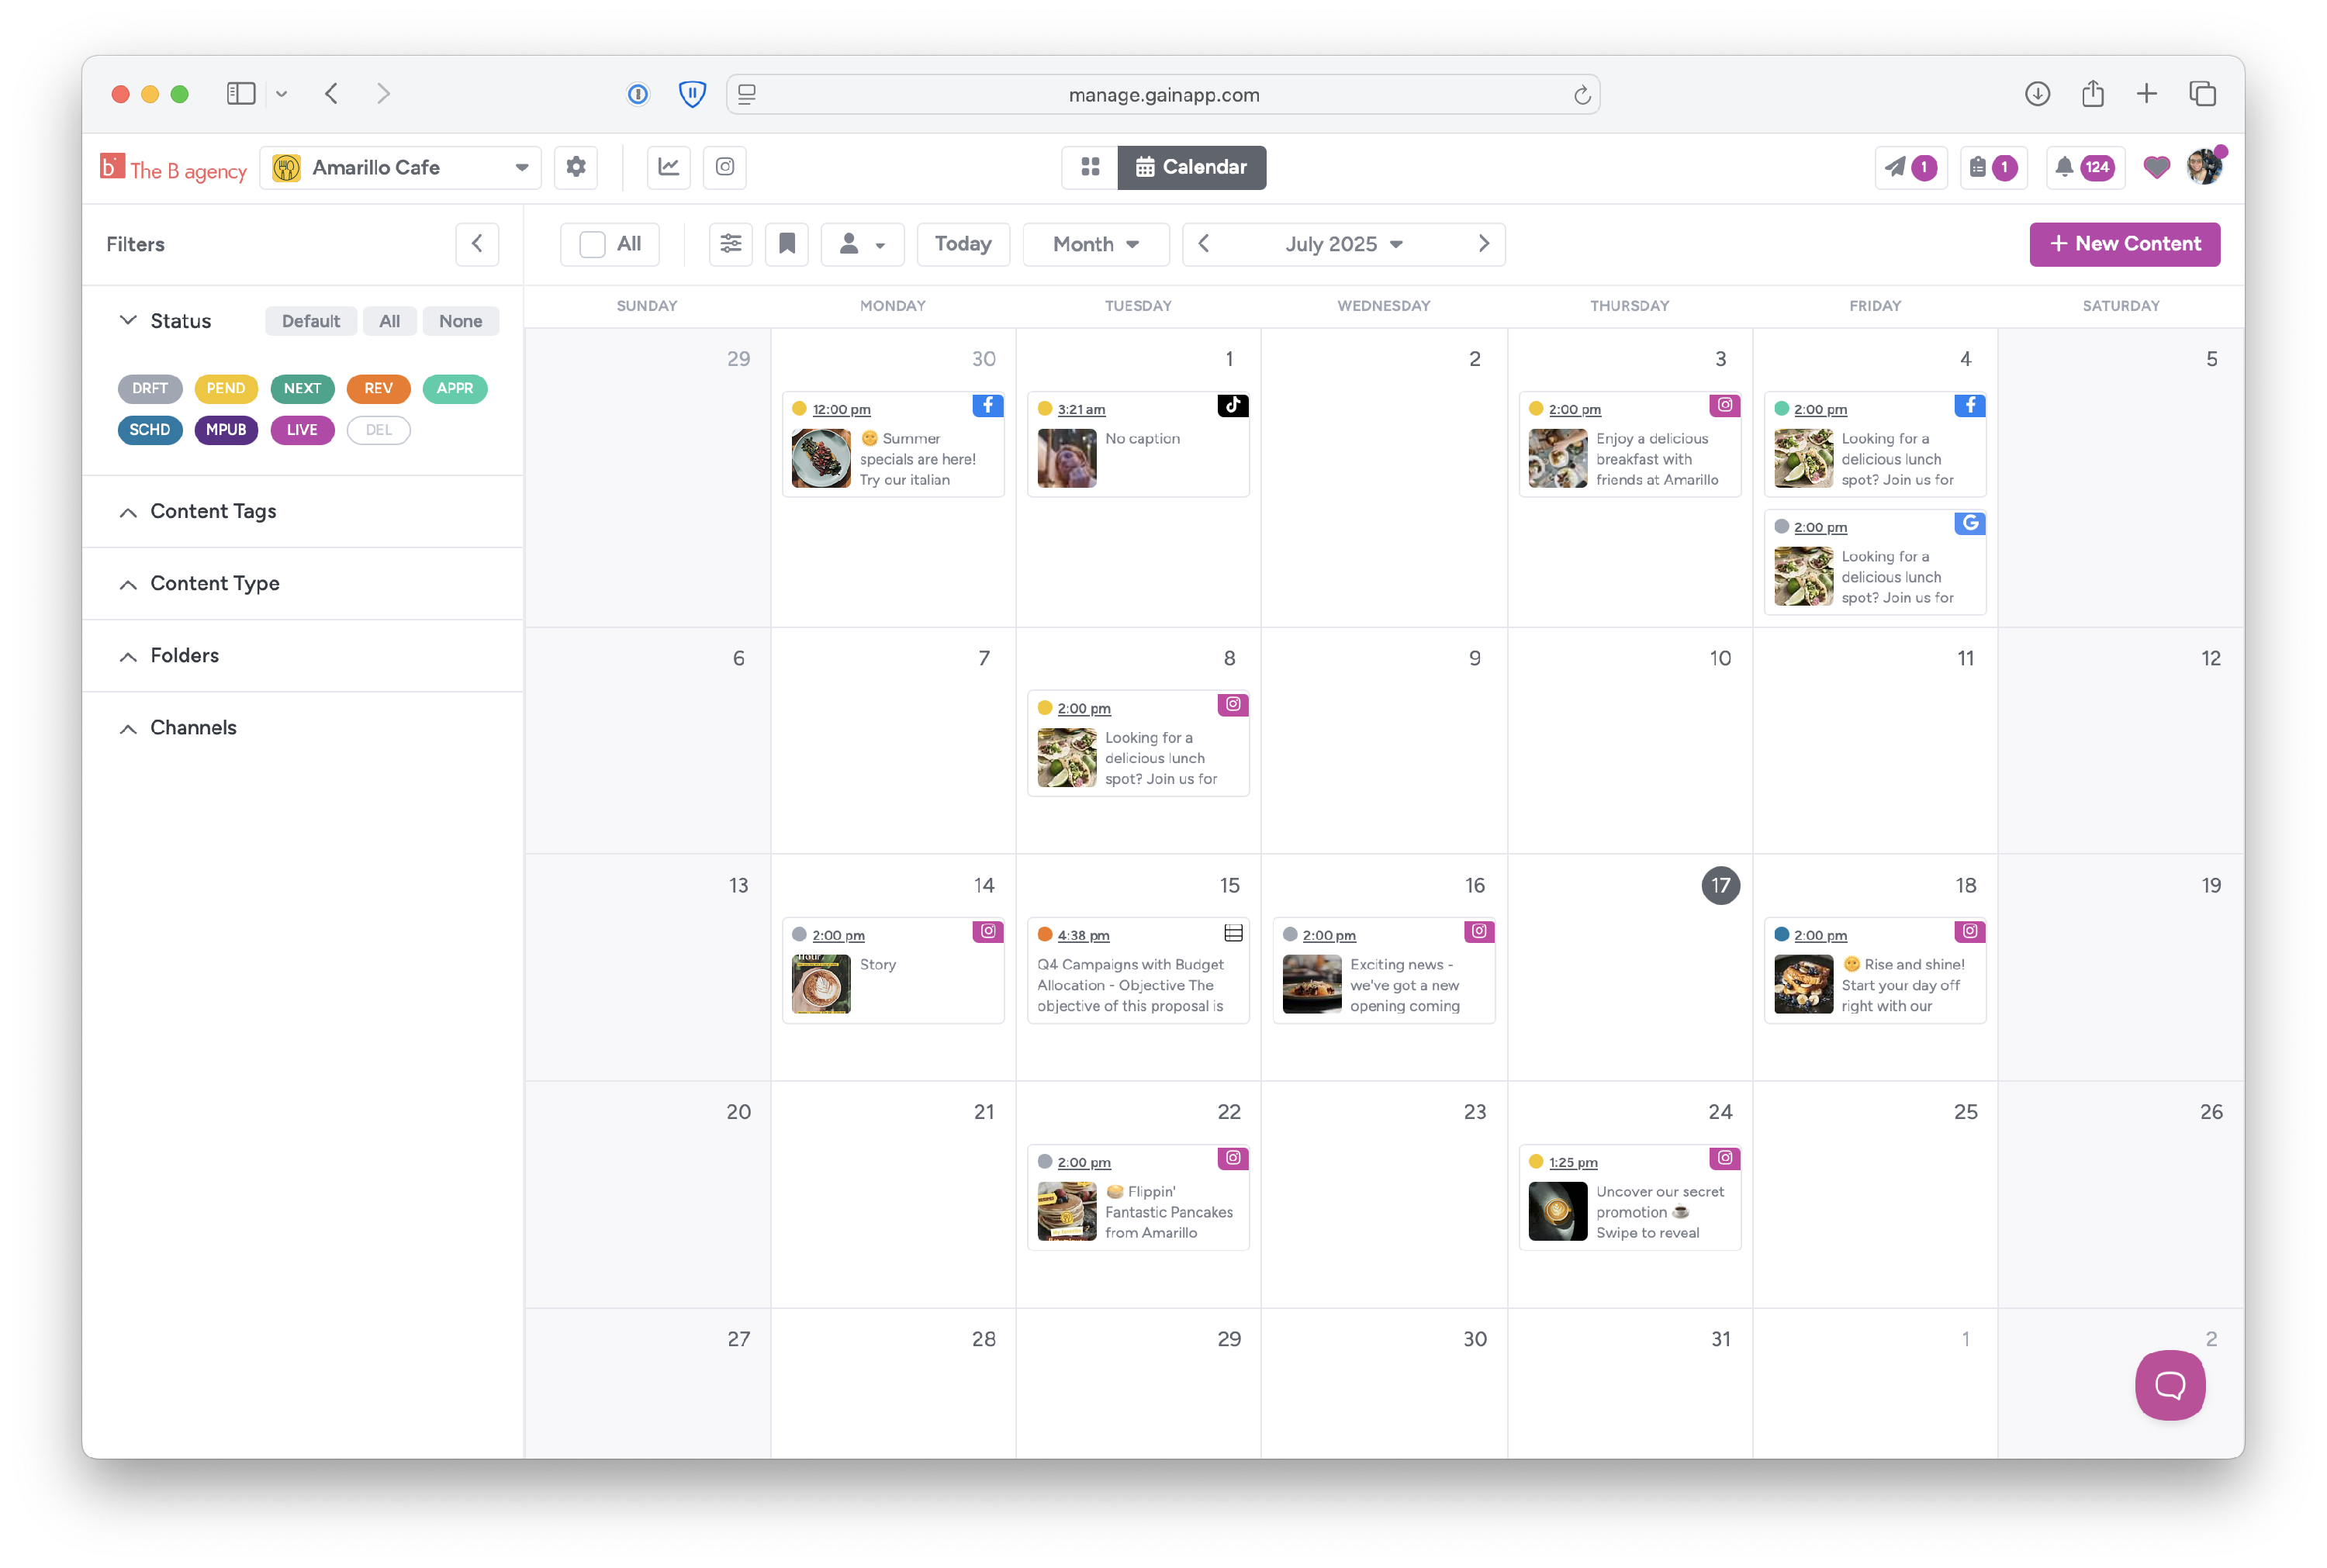
You'll see that you can filter content by:
- Status
- Keyword or Content ID
- Content Tags
- Publish Date
- Content Type
- Folders
- Channels
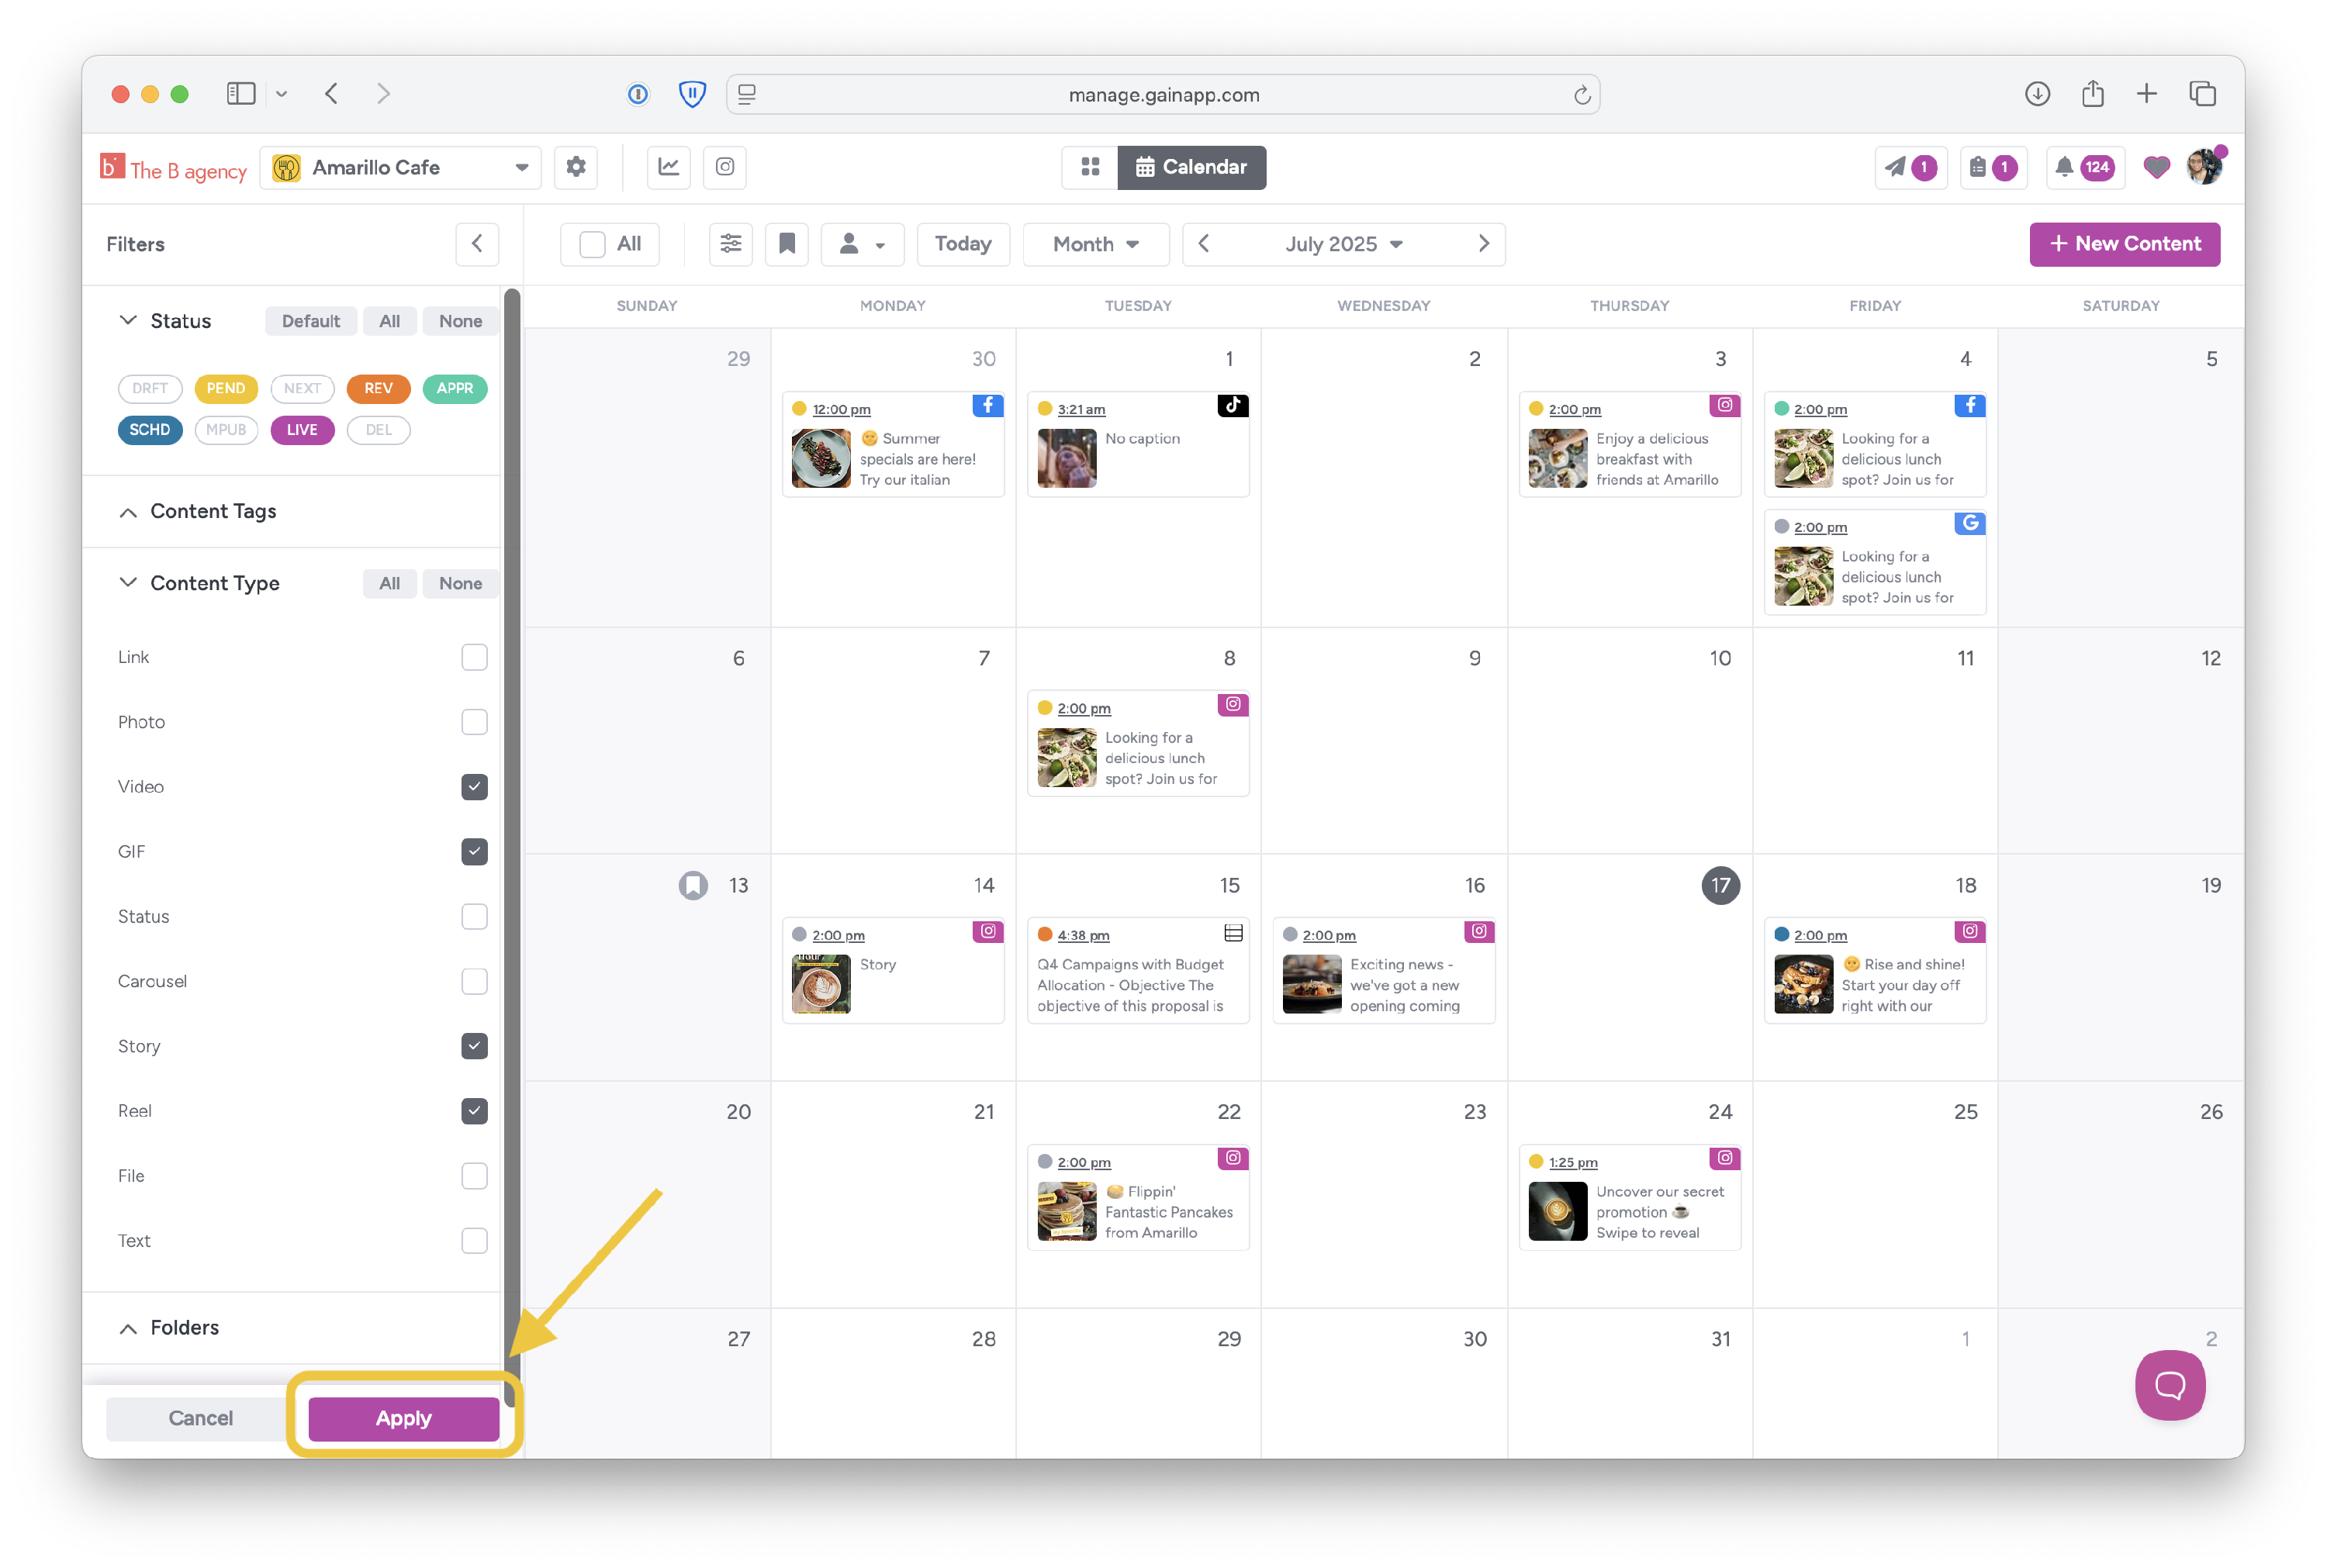
Open the filter or filters you want to use and once you've selected your options, click Apply. This will refresh your view and display only the content that meets your criteria.
💡 Gain will remember your filter settings even if you log out. To return your view to default and see all content, click on the button Reset Filters, which will appear at the bottom of the column any time filters are applied.
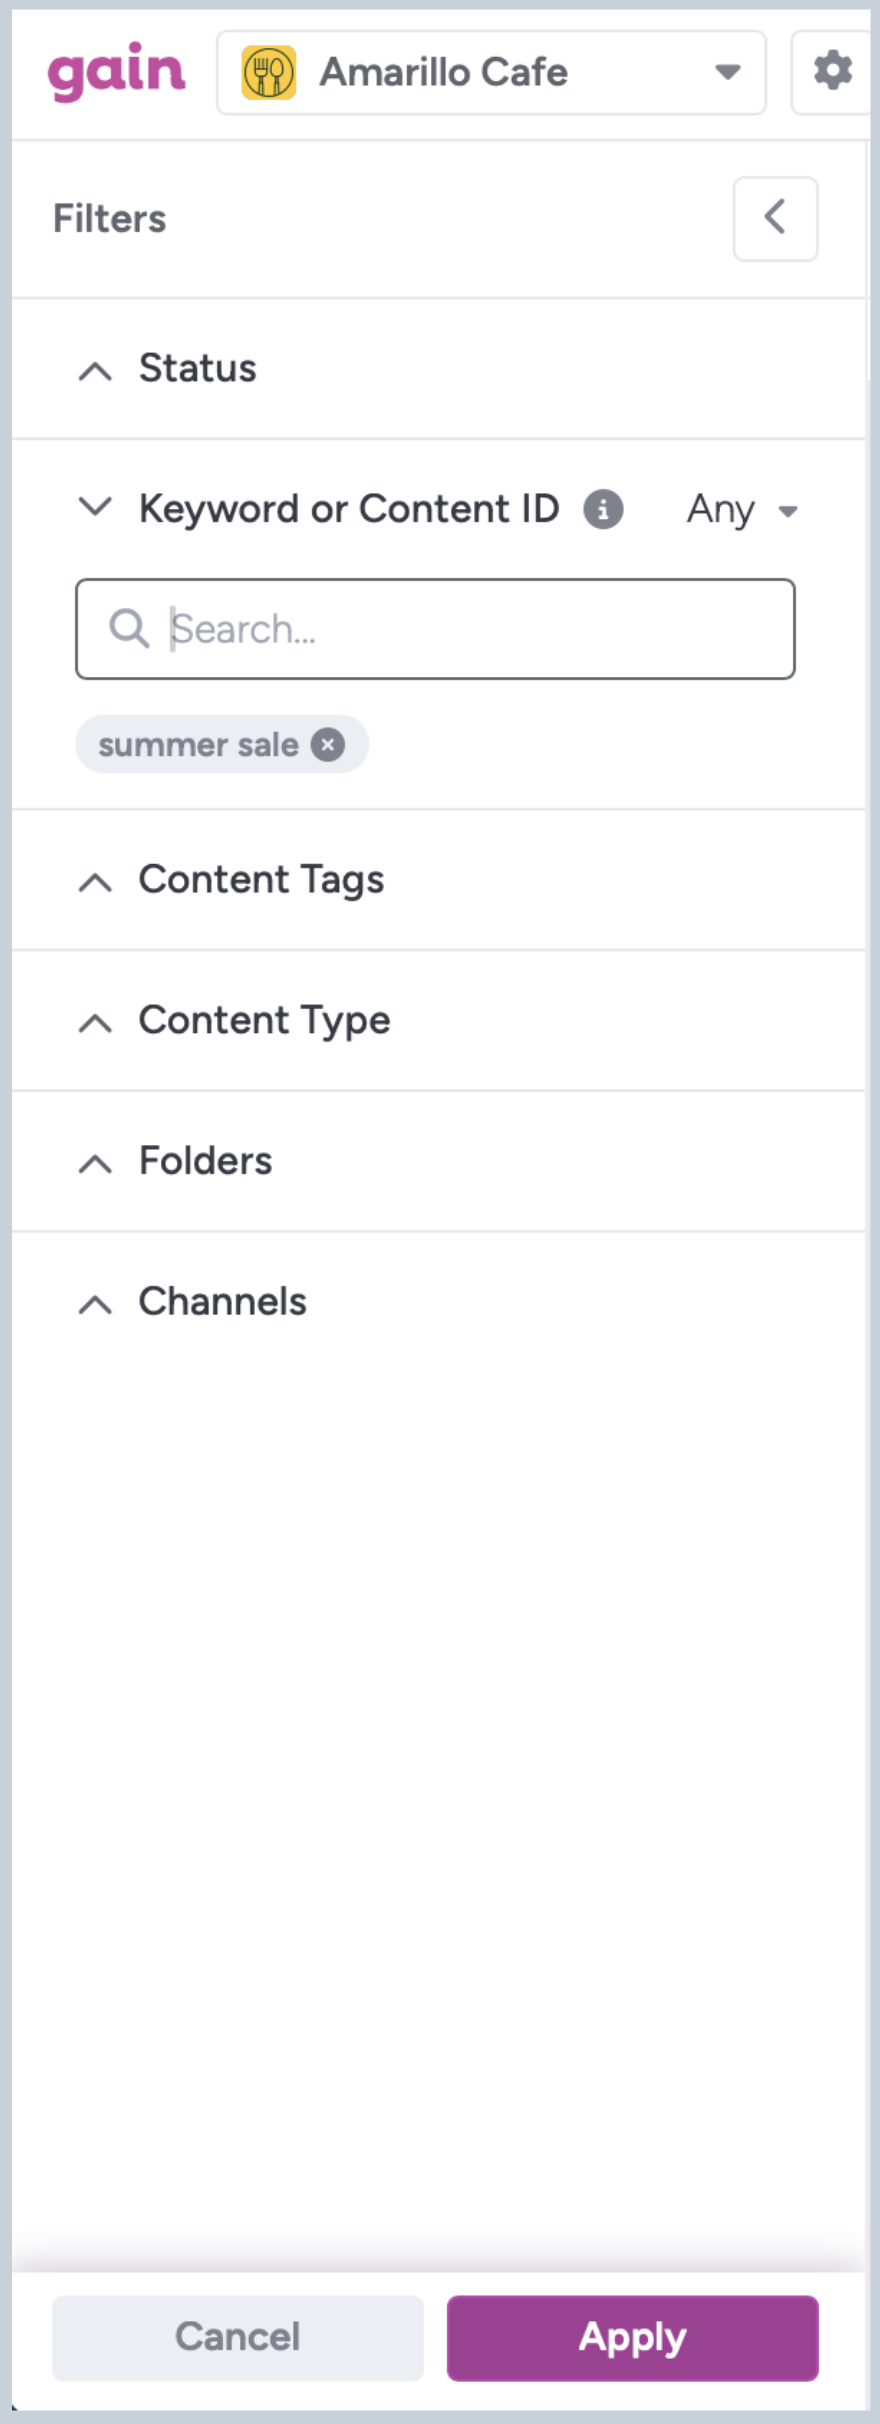
Filtering by Keyword or Content ID

Keywords
Use the keyword search to filter content items that contain specific words or phrases. Just type one or more words or phrases in the search field, hit Enter, and click on Apply at the bottom of the filter column. Your view will refresh to show the posts that contain those terms (and any other filters you may have applied).
In general, for social posts, Gain will search for your keyword(s) in:
- captions
- link URLs
- link descriptions
- content descriptions
Additionally, for Instagram posts, Gain will search in:
- first comments
- tagged usernames and collaborators
For Facebook and X, it will also search in:
- alt texts
For text documents, Gain will search in:
- document titles
- document body
- content descriptions
For videos, PDFs, and other types of files, Gain will search in the:
- titles
- descriptions
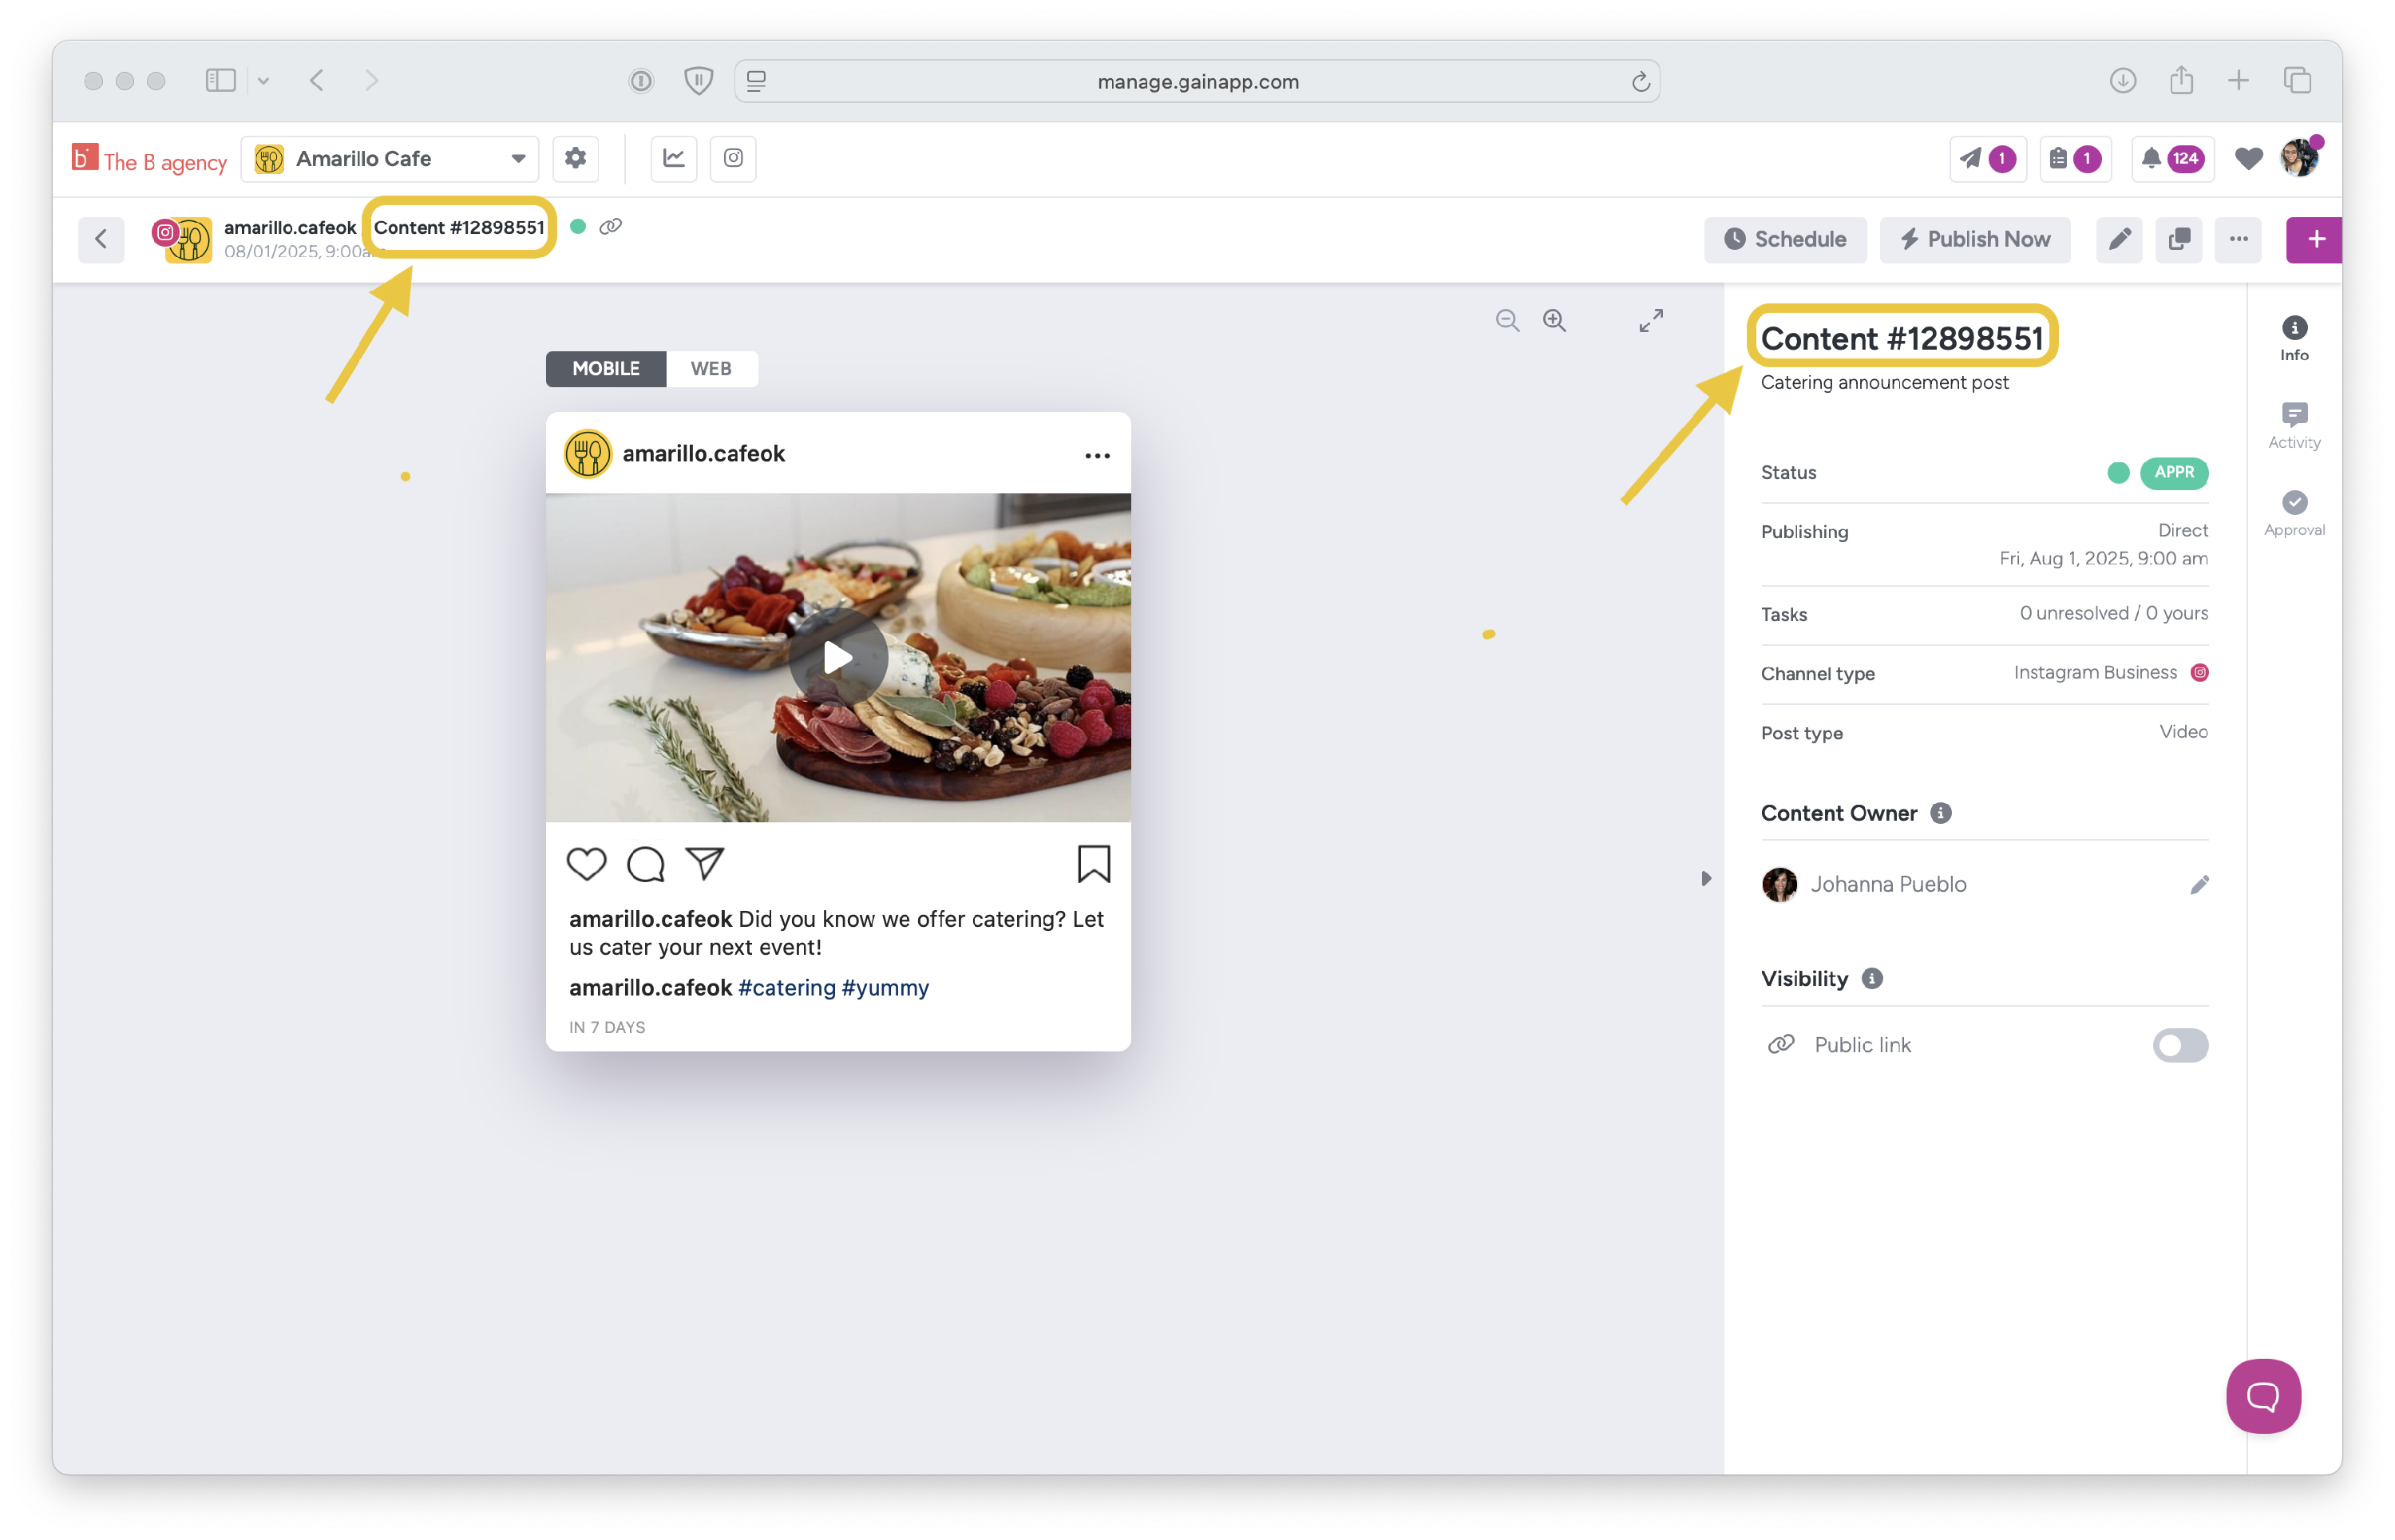
Content IDs
Each content item in Gain has a unique number in its Info section. You can use this content ID to search for and filter which items to view at once.
Filtering by Publish Date
In the Gallery and List views, you'll see an additional filter: Publish Date.
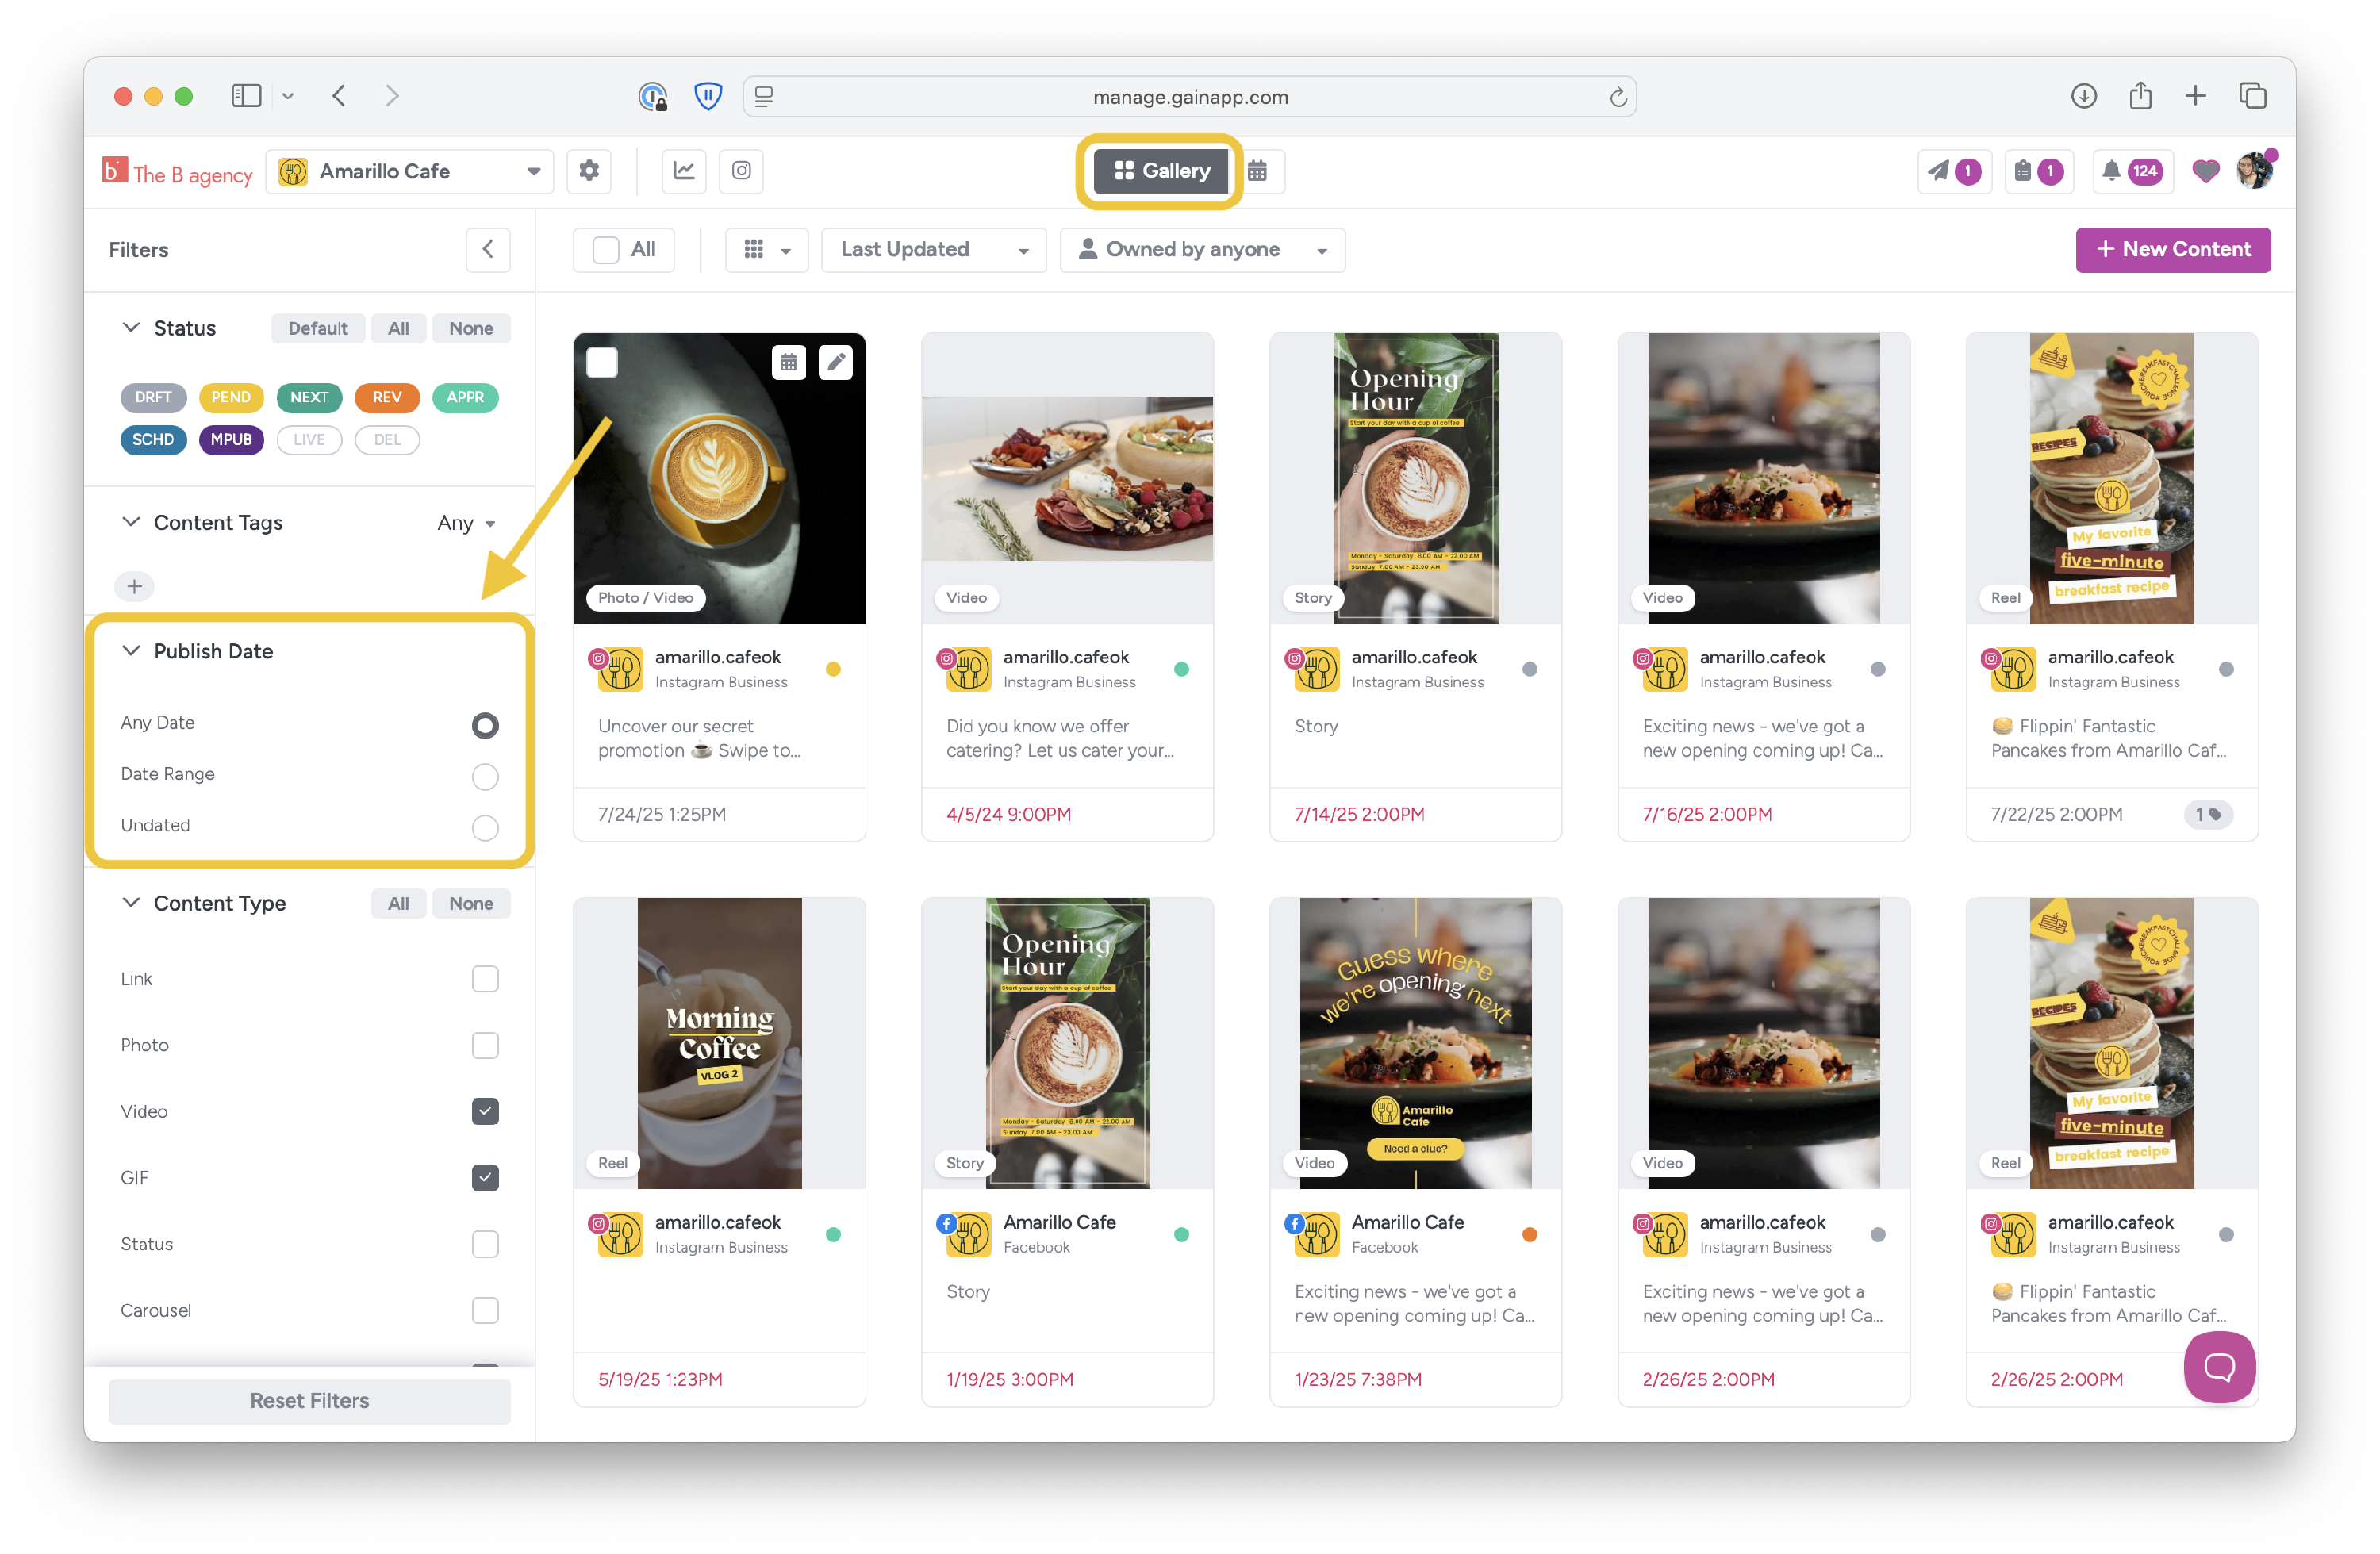
- Any Date shows all content items.
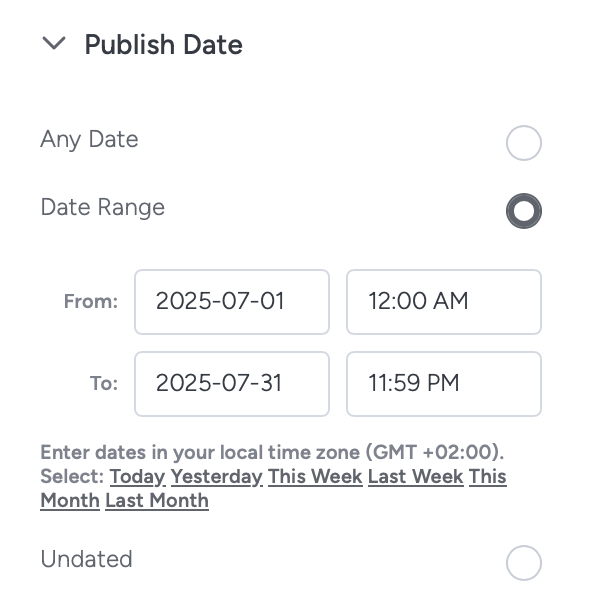
- Date Range allows you to display only content items within a specific date or time range.
- Undated will display only content items that have not been assigned a publish date.
Filtering by Content Owner
Additionally, you can filter content items by their owner. (Read about assigning content owners here.)
You'll find the content owner filter on the top, right above the Calendar, Gallery or List view.

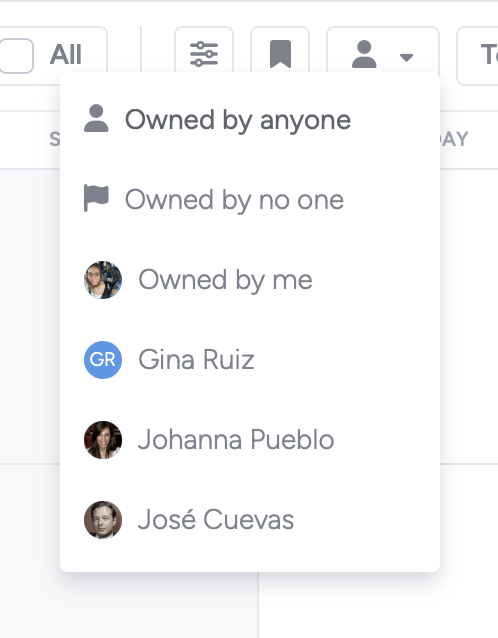
Just choose a user from the list and your view will refresh to display only the content items that belong to that user. To reset the view, select Owned by anyone.