
Quick guide for Admins
Jump ahead
- Create a workspace
- Add your content
- Invite Team Members and Clients (stakeholders)
- Create approval workflows
- Account settings and beyond
Create a workspace
In Gain, you can manage multiple workspaces under a single account. Create a workspace for each client, brand, region or campaign, so each one keeps its own content, folders and approval workflows.
- Click on +Add Workspace in the Workspaces page.
- Follow the prompts to add a name and upload a logo.
- Invite people to join your workspace and assign them specific permissions, such as Team Member or Client.
Note: When you invite people to your workspace, they'll get a welcome email from Gain to set up their password. Clients or stakeholders don't need a password. They'll get an email with a secure link whenever you send them content for approval.
Once your workspace is set up, you can open the Workspace Settings page (⚙️) at any time to:
- add or remove users and edit their permissions
- create custom approval workflows or change existing ones
- create or edit folders
- connect, reconnect or disconnect social media accounts
Add your content
What you set up next depends on what your team needs approved. You can do one or both:
- Marketing files, text documents and web pages: you can start right away. There's nothing to connect.
- Social posts: connect your social channels so Gain can schedule and publish posts once they're approved.
Upload files
You can upload most file formats to Gain, such as PDFs, presentations, videos, images and spreadsheets, and organize them in Folders. Send files to your Clients or stakeholders for approval, where they can annotate them and leave feedback. When you upload a new version of a file, Gain keeps its version history.
Drag and drop files onto the Gallery view, or onto a day in the Calendar view of your workspace. You can upload up to 25 items at a time. Once your files are processed, you can:
- choose the folder to store them in
- add a publish date (optional)
- write a description with notes for your Team Members
- add content tags to categorize or filter content in Gain

💡Note: You can use creative assets from folders to create social posts. Learn more about folders and managing files
Create text docs and add web pages
- Text docs: write briefs, blog drafts and press releases directly in Gain, then send them for approval like any other content. Learn how to create text docs
- Web pages (in beta): use Embed to add a live web page, such as a landing page or email, so your Clients or stakeholders can approve it before it goes live. Learn how to use Embed
Connect social media channels
From your Calendar or Gallery view, open Workspace Settings by clicking the gear (⚙️) at the top left of the page, next to your workspace name. Then, click Channels.
- Click +New social channel at the top right.
- Choose the social network you want to connect.
You'll be taken to the social network's authorization page to allow Gain to publish. See the step-by-step guide to connecting social channels.
Tip: If you prefer not to link your social profiles yet, you can use mockup channels. In a mockup channel, you can create social posts and send them for approval, but you can't schedule or publish them. Learn more about mockup channels
Invite Team Members and Clients or stakeholders
Collaboration is at the heart of Gain. Once your workspace is ready, invite the people who create content and the people who approve it, and give them role-specific permissions.
Click your initials at the top right to open Personal Settings, then select People in Account.
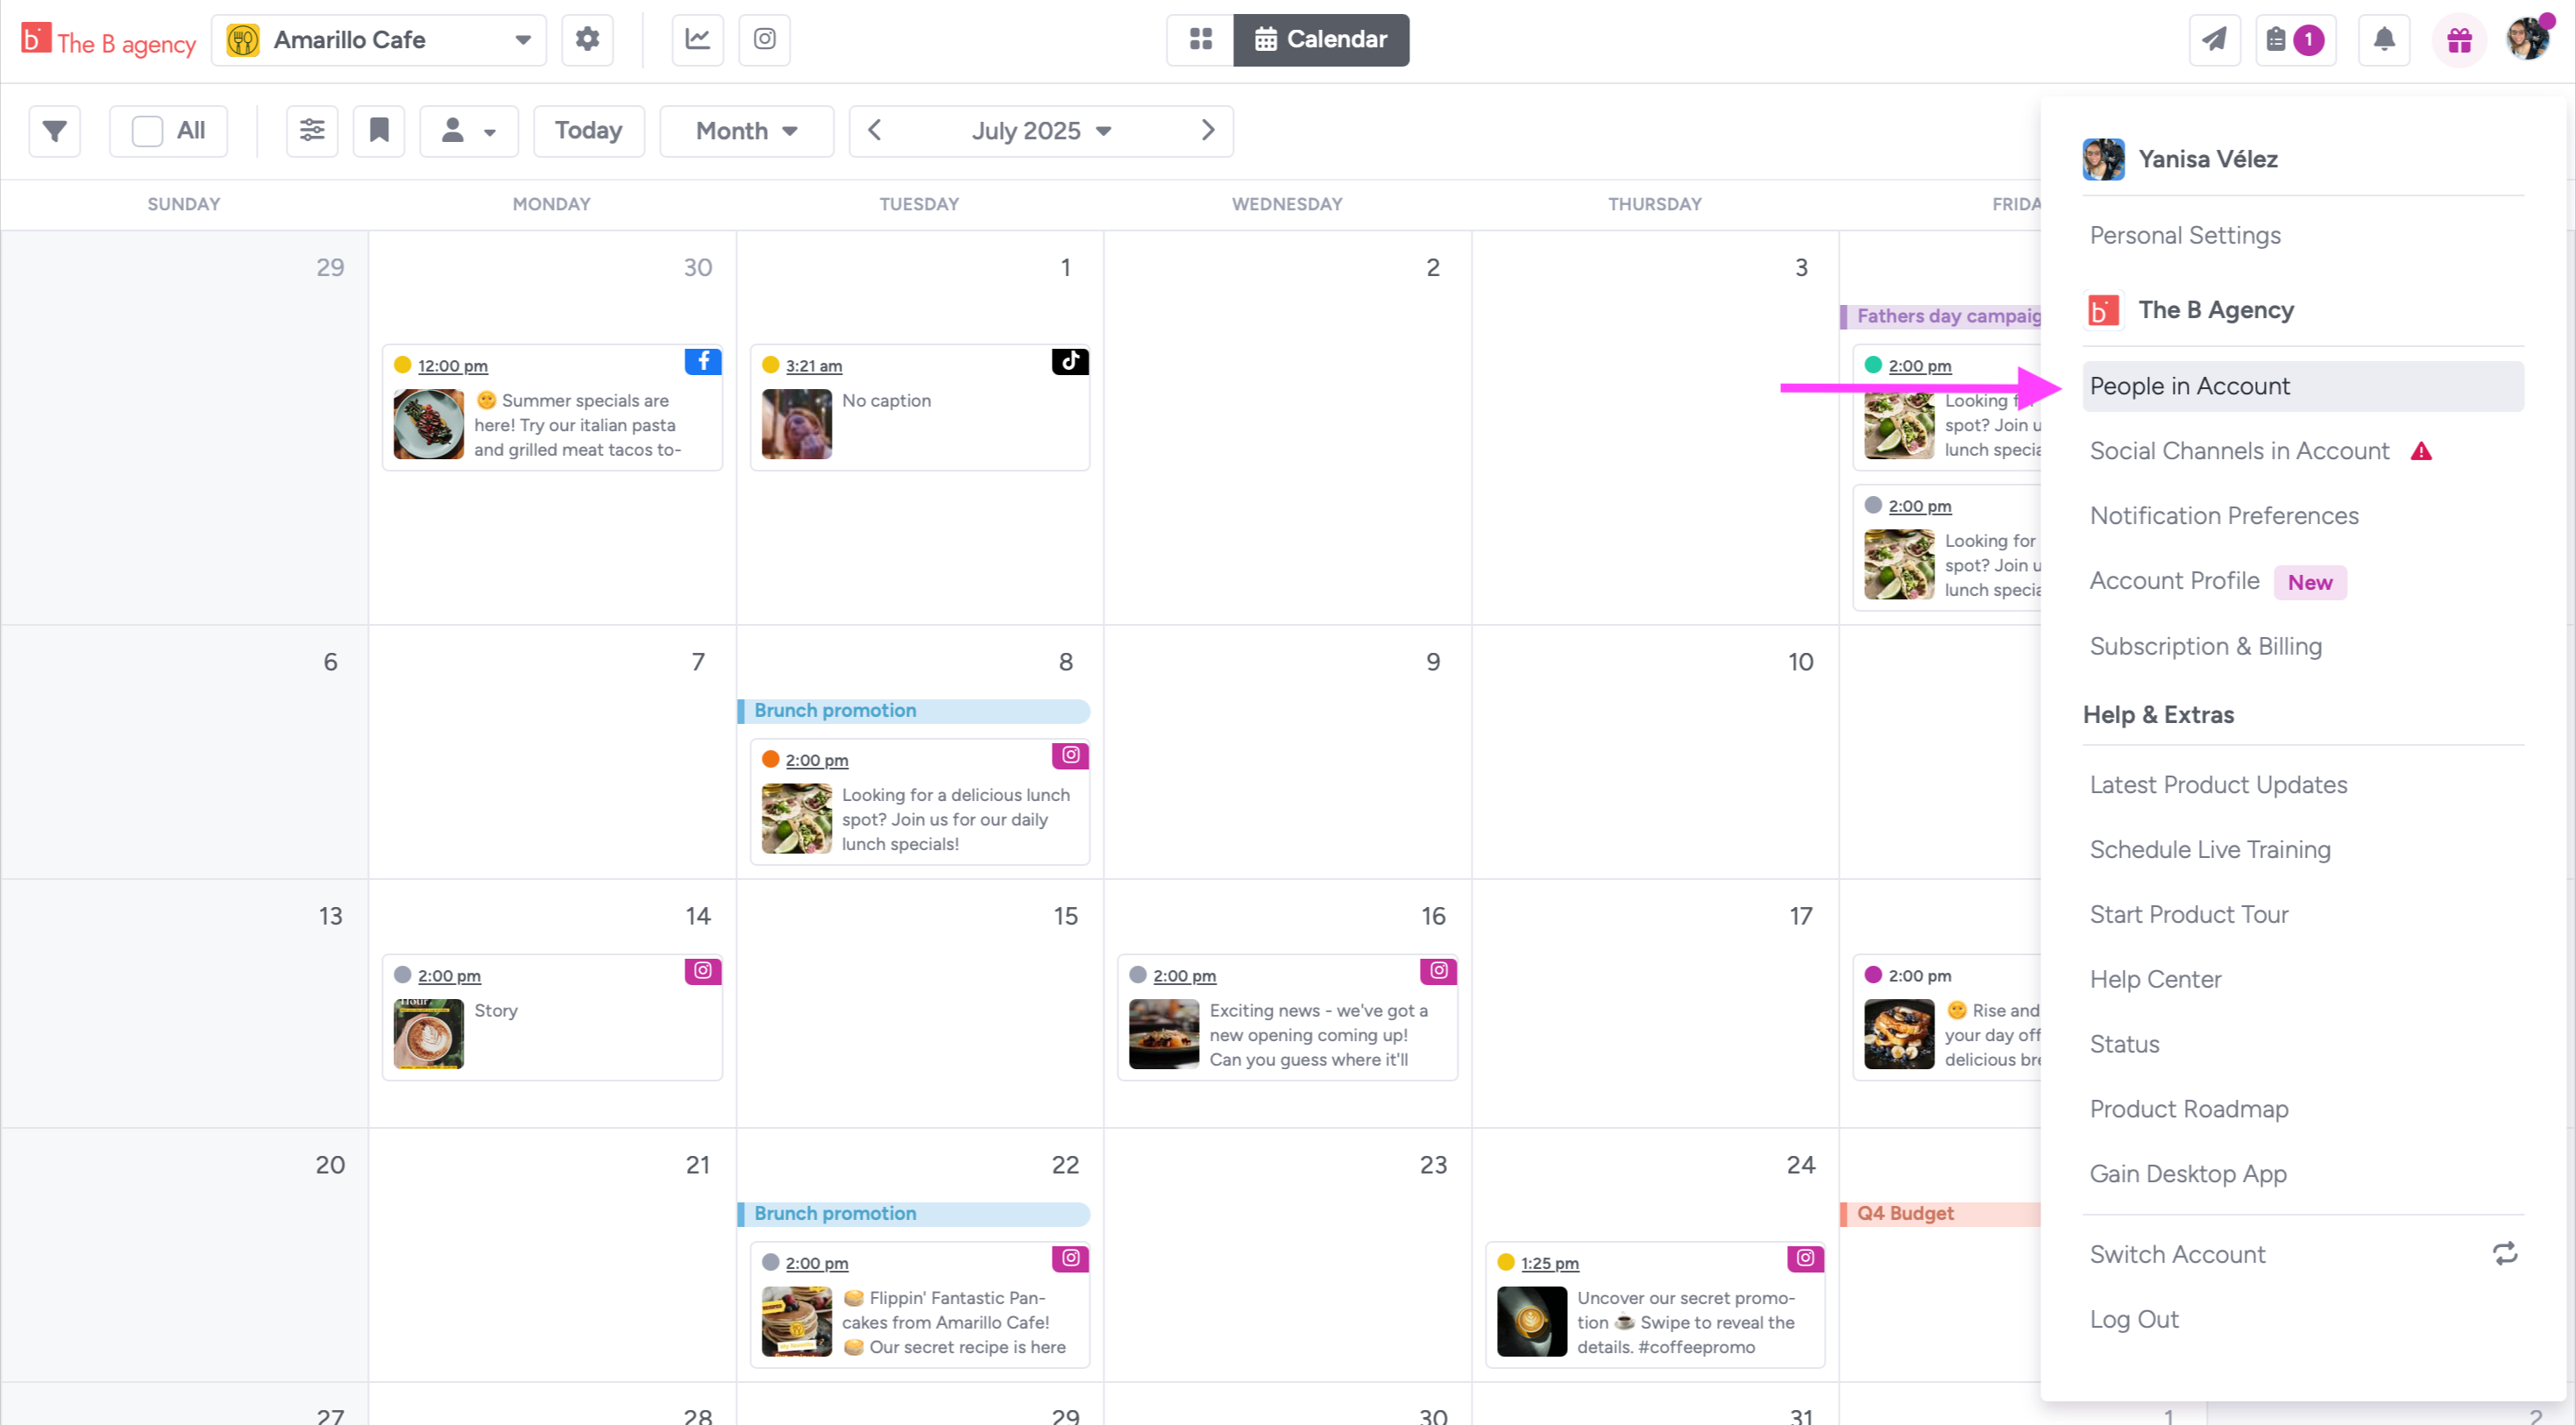
Click + Invite someone new and follow the on-screen instructions to choose their role (Team Member or Client) and the workspaces they can access. They'll receive an email invitation to join your account.

You can come back to this page at any time to change people's permissions or remove them from the account.
The key user roles in Gain
- Team Members: assign this role to the people who create and manage content, such as brand or account managers, content creators and publishers. They create, edit and manage content, send it for approval, and schedule and publish social posts.
- Clients: assign the Client role to the people who review and approve content but don't create or edit it. They can be inside or outside your company. For an in-house team, that might be brand, legal or leadership. For an agency, it's usually your clients. What matters is the part they play in your approval workflow. They log in to approve content from their email notifications, without needing a password.
👉🏼 See the full guide to user roles and permissions
Create approval workflows
Approval workflows are templates you can save and reuse each time you send content for approval. Set them up once, and Gain automatically sends each piece of content to the right people at the right time, collects their feedback, and keeps a time-stamped record of every change request and approval.
You can create a workflow for each client, brand or type of content, with as many rounds and reviewers as you need. For example, a campaign deck might go to brand first and then to legal.
To create your first approval workflow, from the Calendar or Gallery view, open Workspace Settings by clicking the gear (⚙️) at the top left, next to your workspace name. Then click Approval Workflows.
- Click +New approval workflow. Name your workflow and its first round. Team Members can see the workflow name and the people in it, but Clients or stakeholders can't.
- Click Add a person and select the people who need to review and approve the content.

- Click + Add another round to add as many rounds of approval as you need. This helps when several people need to sign off, whether they're inside your company (for example, directors, brand or legal) or outside it (for example, clients and their legal teams).

When you're done, click Save.
👉🏼 See the in-depth guide to approval workflows
Send content for approval
You can send any content item for approval, whether it's a file, a text doc, an embedded web page or a social post. Send it from the content editor right after you create it, or from the Calendar or Gallery view, where you can select several items and send them together. Select the items and click To Approval in the top bar on the right.

Then choose an approval workflow, or, if you don't need several reviewers or rounds, send the content directly to one or more people in a single round.
Keep in mind
- Content you send for approval changes from "Draft" to "Pending Approval." Learn about the life cycle of a content item
- Your Clients or stakeholders get an email when you send them content to review. The email includes a login link that takes them into their approval queue.

- You'll be notified by email and in Gain's Notification Center (🔔 at the top right) when a Client or stakeholder requests changes. Both notifications take you to the content item so you can see the feedback.

- When someone requests changes, the status changes from "Pending Approval" to "Revision." You can then make your changes and send the content back to the person who requested them.
👉🏼 Learn how to manage change requests
- Gain tracks all the activity on each content item. Under Activity, you'll see the item's full history, including comments from Team Members and Clients or stakeholders. Under Approval, you can follow the progress of the approval workflow. Each reviewer's name appears under their round, with a color that shows their status:
- Orange: they requested changes.
- Yellow: the content is waiting for their approval.
- Green: they approved it.


👉🏼 Learn more about sending content for approval and tracking its progress
Account settings and beyond
Open Personal Settings (click your initials or profile picture at the top right) to reach your account settings and other features. You can:
- personalize your account by adding your company logo
- set up white labeling (replace the Gain logo with your company's)
- see billing and payment information (Account Owner only)
- add or remove people, or change their roles and permissions, under People in Account
- reset your password, upload a profile picture and turn on 2-step verification in Personal Settings
What's next?
During your first 14 days with Gain, you can book a personalized training session with our Customer Success team. If you have questions, chat with us in the app or email support@gainapp.com. We're here to make your move to Gain easy and smooth! 👋🏽